Do you remember that I grew flour corn this summer?
When it was ready, I pulled the ears (approximately 50 of them) and hung them near the wood heating stove to dry. Several days ago I took some of the corn kernels off of the cobs. Last night I measured out 2 pounds of it and washed it carefully:
Then I mixed 1 1/2 Tablespoons of pickling lime with 1/2 cup water:
I put the clean corn, the lime water and more water in a stainless pot and brought it to a boil:
As it boiled, the kernels turned a pretty yellow color:
I let it boil for 20 minutes, turned off the heat and let it soak overnight. This morning, I drained the corn in a large stainless colander and rinsed it:
The next step is to put the corn into a large bowl, cover well with water and start rubbing the corn kernels. The little skin part on the outside will come off.
From time to time, the corn is drained again and covered with clean water. This process must be repeated until the water is clear:
Here is the prepared corn, drained and rinsed:
A close-up look at the beautiful corn kernels:
Next, I used my food processor to grind it up some. I did this in two batches:
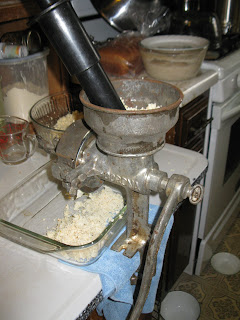
And then I used my old Corona Mill which has metal grinding surfaces to grind the corn:
Here is what the masa looks like after the first grinding:
I ground it again, adding just a little water and here is the finished product:
A closer view:
I learned to do this from my friend, Mely, who blogs at Mexico in My Kitchen. On Mely's blog post about this process, she has a photo of her finished masa with a hand print in it. Here is mine. Hers is much nicer!
Now, on to the tortillas! Here is my tortilla press that my daughter bought for me:
Place your griddle on high heat on the stove:
Take a gallon sized food storage bag, cut off the open end and slit the sides so you can use it to line the press. Here is a piece of the masa dough that I use to make just one:
Line the press with the plastic bag, place the piece of dough on the plastic, not centered, but more towards the hinged side. You will need to experiment to see exactly where. Close the press and press down firmly with the handle. Then, open the press:
Carefully peel the plastic off of the tortilla and put it on the hot griddle. Bake it until you get some brown spots forming on the underside, then flip it over and bake the top. I forgot to get a picture of it baking, but here is what it looks like when it's done:
Obviously, I am still learning, but these were delicious! The 2 pounds of corn made about 3 pounds of fresh masa, and the way it turned out, I would be able to bake approximately 18 tortillas with that much. I made 6, which was plenty for our meal, and I froze the rest in two batches to use later.
Thank you, Mely!
I shared this recipe on Simple Lives Thursday #73.
Wednesday, November 30, 2011
Long Rise 100% Whole Wheat Bread
Ingredients:
15 cups + freshly ground whole wheat flour
6 1/4 cups very warm filtered water (110 - 115 degrees)
2 teaspoons dry yeast
1/2 cup Extra-Virgin olive oil
5/8 cup raw honey
2 Tablespoons unrefined sea salt
2 Tablespoons brewer's yeast (use pure brewer's yeast, not the "fortified" variety)
2 pastured eggs
2 more Tablespoons Extra-Virgin olive oil for oiling the bowl
Instructions:
In a very large bowl, measure out 15 cups of the flour. Add all of the water and then sprinkle on the yeast. Stir the yeast into the water with a fork.
Next, add the oil, honey, salt, brewer's yeast and eggs. Stir well to combine.
Add more flour 1/2 cup at a time until the dough is stiff enough to knead.
Turn dough out onto a surface floured with more whole wheat flour and knead for 10 minutes, adding a little flour as it gets sticky.
The dough should be smooth and elastic. It must not be "slack", nor too stiff.
Wash and dry the bowl. Pour the 2 Tablespoons of oil into the bowl and using your hand coat the inside of the bowl well.
Put the kneaded dough into the bowl, then turn it over so that the top is well-oiled.
Cover tightly with plastic wrap and keep in a warm but not hot place. The kitchen counter is fine. Allow the dough to rise until when you poke the dough with your finger, it "sighs" and the hole does not fill in.
Punch the dough down well and allow it to rise AGAIN in the bowl as before.
Set the oven to 350 degrees F.
After the second rise, oil 5 medium bread pans, form the dough into 5 loaves (it should be oily enough that no extra flour is needed at this point) and place in the prepared pans. If it does want to stick to your hands and the work surface, just put a little more olive oil on your hands and the surface.
Allow to double again. The sides of the loaves should nearly touch the top of the sides of the pans. When you poke a loaf, gently, it should feel "springy." If your dough rises too much in the pans, it will fall in baking. If not enough, then the bread will be heavy and not as nice, but still edible, certainly.
Bake the loaves at 350 degrees F for 45 minutes. You should use a thermometer to check the temperature in your oven if there is any question about it.
Remove from oven, and remove loaves from pans and cool them on wire racks. If you don't have a wire rack, use a folded dish towel to place the loaves on. Cool for at least 15 minutes before attempting to slice. The loaves are still baking!
Keep track of how long all of this takes. The goal is to have it be at least 7 hours from mixing to placing in the hot oven. You can adjust your amount of yeast according.
If I were going to make just 2 loaves, I would use the following:
6 cups + freshly ground whole wheat flour
2 1/2 cups very warm filtered water
1/2 teaspoon dry yeast
1/4 cup extra-virgin olive oil
1/4 cup raw honey
1 Tablespoon brewer's yeast
1 pastured egg
1 more Tablespoon Extra-Virgin olive oil for the bowl
This bread is wonderful, and easily digested, even by many folks who are sensitive to wheat IF you make sure to adjust the amount of yeast so you get that long slow rise.
Monday, November 28, 2011
Bazaar Soaps!
A few days ago I posted about making soap. I told you I would post pictures. Here they are. I will be trying to sell these at a Christmas Bazaar on Saturday. Wish me luck!
Monday, November 21, 2011
Making Soap is much easier than making bread!
Between Saturday and today, I've made 5 batches, from 5 different recipes, of hand made, all natural soap. If you have never made soap, and would like to learn, please don't be worried. Making soap has become very easy, since the advent of the World Wide Web. There is so much information available, literally at our fingertips!
First, decide what kind of soap you would like to make. I would suggest, to begin, just make what I call "every day" soap. It is a simple combination of lard, coconut oil, soft water and lye. After you experience success (and you will,) then you can experiment with other "fancier" recipes. I started making soap about 34 years ago ~ our little children would often leave a bar of soap in the bath water and it would get ruined. Store bought soap was relatively expensive, and so I decided to learn to make our soap. I made the "every day" soap, exclusively, until just a few years ago.
The first time, my husband was in the bathroom washing his hands, and he called out, "Do you know what I like about this soap?".... "It works!"
In the last few years, I have learned to make a shampoo bar, Castile (olive oil) soap, French milled soap, goat's milk soap, shaving soap and soap from recycled oils and fats.
Do not be impressed. The basic procedure is the same for all of the soaps I make. Only the amounts and ingredients differ.
If you are ready, first, go here and watch this:
http://www.youtube.com/watch?v=6etb25cNEDg
The video will give you a basic idea of how soap is made. I must mention that I never added any scents or colorants to my soap for many years. Also, I have used many different things for a soap mold, including glass baking pans and cardboard boxes. I always line mine with a damp cotton cloth to make it easy to remove the hardened soap. I've never had a mitre box and fancy cutting thing, either. I just lightly mark off my cutting lines and use a big sharp knife. Here is a link to a nice video showing a great way to make a soap mold from a cardboard box:
http://www.youtube.com/watch?v=e7Wy7t7ZKIA&feature=related
I stack the bars in a cardboard box, with air around each one to let the soap cure. I've never used a metal rack like the man in the video.
So, here is what you will need to make basic soap.
Lard (available at the grocery store or from a place where they process hogs)
Coconut oil (Get the inexpensive LouAnn brand if you can at the grocery store)
Soft water (it need not be distilled, but it is important for it to at least be soft.)
Lye (sodium hydroxide)
Large stainless steel kettle (alternately, you can use a granite-ware pan that isn't rusty)
Long handled wooden spoon (or a nice smooth sturdy stick)
Plastic container for the water (a plastic pitcher would be best)
Plastic container to measure the lye into
Digital scale
Candy thermometer
Something to use for a mold (see what I mentioned above)
Cotton cloth big enough to fit the mold all the way to the top and over a bit, dampened
A warm blanket or a couple of big towels to keep the soap warm while it is hardening
A protected surface to turn the soap onto (not your wood dining room table - don't ask me how I know)
A stick blender (This is very nice, and makes it all faster, but I made soap for many years
without this luxury. I just used a stick or wooden spoon.)
To work out the proportions in your recipe, go to the MMS Lye Calculator . Look carefully and you will see where you will choose a unit of measure (ounce, gram or pounds), the kind of lye (choose sodium hydroxide), you can ask it to include basic instructions in the print-out. Then scroll down on the page and you will enter the amounts of the fats you want to use.
I would suggest you start with 32 ounces (2 pounds) of lard and 4 ounces (1/4 pound) of coconut oil. Coconut oil will make your soap nice and bubbly, but you don't want too much or it can be drying to the skin.
When you are ready (and the pets and children have been sequestered elsewhere), gather up all of your equipment and ingredients.
FIRST I will talk about SAFETY. You are going to be using lye, which is extremely caustic and can BURN you. ALWAYS keep an open container of vinegar close by when you are working with lye. If something splashes on you, immediately pour vinegar on the area and it will neutralize the lye. ALWAYS wear safety goggles. The man in the video doesn't, but that is silly. AND downright dangerous. ALWAYS add the lye TO the water. If you do it the other way, it could explode and burn you!
Another thing.... the pan, containers and any utensils you use in making soap should be used ONLY for making soap. So, keep them safely tucked away somewhere when not in use.
I personally do not use gloves. They would tend to make me a bit more clumsy and I'd be more likely to have an accident. I just work very carefully and slowly and keep that vinegar handy. I also do not wear long sleeves. If the lye splashes on a sleeve, it will take longer to get it off of your skin. These things are MY opinion, but so far, I've never been injured.
Ok, on to the actual soap making. By now, you have worked out your recipe on the MMS lye calculator and printed it out and studied it. It will tell you how much lye to use and how much water to use. For the recipe I suggested above, the calculator says:
36 ounces lard
4 ounces coconut oil
10 - 15 ounces water (I generally pick a number in the middle of this value)
5.27 - 5.44 ounces of lye (I would opt for 5.39 - nicely and safely in the middle)
Ok... You are wearing goggles, and all the children and pets are far away and will stay there. Prepare your mold(s) by lining it with a damp cloth or parchment paper.
1. Measure fats into the stainless steel kettle (using your digital scale) .
2. Measure the soft water into the plastic pitcher.
3. Measure the lye into the other plastic container.
4. Get your vinegar and take it outside on the porch (if you do not have a porch and nowhere to
work outside, work next to an open window and try not to breathe the fumes that mixing
the lye into the water will create. The fumes will make you cough.)
5. Put the wooden spoon in your water container and take it outside.
6. Take the container of measured lye outside.
7. Very carefully, pour the lye INTO the water, and stir the water. Be gentle. Don't knock your
container over. Stir until the lye is dissolved. It will be VERY hot!
8. Take everything back inside. Don't try to carry it all at once. Be careful.
9. Set the lye/water solution someplace safe to cool.
10. Melt your fats together. The goal is to have the lye/water solution and the fats roughly the
same temperature when you combine them. That is where your candy thermometer
comes in. I only use ONE and don't worry about transferring it between the two things.
It's not a big deal. The temperatures should be about 100 - 125 degrees F, both about the
same.
11. When both things are about the right temperature, use your wooden spoon while you slowly
add the lye water to the melted fats, stirring round and round gently.
12. When they are combined, you can start using your stick blender, if you have one. If not, just
keep stirring with your spoon. If you are using the stick blender, keep it below the top of the mixture, so it won't splash out. Do it like this... Blend for 10 seconds, stir with it off
for 10 seconds. (This way, you won't burn up the motor in your stick blender.)
13. You want to keep doing this until you see it "trace". That means if you dribble some of the soap on top of the batch, there will be a nice little trail that stays up for a few moments
before sinking in.
14. When you reach "trace" you are ready to pour the warm soap into your prepared mold(s). Pour all of the soap into your mold and then put it in a safe place, covered with a warm
blanket. You will want to put something on top of the mold container first, so the
blanket doesn't dip into the wet soap.
15. Keep the soap warmly covered up for 24 hours. Check it and see if it is firm enough to cut
into bars. If not, re-cover and give it more time.
16. When it is ready, turn the soap out onto a surface that the lye will not damage. Then, cut it
into bars however you wish.
17. Set the bars, with air between them, into cardboard boxes or on a rack to cure and dry.
The soap should be ready to use in about 2 weeks. If you are brave, you can check
it with your tongue (gasp!) Just lightly touch the end of your tongue to a bar of soap.
If it "bites", it needs more curing time.
That's it! And WHY did I say it is much easier than making bread? Because it is. Once you learn the process and make it your own, it is something you can easily do. I made 4 different kinds of soap today. Once the equipment was out, it was a breeze to go from one to the other.
I hope you will do a little research, carefully read what I have written several times (maybe even print it out so you can refer to it easily), and go ahead and make your soap. It is very nice, and easy on the skin. It contains the naturally occurring glycerin, which is a by-product of the saponification (chemical reaction that makes soap), and glycerin is an emollient. It softens the skin.
Years ago, you could buy Red Devil Lye at the grocery store, and the amount that was in the container was perfect for making a batch of soap from 5# of fat (10 cups.) Then, later, they increased the amount in the container of lye. Very annoying, because without a scale, there was no way to measure the lye. THEN it became a "hazardous material" and you can't buy it at a grocery store anymore. You might try a hardware store or online (i.e. www.Amazon.com).
If you are making soap, and you've been stirring it for at least 15 minutes and it just isn't cooperating, don't worry. Leave it, and come back from time to time and give it a good stir. It will set up eventually. That happens sometimes if your temperatures are not right when you combine the lye water with the fats.
One last suggestion ~ It can seem a bit tricky to get both solutions to the same temperature. As the lye is cooling, melt the fats. If the lye water is cooled enough ( 100 - 125 degrees F.) and the fat is too hot, set it in a sink of very cold water and stir it and it will cool down quickly.
After my soaps have cured and I have them all cut up, I'll post some more pictures. The one at the top of this post is of part of a batch of Goat's Milk Soap. It will whiten, somewhat, as it cures.
Wednesday, November 16, 2011
Are you making any gifts for Christmas?
This will be a hand-made Christmas for us. I have a dear cousin who makes wonderful jewelry and she helped me with something for the granddaughters. I have a sewn project for all of the women in my life. Everyone else will get something to eat, except DH. I actually bought 1 item for him. I want to show you the little doll I made for someone special (who will remain anonymous for obvious reasons.)
Here she is!
What do you think?
Here she is!
What do you think?
Friday, November 11, 2011
Stir-Fry
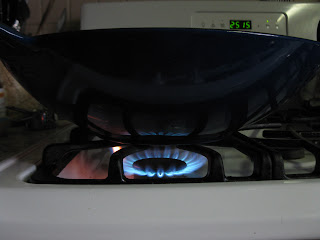
I am going to tell you how I make "Stir-Fry" for us. Here you can see my cast-iron wok, heating on the stove. It is enameled on the outside, but smooth cast iron on the inside and works beautifully. I bought it on clearance for only $10 a number of years ago. What luck! :) There are many kinds of woks available, and even if you don't own a wok, you can make stir fry very well in a heavy-bottomed skillet, so don't let that stop you.
When I want to make stir-fry, I look and see what vegetables I might have on hand that I could use. Here is what I had this time:
1 large onion, sliced thin
1 turnip, peeled, quartered and sliced
1 small carrot, peeled and sliced
a fist-sized chunk of cabbage, sliced
1/4 of a head of cauliflower, sliced
To make a stir-fry, heat some fat (I used lard, maybe 2 T) in your wok while you prepare your vegetables. Choose fat that can stand high heat... so lard, ghee, coconut oil would all be good choices.
Start adding the vegetables. Add the toughest ones first and let them soften (stirring) and then add the others. Stirring constantly, cook the vegetables for a while until they wilt slightly, then add any meat that you might like. I added 1/2 # frozen fully-cooked shrimp. Stir and cook until your meat is done ( or in this case, just until the shrimp were heated through.)
We served this over oven baked brown rice with naturally brewed soy sauce.
This concept is so very versatile. You can use just about any kind of fresh or frozen vegetables and any kind of small pieces of meat that you enjoy. Meat is not necessary, of course. I've made many stir-fries without meat.
It is quick and easy to do. Enjoy!
Sunday, November 6, 2011
Wholesome Soaked Cornbread
Have you ever heard of "pellagra?" It is a nutritional deficiency disease. Here is a quote from Wikipedia about pellagra:
"Pellagra can be common in people who obtain most of their food energy from maize (often called 'corn'), notably rural South America where maize is a staple food. If maize is not nixtamalized, it is a poor source of tryptophan as well as niacin. Nixtamalization of the corn corrects the niacin deficiency, and is a common practice in Native American cultures that grow corn."
In order to "nixtamalize" corn and therefore make the vitamin B3 available to our bodies, the corn needs to be soaked in calcium hydroxide (pickling lime.)
Many of us have a wide variety of foods in our diets and will never run the risk of contracting pellegra. Nevertheless, it is a good thing, whenever possible, to prepare our foods to maximize the nutritional value and help to optimize our health. Not only is this a healthy choice, but it is frugal, making the most of what we have.
That being said, I've come up with a recipe for cornbread that is delicious and very nutritious.
First, you will need to make some "lime water." It is very easy. Just put about 1 inch of "pickling lime" into the bottom of a 2-quart jar. Fill with water, cover tightly and shake well. Then, let it sit on the counter all night and the lime will settle:
In the morning, carefully pour off the slightly cloudy liquid, leaving the lime in the jar. Save the liquid in a cool place, but there is no need to refrigerate it.
Here is my jar of lime water, 1 cup of whole grain cornmeal and a measuring cup:
I stirred 3/4 cup lime water into the cornmeal, covered it with plastic wrap and let it soak overnight:
I lined a wire strainer with a cotton cloth and set it in bowl and then poured the soaked meal into it and let the liquid drain out. Next, I added fresh water, stirred it up again and let it drain again.
Finally, I gathered up the cloth and carefully pressed as much liquid as I could from the soaked cornmeal and emptied it into a mixing bowl:
Then it was time to make the cornbread. This all can sound rather complicated, but it takes much more time to talk about it than to actually do it, and like anything else, after a bit of practice it becomes second-nature.
Wholesome Soaked Cornbread
1 cup whole meal cornmeal that has been soaked in lime water
1 cup freshly-ground whole wheat flour
3/4 cup raw milk
2 Tablespoons kefir whey
1 pastured egg
5 teaspoons non-aluminum baking powder (Rumford)
1/3 cup Sucanat
2 Tablespoons melted butter
In a mixing bowl, combine the cornmeal, flour, milk and whey. Stir well. Cover with plastic wrap and let it sit at room temperature for at least 7 hours, or up to 12.
Preheat oven to 425 degrees F. Butter an 8-inch square baking dish.
Add the baking powder, egg and Sucanat to the soaked mixture and stir together thoroughly. Add the melted butter and incorporate.
Pour into prepared baking dish. Place in the oven and bake for approximately 30 minutes.
Here it is, just out of the oven:
I refused to wait until it had cooled very long, so here is my piece with lots of nice butter, ready to eat!
I encourage you to try soaking your cornmeal.
Since there are only 2 of us here most of the time, I will cut this into serving-sized pieces and wrap each one carefully, plop them into a freezer bag and freeze them. Then I can take out what I need and the extra won't be wasted. This much cornbread will last us for 4 meals.
Thursday, November 3, 2011
I thought canning season was over!
I really thought I was done canning for the year. Then, yesterday the neighbor brought a wheelbarrow half-full of pears from their tree. I sprang into action! Here are a few of them:
Recently, my daughter canned 20 pounds of peaches. She came up with a lovely recipe that did not include sugar. Last year, when I canned the pears, I did use sugar. I've been trying to get away from that as much as possible, so was intrigued with her recipe. Her "syrup" has water, honey, lime juice and vanilla. Here is the combination I came up with. I peeled the pears, cut them into chunks, filled the jars with the chunks and then with the boiling "syrup" that had:
18 cups water
3 cups honey
juice of 2 lemons
1/4 cup vanilla extract
I processed the jars for 35 minutes in quarts - 8 of them. Probably about 1/3 of the "syrup" is left over, so I will do some more tomorrow.
A few weeks ago, a friend offered to let me in on a really good sale of boneless, skinless chicken breasts (all hormone and antibiotic free.) I picked up my order yesterday and came home and canned it. There was 20 pounds of meat and I got 18 1/2 pints.
Canning meat is much easier than fruits and vegetables! I will use this chicken breast meat to make chicken salad.
I guess canning season is never really over... I know that many things that I can would be better for us if frozen. We used to move a lot. I got in the habit of canning so I could take the food along. And then there are the inevitable power outages... and I've lost many things in the freezer. I do dry some of our things. We also have our unheated greenhouse, so we have fresh things through the cooler months.
I don't plan to give up canning.
Subscribe to:
Posts (Atom)