Showing posts with label Foraging. Show all posts

Friday, April 12, 2019

Roasted dandelion root "coffee."

I am not a coffee drinker.  I'm not even a tea drinker.  Still, though, a nice warm comforting beverage is something I enjoy.  I dry mint and stinging nettles for herbal tea. A couple of days ago, I watched this wonderful YouTube video about making "Dandelion Coffee."  I did exactly what he said to do and it worked perfectly! It makes a very nice warm drink.  By the way, never drink HOT drinks.  That can lead to cancer of the esophagus.  

Here is the link to the video I mentioned: https://www.youtube.com/watch?v=HiGlA2tlh2c&t=470s


I didn't have very many dandelions here at our home, so I went to the original Garden Fairy's home and she helped me.  In fact, she did almost all of the digging and getting the soil off of the roots.  As you can see, I brought them home and covered them with water and let them soak for a few hours to help get the soil off.  The Fairy has clay soil, so that was not easy.  

After soaking and rinsing, I cut the roots right off of the plants.  And then I scrubbed them carefully under running water.  Here they are.


I am not going to give you a complete tutorial here.  Please refer to the link above.  Here is what they looked like after I chopped them up in my food processor.


There are roughly 4 cups of chopped roots in that bowl.

Here you can see how I spread them on a baking pan.  This is a "half sheet" pan and worked out very well for my 4 cups of chopped roots.


When they had been dehydrated in the oven, and then roasted, here is the product that I ended up with.


I'm very pleased with this. It tastes very nice to me.  I am hoping to make some more soon. 

Thursday, April 11, 2019

Violet Jelly!

Here in Indiana, USA, it is wild violet season. I went out and picked 2 cups of violet blossoms and put them in this bowl to let any possible hitchhikers escape, for about half an hour.  I didn't actually see anyone, but one never knows.... 


I wanted to make violet jelly.  So, I put the blossoms in a quart jar and poured 2 cups of boiling water over them and let it sit for about 24 hours.  Then, I strained out the infusion. Be sure to press down on the blossoms to get all the liquid out, as much of the color may be clinging to the blossoms.


Next, I you add 2 Tablespoons of lemon juice and the infusion turns this pretty color:


Pour 2 cups of this liquid into a stainless pan that is at least a gallon in size and add 1 box of powdered pectin.  Whisk that together well, and then, stirring, bring it to a full boil.

Add, all at once, 4 cups of sugar, bring it back to a boil, stirring, and boil it for one minute.

Pour the jelly into hot, sterilized jars, add sterilized caps and seal.

So quick and easy.


What does it taste like?  Well... sweet violets!  It's not something you would spread all over bread or toast, in general, but a nice dab on a cracker is very pleasant and it makes a lovely gourmet gift! 

.

.

Tuesday, April 2, 2019

Dandelion noodles - again - sign of spring!


Yesterday I was outside and had been noticing that the dandelions are coming up in our yard. Some people see dandelions as weeds.  Not me!  For me they are a highly sought after and nutritious vegetable.  Here in Indiana, USA, I can harvest them spring through fall. 

On the way back to the house I picked a nice handful of them and came in and made a 2-egg batch of noodles with them.  This time, I also gathered some fresh chives and garlic leaves from the vegetable garden, boiled them all together for 5 minutes, drained them and then put them in the blender with two eggs and a teaspoon of salt.  Then I made the noodles from that mix.  Above, you can see them cooking.

When they were done, I drained them, added about 3 tablespoons of butter, some salt and pepper and some chicken meat that I had canned.  Oh my... we'll have that for our meal today. 

I have posted about this before, and Here is the link to that post. This time, I used King Arthur unbleached all-purpose flour. I also now own a small pasta roller and enjoy that, although that is certainly not necessary. Mine is like THIS ONE.

Sometimes I re-post things, since I've had this blog for about 10 years and I'm sure most of you Gentle Readers have not seen most of it.

Don't you just love springtime?

Saturday, February 2, 2019

"Fiber for the landless."

Are you familiar with "stinging nettles?"  It is a plant that grows wild in many areas of the world, including where I live in Indiana, USA. Here is what they look like in my area.  The name for them tells you what they are like.  They are covered with little prickles that have formic acid in them. If you brush your skin against a stinging nettle, you will feel pain!

Related image

The leaves of the nettles are highly nutritious, and of course, if you cook them, all the sting is gone. They also make a lovely, healthy, herbal tea.  I like to go out in mid to late May and (wearing gloves!) gather the top leaves of  some of the plants and bring them home to dehydrate for tea.  Then, in late June, I take some pruning shears, wear gloves and long sleeves and go cut the stalks, bundle them up, and bring them home.  Then I strip off the leaves and since I no longer have chickens, I put the leaves in the compost bin.

2018 was the first year I ever "played" with nettles.  You see, they produce fibers that can be spun into yarn. It has been a small, but enjoyable journey.  I am still learning, certainly.  Here are a few pictures so you can see what I've been up to:

Here is some on the little hand spindle I used.


I have a small "pin loom" and made a tiny weaving.


My skill and method is still very crude, and yet I am happy with the result. Nettle is a "bast" fiber, similar to flax, from which linen is made. Nettle has been used since prehistoric times. I like that working with it connects me to people back through the generations.  Making bread does the same thing for me.  

Some nettle cordage:


A bit of weaving on a cardboard "loom"


My latest tiny project is a very humble and delicate bookmark that I made to give as a gift.  All of this effort, to anyone not familiar with this, does not look like much.  I assure you, though, that many hours of work have gone into gathering, processing and using these fibers. 


Now, in the dead of winter, I am still working with the fibers I was able to gather last summer and looking forward to the new season, not only to grow food in our garden, but to gather more Stinging Nettles.

The journey continues....


Saturday, July 22, 2017

I canned the Chanterelles...

Since I've never eaten a Chanterelle mushroom before, I cooked up a small amount and ate them.  Very nice flavor and I didn't die.  After watching a few YouTube videos, I chose to pressure can the rest of them.

First, I divided them into smaller pieces and put them with 1 cup of water in my cast iron skillet.


Then, on medium - high heat, and stirring, I cooked them until they were cooked "down."  It only took a few minutes.


I packed them into two half - pint jars, leaving an inch of head space and covering them with the liquid from the pan.  Each jar has 1/4 teaspoon of salt as well.

They were processed at 10 pounds of pressure for 30 minutes.  (Consult a good canning guidebook.)

Here they are!  I am thinking that some day I will fry them in a little butter and serve with potatoes, some meat and green beans. That will be a special meal!


Chanterelle Mushrooms!


Last year, I saw these mushrooms growing near my woodland path and thought they were Jack-O-Lantern mushrooms, which are toxic.  I was out walking in the woods yesterday and saw them again, so did some research and found out I was wrong!  These are Chanterelles.  I brought in three quarters of a pound.  I'm very excited about it.  I've been collecting Oyster mushrooms for a few years here, and now I've found another edible mushroom.  If YOU find some that look like this, the first thing to do is break open a stem.  The inside of the stem should be a creamy white, NOT the same color as the outside of the mushroom.  Then, check the gills.  Chanterelles do not have true gills. Lastly, try pulling one apart lengthwise.  It should come apart similar to string cheese.  Don't take my word for it. Mushrooms can be very dangerous.  Do your own research.  Ideally, find a mushroom expert.  Be very careful, please.  These grow in hardwood forest on the ground, not on trees.

Saturday, May 6, 2017

Homemade Cream of Mushroom Soup!

The weather has been such, lately, that I have been able to forage a lot of oyster mushrooms.  I had two pounds of them in the refrigerator that I needed to use up, so here is what I did to make the Cream of Mushroom Soup.

The ingredients:


First, chop the mushrooms.


Next, melt 1/4 cup butter in a heavy skillet (mine is cast iron.)


Then stir and saute the mushrooms...


until they are tender and look like this:


There will still be some liquid in the pan. Next,
stir in the chicken broth and then the arrowroot 
powder in water (see recipe below.)


Keep stirring until it simmers and thickens.  Then,
stir in 1/2 cup evaporated milk, 1.5 teaspoons salt
and a few cranks of freshly ground black pepper.

Last, transfer the soup to a mixing bowl, and using
a stick blender, blend it nicely.


Voila!  You can also blend it in a regular blender or
a food processor, but the stick blender makes it
so very quick and easy!

Here is the recipe:

Homemade Cream of Mushroom Soup

2 pounds cleaned mushrooms of your choice
1/4 cup butter
6 Tablespoon arrowroot powder (or corn starch)
1/2 cup water
3 cups broth (I used homemade chicken stock)
1/2 cup evaporated milk (or cream)

Chop the mushrooms and saute them in the butter until tender.

Add the broth and then the arrowroot mixed into the water.

Stir and bring to a simmer until thickened.

Add the salt, pepper and evaporated milk and combine well.

Pour the soup into a bowl and blend with a stick blender.

Enjoy!

This post is shared at THIS blog hop!

Sunday, June 5, 2016

Oyster mushroom season!

We have had some good rain, and I was very happy to see a wonderful bloom of Oyster Mushrooms on the Tulip Poplar stumps in our yard yesterday!  I waited until today to harvest them, so they could grow a little more.  We got about 3.5 pounds.  :)


I soaked them in cold water for a while to drive off the hitchhikers, then carefully rinsed them under cool running water and put them through my salad spinner.  Voila!


If you've never had oyster mushrooms (and you enjoy mushrooms) you are missing a real treat.  They are the best I've ever eaten.  PLEASE do not go out and try to gather these on your own if you are not familiar with them.  Get someone knowledgeable to show you first.

Friday, April 8, 2016

Today's Lunch...

I am not certain why, but I decided I would like to show you what I ate for lunch today.  :)

The sandwich you see here is 2 pieces of my "everyday bread" toasted and spread with a little butter.  Then I put on a couple of slices of brie (soft, ripened cheese), 2 slices of braunsweiger, some homemade raw sauerkraut , and some nice, tender chickweed that I went out and picked just for this sandwich.  In the small bowl is some homemade yogurt  topped with lacto-fermented apple chutney.
Oh, my... it was good!


About the chickweed... Now, at least here in Indiana, is a good time to gather chickweed.  It is a wild edible and grows all over the world.  It's very very good for you... better than broccoli or spinach, even.  Here is what Common Chickweed looks like.  Two things to look for - if you look at the stem carefully, you will see a row of tiny hairs going down the stem.  The hairs are ONLY in this row on the stems.  The only look-alike that would be dangerous is the Scarlet Pimpernel, which has redish flowers and the underside of the leaves have brownish spots.  Avoid that.  

If you want to use some, take a pair of scissors and just cut off about an inch of the tops.  The rest of the plant can be rather straw-like.  Bring it in, wash carefully in cold water, then pat dry on a towel.  Use immediately, or keep it in a plastic bag in the refrigerator.  It is a great substitute for lettuce and can be steamed, sauteed, creamed, used in soups, or as a salad on it's own.  It's very mild in flavor and rich in nutrients... and right now, it's free and readily available!

Thursday, October 8, 2015

Jerusalem Artichokes...

Have you ever heard of "Jerusalem Artichokes?"  They grow wild all over the place here.  This past spring, a man was selling some of the tubers at our local Farmer's Market.  I was so excited!  I bought some of them and planted them in the garden.  I once read that "The man who has Jerusalem Artichokes will never starve." Apparently, once established, it will be a big job to get rid of them.  You plant the tubers, and they multiply and send up big tall flowers.
The tubers multiply like crazy in the ground.  You can dig them up any time you like.  I dug up a few yesterday.
There are many ways to use them... they can be steamed and mashed, with butter and salt.  They are great in soup.  Sliced thinly they can be added to salads.  They have a mild slightly sweet taste and are very versatile.  This morning, I made one of our favorite breakfasts, stir fried vegetables, Jasmine rice and scrambled eggs.  We like a little Tamari on the vegetables.
There is no need to peel the chokes.  Just wash and scrub them well.  You may, if you wish, of course, but it's a waste of time, and probably nutrients, as well.  Chokes have a pretty impressive nutritional profile. Here is a chart from Wiki:
Nutritional value per 100 g (3.5 oz)
Energy 304 kJ (73 kcal)

17.44 g
Sugars 9.6 g
Dietary fiber 1.6 g

0.01 g

2 g

Vitamins
Thiamine (B1)
(17%)
0.2 mg
Riboflavin (B2)
(5%)
0.06 mg
Niacin (B3)
(9%)
1.3 mg
(8%)
0.397 mg
Vitamin B6
(6%)
0.077 mg
Folate (B9)
(3%)
13 μg
Vitamin C
(5%)
4 mg

Minerals
Calcium
(1%)
14 mg
Iron
(26%)
3.4 mg
Magnesium
(5%)
17 mg
Phosphorus
(11%)
78 mg
Potassium
(9%)
429 mg


These are very easy to grow, and once established, you can hardly get rid of them, so be careful where you plant them.  They will keep, nicely, for what seems forever in the fridge.  I haven't tried room temperature yet, but I am planning to leave a few out in a basket and see what happens. 


Friday, September 18, 2015

Hickory Syrup

This is the trunk of a Shagbark Hickory (Carya ovata) tree.  About a week ago, a friend, who owns this alpaca farm mentioned to me that you can make "hickory syrup."  I had never heard of it, and was intrigued, so of course I looked online and found the instructions to make some on Dave's Cupboard blog.

My husband and I went out to Crosley Fish and Wildlife Area , found a nice Shagbark Hickory tree, and gathered a small box of loose bark.
This morning I weighed out 1/2 pound of the bark and scrubbed it with a stiff brush under cold running water and then laid it on my perforated pizza pan, placed it in the oven, pre-heated to 350 F, and toasted it for 12 minutes.  Dave says to do it for 10 or 15 minutes, but to be careful it doesn't start to burn.  You don't want your syrup to be bitter. Here it is in the oven toasting.
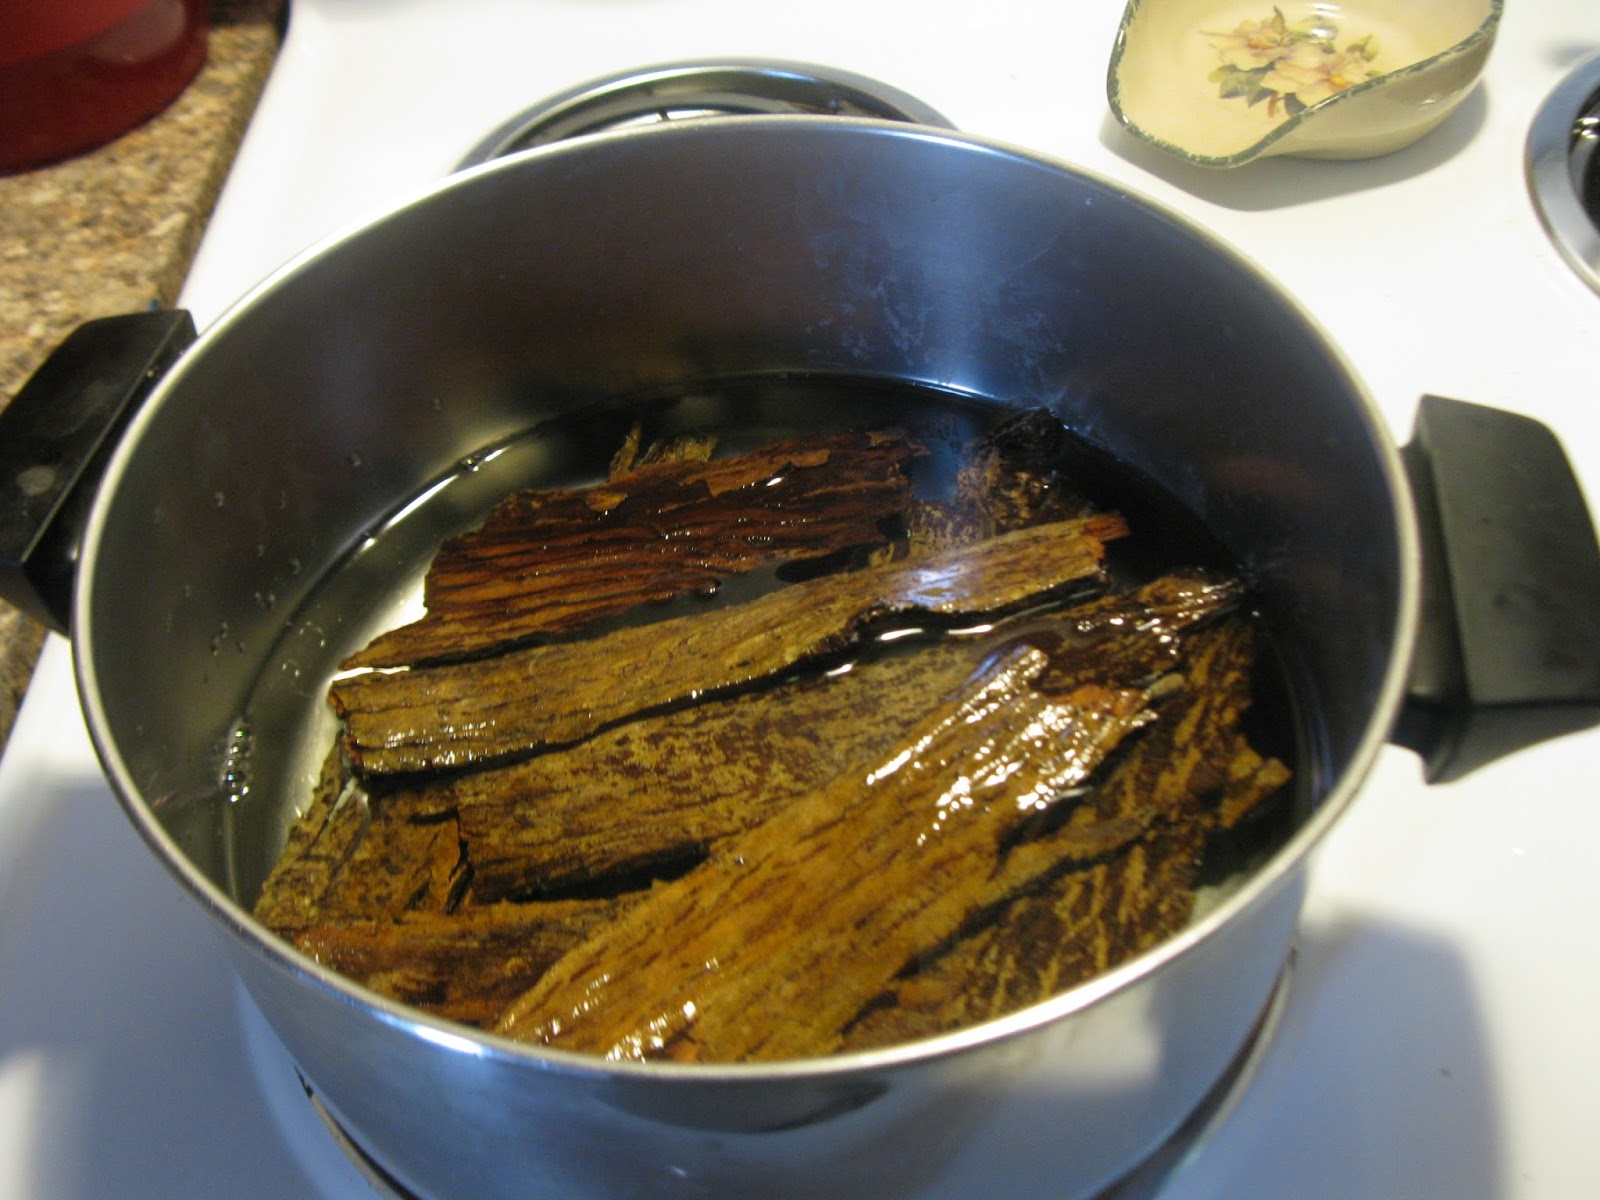
Next, I put it in a soup pot, covered it with water, brought it to a boil and then simmered it for 25 minutes.  It turns the water a beautiful amber color.
Next I removed the bark and then continued to simmer the tea until it was reduced by about 25%.  Then I strained it into a Pyrex measuring container (there were 3.5 cups of tea) and put it in a large sauce pan and added twice the amount of tea, in cane sugar, so that means I added 7 cups of sugar. DO NOT STIR IN THE SUGAR.  Just pour it in there and bring it all to a boil.  NEVER stir it.  This can cause it to crystalize much sooner.  When you pour the sugar into the tea, do not get it on the sides of the pan.  Pour it carefully into the bottom. Ok? Next bring it all to a boil and then turn the heat down and simmer it until it is as thick as you like.
I used a candy thermometer, and mine was just over 220 F when I decided it was done enough.  I kept checking it with a spoon.  It's kind of a judgement call, actually.

I skimmed off the foamy stuff and tasted it.  That part was very bitter, but the syrup is not bitter.  Interesting.  When it was ready, I carefully ladled it into jars and put on clean lids.  It is cooling now.
The aroma of the bark toasting was wonderful... like a spicy hickory smell.  I do like the taste of the syrup.  I would like to think it has some beneficial minerals in it or something, however, it is still sugar, just as maple syrup and honey are sugar.  It should be used sparingly, to top pancakes, etc. and as flavoring in other dishes.


Monday, July 27, 2015

A Good Harvest Day!


Things are looking up here with the garden.  We went out this morning and picked everything that needed picking.

Yellow Crookneck Squash


Tomatoes!  Not quite ripe, but that's how it is this year


Peppers, green and purple-podded pole beans


Bi-color sweet corn


Then I took a walk in the woods and came back with some lovely oyster mushrooms!  (There definitely ARE some advantages to having too much rain.  :)


Related Posts Plugin for WordPress, Blogger...