This little sweetie and our youngest son and his wife came to visit for Christmas.
Wednesday, December 27, 2017
Monday, December 11, 2017
That Gingerbread House...
Years ago, I posted instructions for making a gingerbread house. I had learned how to do it back in the 80's from some sisters in Relief Society. Later, I posted a "humble healthy" gingerbread house and got rid of the other one, but then realized that leaves you without a pattern! I reposted that 2 days ago and then realized my mistake... so now I have found a blog post that someone else has made with the exact instructions and pattern that I used to use. It is simple and fun. Here is the link:

Here is how I decorated my Humble Healthy version with popcorn, nuts, seeds and raisins:
This is a nice project to do with children. We used to make one every year and then on New Year's Day the children would divide it up and eat it!
Thursday, November 30, 2017
Another tiny tip.... egg salad!
Do you make egg salad? How do you cut up your hard boiled eggs for it? Here is what I do. I use a pastry cutter.
It is very quick and easy to do this way.
Tuesday, November 28, 2017
I made a new dolly !!
Our first great-granddaughter is having her 1st birthday party soon. So, I made a rag doll for her.
Tuesday, November 21, 2017
Another tiny tip (embarrassingly so)
When I was growing up, and Mommy would make a pie, if there was extra pie crust dough, she would roll it out, sprinkle it with sugar and cinnamon and bake it and let me eat it. That is the nicest cookie ever!
I have promised to make 5 pies for our Thanksgiving feast this year. I made all of the pastry today and most of it is now in the refrigerator. One will be an apple pie and I assembled it today (I did not bake it yet) and ended up with a small amount of leftover pie crust dough. I wanted to bake it, but it seemed silly to heat up the big oven to cook something so very small. So, I tried something new. I rolled it out, sprinkled it with a little sugar and cinnamon and cooked it in a small cast iron skillet on medium heat until the bottom started to brown, and then flipped it over for just a little while. It work out very well.
I have promised to make 5 pies for our Thanksgiving feast this year. I made all of the pastry today and most of it is now in the refrigerator. One will be an apple pie and I assembled it today (I did not bake it yet) and ended up with a small amount of leftover pie crust dough. I wanted to bake it, but it seemed silly to heat up the big oven to cook something so very small. So, I tried something new. I rolled it out, sprinkled it with a little sugar and cinnamon and cooked it in a small cast iron skillet on medium heat until the bottom started to brown, and then flipped it over for just a little while. It work out very well.
Something so small, but at least not going to waste!
Thursday, November 16, 2017
Turkey Wars !
Are you old enough to remember "gas wars?" When I was young, each gasoline station set it's own price. If stations were close to each other, sometimes they would keep lowering prices to try to outdo each other. It isn't that way anymore. I think someone else must set the prices.
Well, every November, here in the USA, we have what I call "Turkey Wars." The grocery stores sell turkeys for ridiculously low prices and it seems to me that they try to outdo each other. I bought a nice frozen turkey for 78 cents a pound last week! I can ordinarily buy whole chickens for about 99 cents a pound and so the turkey was 21 cents a pound lower even than that. A turkey has more meat per bone, by weight, so 78 cents a pound may as well be free. I put that one in the freezer to save for later.
We will be eating our Thanksgiving feast at our daughter's home, and she is fixing the turkey for the meal. I saw another grocery advertisement offering frozen turkeys for 99 cents a pound this week. We went and bought two of them Monday evening. I left one hanging in the cold garage to thaw partially (we hung it so no critters could get to it) and today I canned the meat.
First, I cooked the turkey, whole, on a rack, in my pressure canner/cooker for 90 minutes at 10 pounds of pressure. (I thoroughly washed the pot first!). After the pressure came down and I opened the pot, here is what the turkey looked like. It is about 14 pounds. I added 1 gallon of water, half an onion, roughly chopped, some chopped celery and a few halved garlic cloves so the broth would be flavorful.
After letting it cool, I de-boned it, cut the meat into bite - sized pieces, strained the broth and then packed the meat into pint sized canning jars. I filled them up with broth to within 1 inch of the rim, cleaned the rims, simmered the lids and proceeded as usual. I ended up with 7 pints of meat, and 10 pints of extra broth.
If you are unfamiliar with canning, be sure to consult a reliable canning book, such as the Ball Blue Book, or this book: So Easy to Preserve
It will be very nice to have this on the shelf. I can make turkey and noodles or dumplings, soup, pot pie... Yummy.
Thursday, November 2, 2017
Move over Mac and Cheese!
This morning, I made a batch of mayonnaise and so had 3 forlorn egg whites I needed to find a use for. Voila! I decided to make some egg white noodles, cook them and combine them with a cheese sauce. It turned out lovely and delicious.
As soon as the fresh noodles were made, I boiled them in plenty of water for 5 minutes, then drained them well. In the mean time, I made the cheese sauce:
2 Tablespoons butter
2 Tablespoons all purpose flour
1 cup whole milk (warm)
1.5 cups grated sharp cheddar cheese
Salt to taste
In a skillet, melt the butter, stir in the flour and very gradually add the warm milk, stirring vigorously with each addition. Do this over medium heat. When it is all nicely combined and thick, stir in the grated cheese until it is melted and smooth. Add the drained noodles. Salt to taste.
Wednesday, October 18, 2017
Hugelkultur!
According to Wikipedia, "Hügelkultur is a composting process employing raised beds constructed from decaying wood debris and other compostable biomass plant materials. The process helps to improve soil fertility, water retention, and soil warming, thus benefiting plants grown on or near such mounds."
This is my first try with Hugelkultur, and I have to say I am very happy about this new adventure. Yesterday, our oldest daughter helped me in the garden (I have a second Garden Fairy!) and we dug the pit. See, you dig a pit. I think most people probably dig it deeper than we did, but this will have to do. Then, with a little help from me and the Fairy, my husband hauled a lot of rotting wood up from our wood lot and we spread that out in the pit. Then we covered it back up with earth.
That will sit there and molder until Spring and then I will plant in it. Not only do I enjoy experimenting in the garden, but that part of the garden tends to be very wet in the Spring, and so now it is a raised bed, and I won't have to fight the puddles!
Here I am, digging...
Here is the pit filled with rotting wood...
And here is the Hugelkultur bed covered back up with earth...
We also threw a lot of compostable waste from the garden in before we put the wood in... such as trimmings from asparagus, weeds, old vegetable plants, etc..
Hopefully, I'll be able to give you a good report next year.
Tuesday, October 3, 2017
Tuesday, September 12, 2017
Some thoughts about efficient home canning...
I started canning in 1976, the summer our second son was born. I remember when he was 2-weeks-old, sitting in a chair nursing him, snapping green beans and watching the pressure canner all at the same time. I was one determined momma!
Here I am, 41 years later and that baby is, of course, 41 years old. Still canning...
I have learned how to do it in a way, that for me, is quite efficient. If I can set up my system carefully, it makes it so much more streamlined and enjoyable. I want to walk you through it. Today I canned 14 quarts of my "World Famous Chili Beans." ;) I have had 27,168 hits on that page as of right now, so I think they must beworld famous at least fairly popular.
Last night, I washed and picked over 8 pounds of red kidney beans to soak in my huge stock pot with water and a few glugs of lemon juice. Then I went and retrieved the quart jars I was planning to use, washed them carefully and put them on a towel to drain. I mixed up the seasoning mix, and gathered the lid rings and caps. Everything was clean and ready to go.
So, today, I drained those beans (only a 24 hour soak - not as long as in the original recipe - I was in a hurry), rinsed them, put them in clean water in the stock pot and boiled them for 30 minutes
In the meantime, I got everything else ready, putting the spice mix and salt into the jars and heating up the caps.
The pads in the foreground are to set the hot pot of beans on. Here are the caps and rings:
I then prepared the pressure canner by adding 3 quarts of water and a little vinegar and the rack for the bottom. I filled the jars, applied the lids and put 7 jars into the canner, and since these are quarts, after exhausting for 10 minutes, I processed them at 10 pounds pressure for 90 minutes.
After sufficient cooling, I placed the finished jars of chili beans on a folded towel on the counter.
This is two 7-quart batches. I had quite a lot of beans left over. I think next time I'll just use 7 pounds of beans instead of 8... but don't worry, the leftover beans will get eaten with brown rice, home canned salsa and sour cream... oh yum.
My point is... plan your work and system. First, wash, dry and put away all of your dishes and start with a clean kitchen. Then clean up as you go. It's so much more fun that way!
Here I am, 41 years later and that baby is, of course, 41 years old. Still canning...
I have learned how to do it in a way, that for me, is quite efficient. If I can set up my system carefully, it makes it so much more streamlined and enjoyable. I want to walk you through it. Today I canned 14 quarts of my "World Famous Chili Beans." ;) I have had 27,168 hits on that page as of right now, so I think they must be
Last night, I washed and picked over 8 pounds of red kidney beans to soak in my huge stock pot with water and a few glugs of lemon juice. Then I went and retrieved the quart jars I was planning to use, washed them carefully and put them on a towel to drain. I mixed up the seasoning mix, and gathered the lid rings and caps. Everything was clean and ready to go.
So, today, I drained those beans (only a 24 hour soak - not as long as in the original recipe - I was in a hurry), rinsed them, put them in clean water in the stock pot and boiled them for 30 minutes
In the meantime, I got everything else ready, putting the spice mix and salt into the jars and heating up the caps.
The pads in the foreground are to set the hot pot of beans on. Here are the caps and rings:
Here is a trivet and my magnetic wand for picking up the hot caps out of the water and also a clean, damp washrag for wiping the rims of the jars before applying the caps.
I then prepared the pressure canner by adding 3 quarts of water and a little vinegar and the rack for the bottom. I filled the jars, applied the lids and put 7 jars into the canner, and since these are quarts, after exhausting for 10 minutes, I processed them at 10 pounds pressure for 90 minutes.
After sufficient cooling, I placed the finished jars of chili beans on a folded towel on the counter.
This is two 7-quart batches. I had quite a lot of beans left over. I think next time I'll just use 7 pounds of beans instead of 8... but don't worry, the leftover beans will get eaten with brown rice, home canned salsa and sour cream... oh yum.
My point is... plan your work and system. First, wash, dry and put away all of your dishes and start with a clean kitchen. Then clean up as you go. It's so much more fun that way!
Tuesday, August 29, 2017
I love canning tomatoes and preventing early blight !!
Have you ever canned tomatoes? It is so very easy to do. This has been a wonderful year for tomatoes in our garden... partly because of burying blended kitchen scraps around the plants, and also, largely because I found a video on YouTube that said to mix 1 Tablespoon of baking soda and one crushed aspirin in a gallon of water and use it to spray the leaves, on the top and bottom of all the leaves, at least once a week and after a heavy rain. It prevents early blight. I have had trouble with blight for many years and this year... none. I am very very grateful!
Friday, August 18, 2017
Sadly... before you know it, winter will be here, so I am re-posting this!
Replacing a Zipper in a coat/jacket
Here you can see a perfectly good jacket. The problem is, the zipper is broken! Replacing a zipper is really not difficult, but it is tedious and takes considerable time. If your coat/jacket is nice, and/or you love it, it is more than worth the trouble to replace the zipper.

Here is the zipper I ordered over the internet here. This company is wonderful. They have everything and excellent customer service!

A closer look at the invoice:

The zipper I purchased cost $6.03 including the shipping, and so for a nice coat, you can see that this would really be worthwhile.
Now, don't be afraid. Breath. Relax. Here we go.
FIRST ~ set your sewing machine to its longest stitch length. Sew a line of stitching along the jacket opening, far enough in from the edge that you do NOT catch in the existing zipper. This is to hold everything together nicely and make the reassembly easier. Do this on both sides of the jacket.
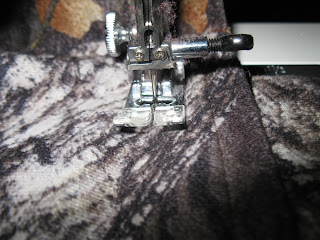
Here I am doing the same thing on the other side:

SECOND ~ take your little seam ripper and do (carefully and don't stab yourself) whatever it takes to remove the broken zipper:

Here I've gone a little farther in the process:
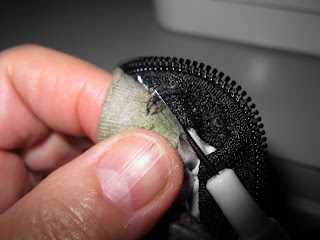
Here I am removing some stitching from the surface:
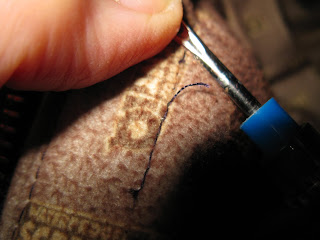
And here is what it looks like with the zipper removed. Now you will see the wisdom of doing that basting line of stitches so the jacket doesn't blow up and get all weird.

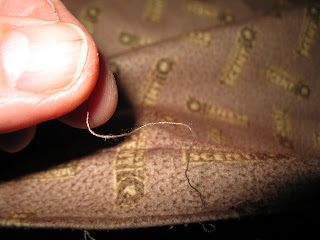
THIRD ~ carefully remove all the bits of loose thread:
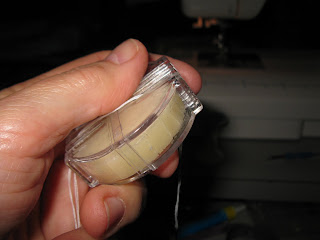
FOURTH ~ Thread a sturdy hand sewing needle with a doubled thread and run it through some beeswax so it will be less likely to tangle while you are sewing. Rosin will work instead of the beeswax, too, or if you have neither, find a piece of candle or even hand soap to use!
FIFTH ~ I hope you took the time to observe how the old zipper was positioned. You are going to unzip the new zipper, and one side at a time, you will put the new zipper in, and pin it in place and then hand baste it in place:

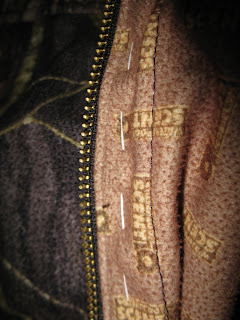
See? Here is one side basted together:

And here is the other side:
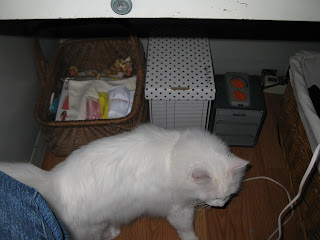
Oh, yes, and it is very helpful to have a fuzzy cat walking around under your work table at this point:
SIXTH ~ Before you sew the zipper in with your machine, zip up the jacket to make sure it is going to work!
SEVENTH ~ Now, simply, using a normal stitch length, sew along the same line where the old zipper was sewn in like this:

Make sure to replace any seams or stitching you have removed:

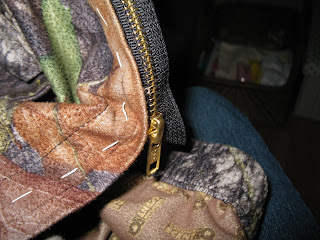
Be sure to remove any basting stitches. On this one, there was the nice little tab on the old zipper, so I just transferred it to the new one:

That's all you need to do! Even if it doesn't turn out perfectly, it is better than throwing away a perfectly good coat.
Please feel free to ask questions if I can help.
Here is the zipper I ordered over the internet here. This company is wonderful. They have everything and excellent customer service!
A closer look at the invoice:
The zipper I purchased cost $6.03 including the shipping, and so for a nice coat, you can see that this would really be worthwhile.
Now, don't be afraid. Breath. Relax. Here we go.
FIRST ~ set your sewing machine to its longest stitch length. Sew a line of stitching along the jacket opening, far enough in from the edge that you do NOT catch in the existing zipper. This is to hold everything together nicely and make the reassembly easier. Do this on both sides of the jacket.
Here I am doing the same thing on the other side:
SECOND ~ take your little seam ripper and do (carefully and don't stab yourself) whatever it takes to remove the broken zipper:
Here I've gone a little farther in the process:
Here I am removing some stitching from the surface:
And here is what it looks like with the zipper removed. Now you will see the wisdom of doing that basting line of stitches so the jacket doesn't blow up and get all weird.
THIRD ~ carefully remove all the bits of loose thread:
FOURTH ~ Thread a sturdy hand sewing needle with a doubled thread and run it through some beeswax so it will be less likely to tangle while you are sewing. Rosin will work instead of the beeswax, too, or if you have neither, find a piece of candle or even hand soap to use!
FIFTH ~ I hope you took the time to observe how the old zipper was positioned. You are going to unzip the new zipper, and one side at a time, you will put the new zipper in, and pin it in place and then hand baste it in place:
See? Here is one side basted together:
And here is the other side:
Oh, yes, and it is very helpful to have a fuzzy cat walking around under your work table at this point:
SIXTH ~ Before you sew the zipper in with your machine, zip up the jacket to make sure it is going to work!
SEVENTH ~ Now, simply, using a normal stitch length, sew along the same line where the old zipper was sewn in like this:
Make sure to replace any seams or stitching you have removed:
Be sure to remove any basting stitches. On this one, there was the nice little tab on the old zipper, so I just transferred it to the new one:
That's all you need to do! Even if it doesn't turn out perfectly, it is better than throwing away a perfectly good coat.
Please feel free to ask questions if I can help.
Subscribe to:
Posts (Atom)


