Showing posts with label Main Dishes. Show all posts

Tuesday, April 2, 2019

Dandelion noodles - again - sign of spring!


Yesterday I was outside and had been noticing that the dandelions are coming up in our yard. Some people see dandelions as weeds.  Not me!  For me they are a highly sought after and nutritious vegetable.  Here in Indiana, USA, I can harvest them spring through fall. 

On the way back to the house I picked a nice handful of them and came in and made a 2-egg batch of noodles with them.  This time, I also gathered some fresh chives and garlic leaves from the vegetable garden, boiled them all together for 5 minutes, drained them and then put them in the blender with two eggs and a teaspoon of salt.  Then I made the noodles from that mix.  Above, you can see them cooking.

When they were done, I drained them, added about 3 tablespoons of butter, some salt and pepper and some chicken meat that I had canned.  Oh my... we'll have that for our meal today. 

I have posted about this before, and Here is the link to that post. This time, I used King Arthur unbleached all-purpose flour. I also now own a small pasta roller and enjoy that, although that is certainly not necessary. Mine is like THIS ONE.

Sometimes I re-post things, since I've had this blog for about 10 years and I'm sure most of you Gentle Readers have not seen most of it.

Don't you just love springtime?

Thursday, November 2, 2017

Move over Mac and Cheese!

This morning, I made a batch of mayonnaise and so had 3 forlorn egg whites I needed to find a use for.  Voila!  I decided to make some egg white noodles, cook them and combine them with a cheese sauce.  It turned out lovely and delicious.


As soon as the fresh noodles were made, I boiled them in plenty of water for 5 minutes, then drained them well.  In the mean time, I made the cheese sauce:

2 Tablespoons butter
2 Tablespoons all purpose flour
1 cup whole milk (warm)
1.5 cups grated sharp cheddar cheese
Salt to taste

In a skillet, melt the butter, stir in the flour and very gradually add the warm milk, stirring vigorously with each addition.  Do this over medium heat.  When it is all  nicely combined and thick, stir in the grated cheese until it is melted and smooth.  Add the drained noodles.  Salt to taste. 


Wednesday, March 23, 2016

"Tuna Noodle Stuff" - from scratch...

Back in 1976, my husband was teaching middle school earth science in Aurora, Nebraska.  Pay for teachers was not stellar at the time and money was tight.  We had 3 small children.  We realized one day that we had all but run out of money for food, and it would be two weeks before we could buy groceries again, so we sat down and "put our heads together" to figure out what to do.  We did have items for breakfast and lunches, but nothing for suppers.  With the amount of money we had left, we figured out that we could buy enough ingredients to make "Tuna Noodle Stuff" (as we call it) every evening for those two weeks.  So, that's what we did.  We bought egg noodles, cans of tuna and cans of condensed mushroom soup.  Fortunately, we really like Tuna Noodle Stuff.  :)

Fast forward 40 years.  I was trying to decide what to cook today and feeling a little fuzzy in the head.  In the front of my recipe box I have a list of meals that my husband likes, so I got it out and noticed Tuna Noodle Stuff.  Yes!!!  That's what I'll make!  But I made it from scratch.  Here is what I did, with the recipes involved.

First I made egg noodles and boiled them for 5 minutes.

Here are the noodles:


Here they are boiling:


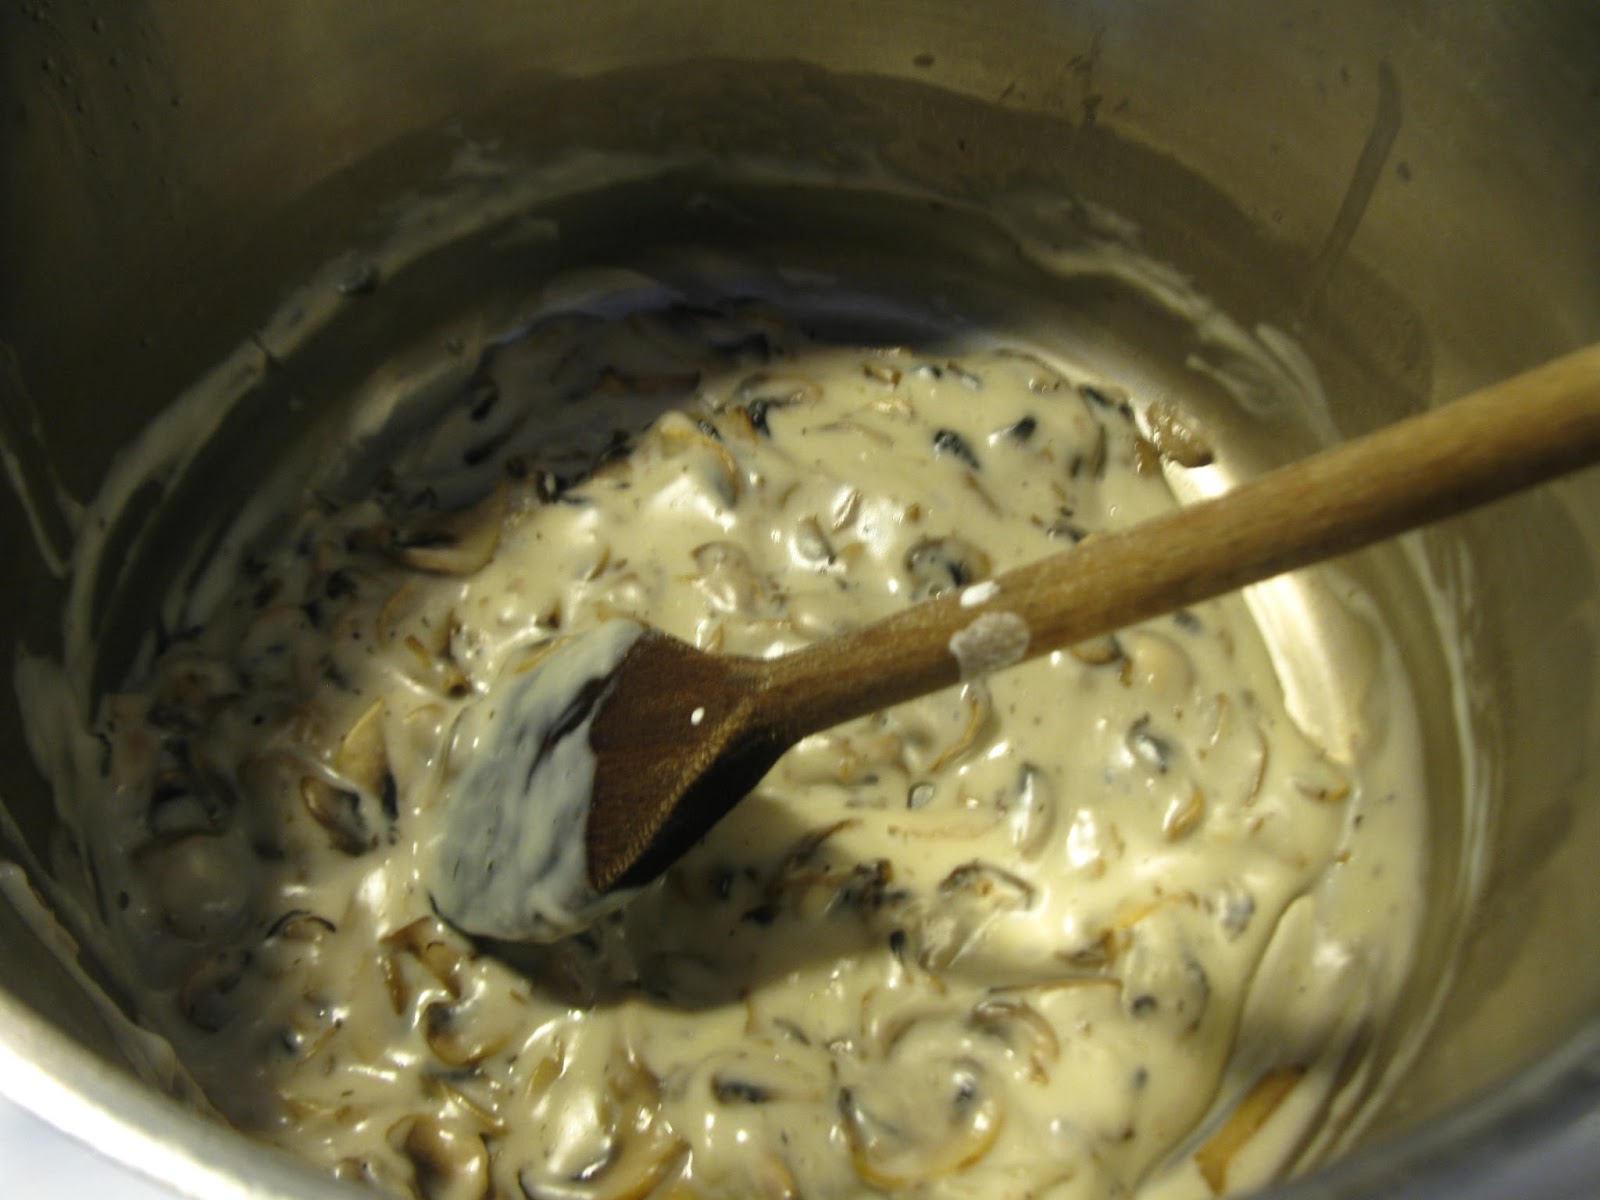
Then, I made homemade cream of mushroom soup:


And combined the cooked noodles with the soup and drained canned tuna:


It is very good.  Here are the recipes:

Cream of Mushroom soup

8 ounces button mushrooms, sliced thinly
3 Tablespoons butter
1/4 cup corn starch
1 1/2 cups whole milk
1/3 teaspoon sea salt

Melt the butter and saute the sliced mushrooms until they are soft.  Combine the milk and corn starch in a jar and shake it all up well together.  Add the milk mixture to the sauteed mushrooms, and stir constantly until it is all nice and thick.  Then add the salt and stir.  Remove from heat.

Egg Noodles

2 large eggs
1 teaspoon sea salt
unbleached white flour

Using a fork, stir the salt into the eggs and then, a little at a time, add flour until the dough is not stiff, but firm.  Knead on a floured surface until smooth.  Divide in half and, using plenty of flour, roll the dough out as thinly as you can and then, using a pizza cutter, cut it into strips.  Then do the other half of the dough.

Drop noodles into boiling water and cook for 5 minutes.  Then drain in a colander.  Add the noodles to the soup, add 2 cans of drained tuna, and stir well.  Serve!

By the way, you can add more milk to the soup if you want to eat it as soup.


Tuesday, June 16, 2015

Tonight's stir-fry!


It's so nice, this time of year, when some of the early things are ready to eat in the vegetable garden.  This morning, I went out there and brought in some things to make a vegetable stir-fry for our dinner.  There is Jericho lettuce, Swiss chard, kale, green onions, rhubarb, chives, and radishes. I will add some garlic, too, and saute it all in coconut oil, serve it on brown rice and use Tamari for seasoning.  Too bad it's only lunch time now....  ;)  If you let me know you are coming, I'll makes some extra rice.

Friday, December 5, 2014

Salmon Pot Pie !


INGREDIENTS

2 unbaked pie crusts (recipe below)
2/3 cup brown rice
1/2 teaspoon salt
1 1/3 cups water
1 large onion, sliced thinly
1 small can mushrooms, drained
1 Tablespoon butter
1.5 cups homemade stock or broth
3 Tablespoons corn starch
14.5 ounce canned Salmon, drained
1 cup shredded cheese

DIRECTIONS

1. Bring water to boil in small saucepan.  Add rice and salt.  Cover, simmer for 45 minutes.  Be sure to watch water level.  Don't let it run completely dry.

2. Preheat oven to 450 F.

3. Put one of the crusts in a 9 inch pie pan.

4. Sautee sliced onions in butter until soft, and then add the drained mushrooms and cook a little longer.

5. Mix corn starch into broth or stock, stirring, bring to a boil and simmer until thick.  Add 1/2 teaspoon salt.  Taste and see if it needs more salt.

6. Mix the thickened broth with the rice and put half of it in the bottom crust.

7.  Drain and mash the canned salmon.  Spread that in the pie now.

8. Spread the onions and mushrooms next.

9.  Pour in the rest of the rice mixture and spread that around.

10.  Sprinkle on the cheese.

11.  Add the top crust.  Trim.  Flute the edges.  Protect edges with foil or one of THESE.

12.  Bake for 10 minutes.  Reduce temperature to 350 F. and bake for 30 more minutes. Remove from oven.

13.  Allow to cool for 15 minutes, slice and serve!

This is very very good.  :)

How I made the crust -

In the bowl of a food processor, with the metal blade, put:

2 cups unbleached flour
1 teaspoon salt
2/3 cup cold butter, cut in chuncks

Process that until the butter is cut in little pieces, then -

Turn on the processor and begin slowly adding COLD milk, a little at a time, until the dough is soft, but not sticky.

That's it!

Friday, June 27, 2014

Chicken Alfredo casserole - my way :)


That photo doesn't look too great.  Sometime soon I need to get my camera situation fixed!  I just had to share this with you, though.

One of my favorite YouTube channels is Our Half Acre Homestead. The lady that does it shows how to do all sorts of things that I'm interested in.  Yesterday evening, I watched her make her "Chicken Alfredo Casserole."  I decided to try to make something very similar with what I had on hand.  Here is her video:


I had been out earlier in the evening just walking around looking at things in the yard.  I found some Very Large dandelion greens and so I picked them thinking I would use them in some noodles. When I saw the YouTube video, I knew what I would do!

I pretty much did just what Mrs. Volfie did, with these changes:

1. Instead of commercial pasta, I used my dandelion egg noodles, 2 eggs worth.
2. When I made the white sauce, I used 1 cup whole milk, 1 cup heavy cream, 1.5 Tablespoons butter, 1 teaspoon RealSalt, and 2 Tablespoons unbleached King Arthur flour.
3. 2 garlic cloves, minced instead of the 1 - 2 Tablespoons she used.
4.  I don't have any spinach, so I used Swiss chard, ribs removed, torn into pieces.
5. I pulled a fresh onion from the garden and chopped it up.

Oh My Goodness!  It was absolutely delicious!  Thank you, Mrs. Volfie!

Thursday, January 23, 2014

Pressure Cooking - Chapter 6

Here is a One-Pot meal I made in the pressure cooker for supper tonight.  It was delicious! Everything turned out very nicely - but next time I will make a couple of changes, which I will explain below:

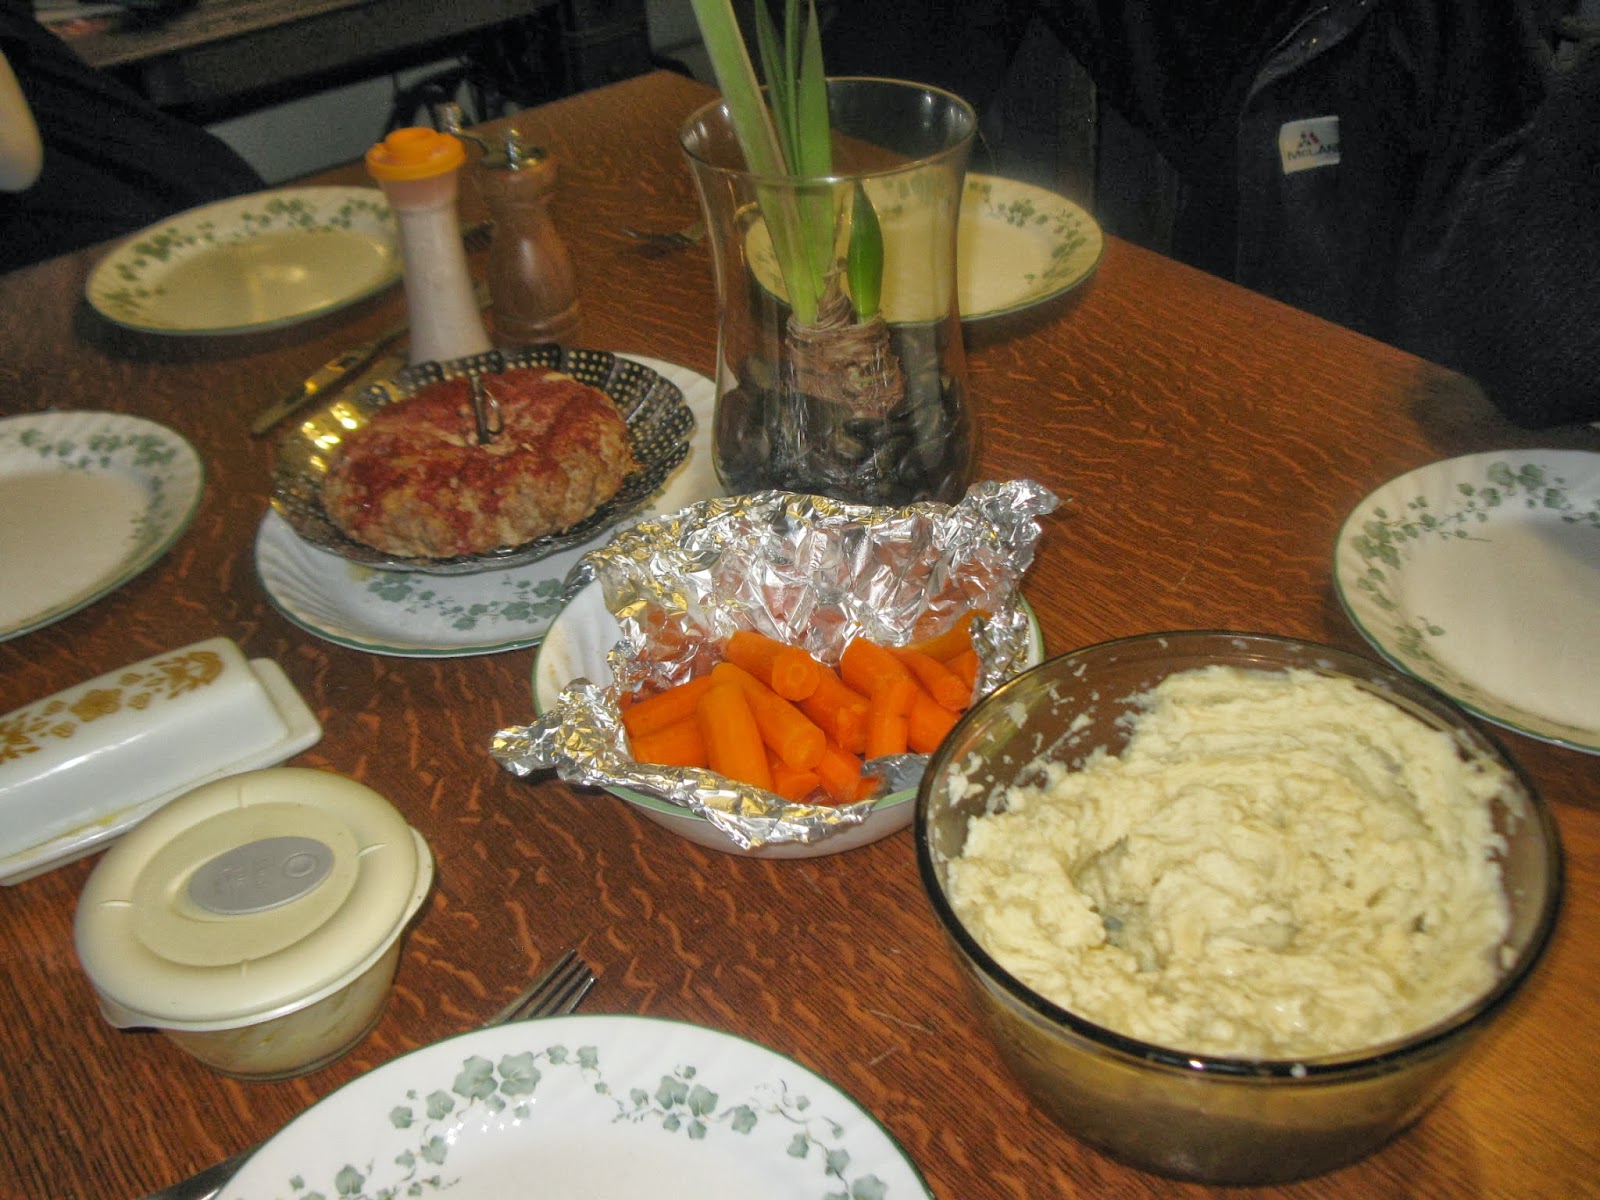
Pressure Cooker Meatloaf, Carrots and Mashed Potatoes
In a 6-quart pressure cooker - pour in two cups of water and place the trivet.


Scrub potatoes and add them in one layer on top of the trivet.


Combine for the meatloaf: 1.5# ground meat (I had lamb so that's what I used), 2 eggs, 1 medium onion, finely chopped, 1 cup soft whole-wheat bread crumbs, 1 teaspoon salt, 1/4 teaspoon freshly-ground pepper.  Stir together with a fork and then finish up the mixing with your hands so the ingredients are thoroughly mixed.


Butter another trivet.  Next time I will use the steamer rack that I show you below, to make it easier to lift the meat from the pan.


Form the meat mixture into a squat donut shape.


Place it on the buttered trivet or steamer rack.


Here is 3/4 cup tomato sauce.


Pour it over the meatloaf.


Peel some carrots and wrap them tightly in foil.  NEXT time I will slice the carrots as they were not quite done enough.


Place the packet of carrots on top of the meat. Put on the lid, bring up to pressure.  Reduce heat until the petcock is rocking gently.  Cook, at pressure, for 15 minutes.  Remove from heat and cool quickly under cold running water until the pressure is gone.


Open the cooker, remove the carrots.  Check the internal temperature of the meatloaf with a thermometer.  It needs to be at least 155 degrees F.  If it is not, after you remove the potatoes, place the steamer basket back in the cooker, put the lid on loosely and put the cooker back on the stove and steam the meat for a few more minutes.  Check the temperature again.  


While you are steaming the meatloaf, remove the skins from the potatoes and prepare mashed potatoes.  I like to add butter, cream cheese, milk and salt to ours.

Here is the meal.  We ate it all!  (There are 6 of us.)


This was easy and economical, and as I said above, next time I will slice the carrots and use the steamer basket for the meatloaf instead of the trivet.  

Monday, January 20, 2014

Pressure Cooking - Chapter 5

I am here today to humbly acknowledge a pressure cooking failure.  :'(  It's ok.  I rescued it, but I want to tell you what happened so you will avoid my mistake.

On the third Sunday of each month, our congregation at Church has a potluck dinner after our 3-hour block of meetings.  Saturday evening, about 7 p.m., I suddenly gasped and said, "Oh!  Tomorrow is the pitch-in lunch!"  Fortunately, it was early enough in the evening that I could make some food to take without having to stay up half the night.

I made a triple batch of chocolate brownies, without walnuts, because our grandson is allergic to walnuts.  I also made a batch of WHITE "Jiffy Buns" from the wonderful Whole Foods for the Whole Family cookbook.  Mine was published in 1981 by La Leche League. There are more recent editions available.  That recipe calls for whole wheat flour and makes wonderful buns, but for this occasion I decided to make white flour buns. Oh, my goodness they were soft and lovely.  It only takes an hour from start to finish.  Fabulous when you are in a hurry, and the dough can be used to make buns, rolls, cinnamon rolls or bread or whatever you like.

I had a large pork sirloin roast.  I decided to make pulled barbecue pork for sandwiches.  That is why I made the buns.  However the roast was frozen solid.  I thought... "Aha!  I could cook this in the pressure cooker real fast!"  THAT was a Big Mistake.  I cooked it, on the trivet, with 2 cups of water for an hour at pressure.  Still raw in the middle, so I gave it 30 more minutes.  Still not done enough and the outside was getting overcooked.  What to do... what to do... so I put it in the crockpot and poured the cooking liquid and quite a bit of barbecue sauce over the top of it and cooked it on low overnight.  In the morning, it was nicely done.  I did have to discard some of the very very done bits from the outside, but the rest of it was fine.  I pulled it apart, added barbecue sauce, and it was yummy.  No One Complained and it was All Gone at the end of the meal, as were the buns.

So, don't do what I did.  If your roast or large piece of meat is frozen. please thaw it first if you wish to pressure cook it.  OR, just do it in the crockpot from the start.

Here is the frozen roast.


Here is what it looked like after 90 minutes of cooking.  Still not done enough.


Saturday, January 18, 2014

Pressure Cooking - Chapter 4

I used the pressure cookers for dinner again yesterday.  This time, it was pork loin chops in one cooker and potatoes, carrots and cabbage in the other.  I learned something new.  I filled the 4-quart cooker with potatoes, carrots and a large chunk of cabbage, the trivet and 2 cups of water.  It was cooked at pressure for 10 minutes, and quickly cooled under running cold water.  When I opened it, the cabbage was not done.  :(  So I gave it two more minutes.  It was done then, but the potatoes and carrots were too done.  It all still tasted good, but next time I'll cut the cabbage into smaller pieces.


I browned the pork loin chops in lard in a cast iron skillet,


placed them all in the pressure cooker with two cups of water under the trivet, cooked them at pressure for 12 minutes and let the pressure go down naturally.  They were wonderfully tender. 


I also made a batch of  Melynda Brown's wonderful sourdough biscuits and baked them in our toaster oven, thus not heating up the large oven for a small item.  I love these.  They are substantial, keep well and worth eating.  You can even split and toast them!  Thanks, Melynda!


So, that was our meal, and was enjoyed by all.  Have a wonderful weekend!

Wednesday, January 15, 2014

Pressure Cooking - Chapter 2

File:Groundhog3.jpg

In 1972, my husband and I didn't have very much money.  We made it, but there was definitely no "extra" so we did everything we could figure out to pinch pennies.  One day, he shot and killed a ground hog. It was a fairly large animal.  After preparing it for cooking, we cut it into two portions.  The first portion I roasted in the oven.  It was as tough as shoe leather.  Very difficult to eat.  The second half I cooked in our pressure cooker.  It was falling-off-the-bone tender, moist and delicious!  The moral of this story is that you can purchase less-expensive cuts of meat, and if you pressure cook them, they become tender.

I did not cook a ground hog today.  Instead, I made ham and Great Northern bean soup and cornbread in the pressure saucepans.  Here we go!

The night before, pour 1 pound of dried Great Northern beans into a colander, rinse thoroughly, pour them into a large bowl, add 2 Tablespoons of lemon juice and 3 times as much cold water as there are beans.  Let that sit on the counter until you are ready to cook the next day. As in yesterday's post, I am using TWO pressure saucepans for this meal.


This is what they look like after soaking.


Pour the soaked beans into your colander and rinse them thoroughly.


Put a nice meaty ham hock into the smaller cooker, on the trivet, with 2 cups of water.  Secure the lid and bring up to temperature.  Allow to cook at pressure for 15 minutes, then cool quickly under running cold water.


When the pressure releases, open the cooker and the ham hock will look like this.


Pour the cooked meat and the liquid over the beans that by now you have poured into the 6-quart pressure cooker.  Add enough more water to cover the beans by at least 1/2 inch.  I added one whole inch since we like our soup a little more watery.  Here it is, ready to cook.


Prepare a batch of cornbread (recipe follows.)  Pour it into an appropriately sized pan or Pyrex bowl.  I used a 1.5 quart Pyrex bowl, well buttered.  Add 1.5 cups of water and the trivet to the smaller pan.  Cover the bowl or pan tightly with aluminum foil.  Place it in the cooker on the trivet and water.  Secure lid.  Bring to pressure, cook for 22 minutes.  Remove from heat and allow the pressure to go down by itself.  Here is what it looked like after cooking.


Here are both cookers on the stove.  When you cook the bean soup, bring it up to pressure, reduce heat and cook for 5 minutes.  That's right.  Only FIVE minutes.  Remove from heat and allow the pressure to go down naturally.


The corn bread was moist, sweet, and delicious!


The soup was just right!  I also added a teaspoon of Realsalt and some freshly ground black pepper.


My husband likes to put a piece of cornbread in his bowl and pour his soup over that.  I prefer to eat them separately.  Here is mine with butter and some lovely honey.  Oh my!  Such luxury!


I hope you will try this.  It saves time and energy and the food turns out so nicely.  Here is the cornbread recipe I promised:

Pressure-Cooker Cornbread

1 1/3 cups corn meal
2/3 cup unbleached flour
1/3 cup sugar
1 Tablespoon baking powder
1 teaspoon salt

1/4 cup melted butter
1 cup buttermilk
2 eggs

Mix the dry ingredients together in a bowl.  Mix the wet ingredients together well.  Pour the wet into the dry and stir with a fork, just until the batter is moist.  Do not beat it.  Pour into greased baking vessel and then proceed as described above, cooking at pressure for 22 minutes, with 1.5 cups water in the pan and the trivet.  Be sure to cover your pan or bowl tightly with aluminum foil and allow the pressure to go down by itself.

This is fun.

Saturday, July 20, 2013

Lasagna without pasta!


We don't eat pasta anymore, as I don't believe it is a healthy food.  But I ADORE my homemade spaghetti sauce, so thanks to an idea I got from a friend recently, I made this lasagna.

Lasagna Without Pasta

Sauce
 
1 # ground meat.  I used venison, but I am sure others would work as well.
1 medium onion, diced
2 Tablespoons bacon grease (or lard, butter or coconut oil)
1 quart canned tomatoes, drained
1 small can tomato paste
1 Tablespoon dried Italian Seasoning
1/2 teaspoon salt or to taste

Cheeses

1/2 # grated cheese of your choice.  I used homemade farmhouse cheddar
1/2 # cottage cheese
grated Parmesan to serve with the lasagna, if desired 

"Pasta"

Cabbage leaves, steamed 15 minutes and then rinsed in cold water (I can't tell you how many)
1 medium zucchini  squash, sliced with a julienne peeler (see below)  Do not slice beyond where the seeds grow.  Just use the outside parts.

Melt bacon grease in a heavy frying pan, add the onion and saute until partially cooked.
Add the meat, and chop it up and cook it until it is all browned.
Add  the drained tomatoes, tomato paste, Italian Seasoning and salt.  Simmer, stirring often while you prepare the vegetables and grate the cheese.

I use a julienne peeler to prepare my zucchini and then saute it for a little while in some olive oil.  Here is the peeler:


And here is the zucchini after being sauteed.  I can't tell you how long to cook it.  Do it on medium/low heat, and stir a lot until it gets kind of limp:


Then, in a 9 inch square glass baking pan, which has been well buttered, place the steamed cabbage leaves, about 2 deep.  Add 1/3 of the sauce, 1/3 of the cheese, 1/3 of the cottage cheese.  Then, spread out the zucchini.  Then as before, the sauce, cheese and cottage cheese.  The last layer will be more cabbage, sauce cottage cheese and cheese.  

You will need to gauge how much of everything so as to not overflow the dish.

Bake at 350 for about 40 minutes.  Allow to set for 15 minutes before serving.  There will be some juice, but not a lot.

You can sprinkle on Parmesan if you wish.

Very yummy and even my husband likes it!  :)

Tuesday, January 29, 2013

Crock Pot Beef Short Ribs (and homemade bullion cubes)


These are SO good!  I have to share how I made them.

Crock Pot Beef Short Ribs

5 pounds beef short ribs
1 cup homemade beef broth
3/4 cup Tamari (that is soy sauce made with just soy, not wheat, but you could use other soy sauce)
1 Tablespoon grated fresh ginger
1 large garlic clove, peeled
1 smallish onion, peeled and chopped
1 fresh apple, cored and chopped
1 Tablespoon honey

Broil the short ribs on a baking pan, under high heat and close to the broiler for 4 minutes on one side, then turn them over and cook for another 4 minutes.

Place the ribs in a crock pot.  

Combine the broth, Tamari, ginger, garlic, onion, apple and honey in a blender and puree.  Pour that over the ribs in the crock pot.  Put on the lid, plug it in and turn to low.  Cook for 7 - 8 hours.

Retrieve the ribs and place them on a platter to serve.

Here is what will be left in the Crock pot:


All that yummy, richly flavorful broth can't be thrown away!  So, what I do is freeze it in ice cube trays, pop the cubes into freezer bags and use them like bullion cubes...  They are nice to add to soup, sauces, gravy or even to dissolve into boiling water to drink.


Delicious and no MSG!!!

I am saving the bones for the next time I want to make stock.  They are in a freezer bag in the freezer.

Shared at Simple Lives Thursday #132

Thursday, December 13, 2012

More about Masa...

You might recall that I previously posted about making masa harina, and then corn torillas from scratch HERE.  That worked very well, but because I had to use the big Corona Mill, it was messy and time consuming (what isn't in a kitchen??) 

Just the other day, I took down our flour corn (pictured above) and spent some enjoyable time taking the kernels off the cobs.  My DH sometimes thinks it could be done faster, if I did it his way, but I really enjoy just sitting and rubbing the kernels off into a big bowl.  To me, it seems like bounty and makes me happy!

As I was thinking about making some more masa, I wondered if maybe I could complete the whole process right in the food processor instead of starting there and then graduating to the Corona Mill.  I have to report, it worked beautifully!

Look at the other post about how to prepare the corn with pickling lime and all of that.  I fixed 2 pounds of the kernels this time, 2 cups at a time, and processed them in the food processor until the masa was nice and soft and fine textured.  The trick is to add a little water and let it process long enough!  I would suggest for 2 cups of the prepared kernels, you add about 1/2 cup of water.  You might want to start with 1/3 cup and add a tiny bit more if needed.  Stop the machine from time to time and scrape down the contents.  Eventually, it will mostly be gathered together in one mass and look like this:
And when I got it out, it looked like this! See, Mely?
We just finished eating some tostadas with refries, lettuce, salsa and cheese for lunch.  The flavor of the fresh masa is incredible.  You can't buy this at a store.  It might seem like a lot of work, but it's not, really, now that I can just use the processor!


This post is linked to Simple Lives Thursday!

Wednesday, November 28, 2012

48 # of ground venison!

Last week, my husband bagged a nice deer for us.  This is the first one he's ever gotten.  It was very exciting and very welcome.  The whole idea is so we can have healthy meat to eat and can save money.  We didn't want to pay for processing, so we decided to turn it all into ground meat.

It hung, in the garage, for four days, and we were blessed with nice cool weather, between about 30 and 40 degrees, so it was perfect.  Today, he took the meat off of the bones, cut it into chunks for me and then I put it through a grinder that attaches to my Kitchenaide mixer.
Then I packed it into freezer bags, 1 # in each bag and put them in the deep freeze.  I froze 45 pounds of the meat. 
Two pounds of it was made into jerkey.  It is in the dehydrator right now.  The other pound we had for lunch.  Yummy!
When he took the meat off of the bones, he dropped the pieces into an old cooler that I had sterilized.  Here is how it looked.  Not very pretty, but so much food!
And here is about 12 pounds of it all ground up.
I am very grateful to have all of this food.  It was a big job, because we don't really know what we're doing, yet, but in the end, it worked out just fine.

Hamburgers
Chili
Soup
Meat balls
Stew
Meat loaf

Yes. :)

This post is linked to Simple Lives Thursday #123.
Related Posts Plugin for WordPress, Blogger...