Showing posts with label Easter. Show all posts

Thursday, March 29, 2018

Easter Time again!

Easter Egg Musings...


My mother grew up on a farm in North Dakota, in the early 20th century. They had chickens, but their chickens laid white eggs. Nothing wrong with that, of course, but she told me that for Easter, her mother would boil the eggs with onion skins in the water to make them be a pretty color. I always think of that. I made these hard-boiled eggs a couple of days ago and wondered what she would think. These come from the chickens of a friend of mine, and they are brown, tan, white and even blue! Araucana chickens lay blue and green eggs. There is no need for me to color them at all, but if you DO color eggs, there are ways to do it naturally and not have to use chemical colorings.

Hard boil your eggs, and allow them to cool completely. Make sure they are well dried before placing them in the dye baths. Immerse the eggs in the coloring liquid to which you have added 2 Tablespoons of white vinegar (per quart of liquid) and put them into the refrigerator. Go back from time to time and check on the color. When it is as you wish, then remove the eggs and discard the dye liquid. The longer they soak, the deeper the dye color. After coloring, be sure to store your eggs in the refrigerator!

1. Onion Skin Dye Yellow to GoldTo make dye from yellow onion skins, place several skins in your pot of water. Boil them for a little while and allow the mixture to cool with the skins in the water. Then drain off the water to use for the actually dyeing. Add the vinegar. Put the skins in your compost. Soak your hard-boiled eggs in this dye bath and depending on how many eggs you use and how concentrated the dye bath is, you can get warm tones that range from gold to a lovely terra cotta.
2. Cranberry Dye Light Blue
To use fresh cranberries, boil 4 cups cranberries in 2 cups cold water until the berries burst. Let them cool. Drain and save the liquid. Add the vinegar. For a light blue, soak only a short time. If the eggs stay in very long, they will become dark gray in color.
3. Turmeric Yellow Dye
In a quart of water, simmer 1/4 cup of ground turmeric. Cool. Strain, add the vinegar and proceed.
4. Red Cabbage Blue
About 3/4 of a head of red cabbage chopped up will make a lovely blue. Again, cook for a while, cool in liquid, strain, add the vinegar and then dye your eggs.
I am sure there are a number of other recipes you can use. These are the ones I am familiar with.
You might wonder why I'd go to the trouble...? I used to use food colorings when my children were still at home. I was not aware of the natural choices besides the onion skins. This natural method is healthier, of course, and I think a lot more fun!
You can make patterns on the eggs by drizzling them with melted wax or wrapping them with rubber bands before dyeing.
Easter is coming soon! Make your plans and have fun with this.
I have blogged about this previously, but I will mention it again here. This is the BEST way to make hard-boiled eggs. even very fresh eggs will peel easily and you won't have the unattractive green layer between the yolk and the white of the egg.
To Hard Boil Eggs

1. Bring a 3 quart saucepan half-full of water to a boil. 2. Using a push pin, poke a tiny hole in the large end of each egg. 3. With a slotted spoon, place all of the eggs in the boiling water. 4. When the water begins to boil again, set your timer for 10 minutes, and reduce the heat so the water is simmering. 5. While the eggs are cooking, prepare a bowl of ice water.6. When the eggs are done, immediately transfer them to the ice water. Let them sit in there for a few minutes. 7. Drain and peel when you are ready!

Tuesday, April 17, 2012

Babka Easter Bread - a little late!

Babka bread originally came to this country from Poland and is traditionally served at Easter.  There are many recipes available.  This is my super-healthy adaptation.


Babka Easter Bread
 
5.5 cups sprouted whole wheat flour
1/2 cup raw milk, scalded
2 cups filtered water, divided
2 1/2 teaspoons active dry yeast
1/4 cup extra-virgin coconut oil
1/2 cup raw honey
2 pastured eggs
1/2 cup Rapadura
1 Tablespoon cocoa
1/2 teaspoon ground cinnamon

 
Grease 2 medium-sized loaf pans with coconut oil.

Measure the flour into a large bowl.  Stir in the salt.


Pour milk into a small saucepan and scald (heat gently until bubbles form all around the edges) and add the coconut oil to allow it to melt.  Add the honey and when the mixture is lukewarm, add the eggs and beat together.  


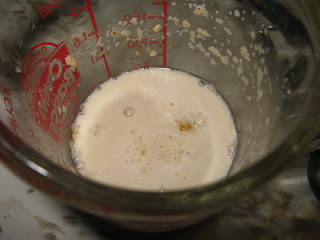
Heat ¼ cup water to 110 – 115 degrees F.  Sprinkle the yeast onto the warm water and stir with a fork.


Add the milk mixture, 1 ¾ cups more water and the yeast/water mixture to the bowl containing the flour and salt.

Wash and dry the bowl and grease well with more coconut oil.

Stir thoroughly, and if need be, add more sprouted whole wheat flour to make a soft kneadable dough.

Turn the dough out onto a floured surface and knead for 10 minutes, adding more bits of flour to prevent sticking. 

When the dough is springy and elastic, place it in the greased bowl, rub a little more coconut oil over the top and cover the bowl tightly with plastic wrap.

Allow to raise until it doubles in bulk in a warm place. (80 degrees F.)  You can tell when it is double if when you poke it with your finger, it “sighs” and the hole does not fill back in.  Watch it carefully.  You don’t want it to rise beyond that point.


Press the dough down to release the gas, re-cover, place in your warm place again and allow it to raise for 30 more minutes.

Flour your work surface (continue to use the sprouted wheat flour) and pour the dough out.  Do not handle the dough any more than necessary.  Cut it in half and place the extra piece back in the bowl.
Using a rolling pin, roll the dough to approximately a 20 inch by 10 inch rectangle.


Combine the Rapadura, cocoa and cinnamon.  Sprinkle evenly over the dough rectangle.


Now… working from one short end, “accordion – fold” the dough, trying to get the individual folds to be about 3 inches in height.  When you get near to the end of the dough piece, use the unfolded part to wrap across the top of the folds.  Pinch it along underneath, pinch and tuck the ends under and place it in a bread pan, seam side down. The following pictures show the process.


Repeat with the second piece of dough.

Here is what it looks like when it is ready to go into the oven.


The reason you should not handle it anymore than necessary, is that as it raises, gas bubbles are formed in little pockets of gluten fibers.  You want to maintain those little pockets and not rip them apart.  This is particularly important when using dough made from sprouted wheat flour, as it is more tender.

Start pre-heating your oven to 350 degrees F.  Set the 2 loaf pans on top of the stove.

Allow to raise until it doubles, and is springy when you poke it.

Place both loaves in the oven and bake for 50 minutes.  Remove from oven.  Remove from pans and cool on wire rack for at least 20 minutes before slicing.

Slice thickly and serve with plenty of nice butter!


 If you like, you can add raisins or other dried fruit and/or chopped nuts when you sprinkle on the cocoa/cinnamon mixture.


Related Posts Plugin for WordPress, Blogger...