
Friday, December 21, 2018
Sunday, December 16, 2018
Button Lamp - another repost!
We recently had a 3-day power outage. The weather was cold, but not bitterly so. Fortunately, we have a propane heater and two good-sized propane tanks, which my husband keeps filled. The heater can easily keep our small trailer house warm. It made me think of this, which I posted quite a while ago and might be helpful if you lose your power.

I just ran across this picture... and wondered if you have ever heard of a "button lamp." Many years ago, we got this idea from one of Laura Ingalls Wilder's books called The Long Hard Winter. These are easy and fun to make and if you ever find yourself with no electricity, no candles... nothing to make light with, please remember this! All you need is a small glass dish or saucer, a button - not a plastic button, but one made of shell, glass or wood, a small square of cotton fabric, a piece of string and a match to light it with! The reason you don't use plastic is that if the flame contacts the button, you will have a cloud of toxic and not very nice smelling fumes coming off of it.
Cut your cotton fabric large enough to wrap tightly around the button and use the string or thread to tie it on, leaving the little pointy ends sticking up. Then, put some sort of oil or fat (Ma Ingalls used axle grease I think!) into your dish... don't use very much. You don't want to drown the flame. Put the wrapped button into the fat and get a little bit of it on the "wick" and then light it! This makes a very satisfactory light in an emergency.
One time, many years ago, the power went out. The children got busy making button lamps. We had several of them (more than we needed!) lit and happily giving light to our home, and then of course the power came back on! We were sincerely disappointed!
A Button Lamp

I just ran across this picture... and wondered if you have ever heard of a "button lamp." Many years ago, we got this idea from one of Laura Ingalls Wilder's books called The Long Hard Winter. These are easy and fun to make and if you ever find yourself with no electricity, no candles... nothing to make light with, please remember this! All you need is a small glass dish or saucer, a button - not a plastic button, but one made of shell, glass or wood, a small square of cotton fabric, a piece of string and a match to light it with! The reason you don't use plastic is that if the flame contacts the button, you will have a cloud of toxic and not very nice smelling fumes coming off of it.
Cut your cotton fabric large enough to wrap tightly around the button and use the string or thread to tie it on, leaving the little pointy ends sticking up. Then, put some sort of oil or fat (Ma Ingalls used axle grease I think!) into your dish... don't use very much. You don't want to drown the flame. Put the wrapped button into the fat and get a little bit of it on the "wick" and then light it! This makes a very satisfactory light in an emergency.
One time, many years ago, the power went out. The children got busy making button lamps. We had several of them (more than we needed!) lit and happily giving light to our home, and then of course the power came back on! We were sincerely disappointed!
Saturday, November 17, 2018
Red Lentil and Brown Rice soup - in the Instant Pot...
This recipe is not original with me. I found the basic recipe at www.allrecipes.com and modified it for the Instant Pot. We are in our 3rd day of a power outage because of a freezing rain storm. My husband has a gasoline powered generator that we are using to keep our food cold in the fridge and the freezer, but also, when it's on, I can do a little cooking. I just can't use the kitchen range, as it draws too much power. Each afternoon, my sweet husband hauls the generator over to the neighbor and hooks it up there for their freezer. He's a good man.
So, he deserves good food. Today we are having scrambled eggs, made in the electric skillet, the Red Lentil and Brown Rice soup, cooked in an Instant Pot, and cornbread baked in an Instant Pot. My tummy is telling me it's time to eat. I'm just waiting for the cornbread to get done. :)
Red Lentil and Brown Rice Soup - Instant Pot
With the IP set on "saute", cook together, stirring until onions are wilting:
1 coarsely chopped red onion
3 minced garlic cloves
2 Tablepoons extra-virgin California olive oil
Add the following, put on the lid, set to seal and cook for 35 minutes on manual. Let it cool for 10 minutes, and then quick release and open the pot, carefully
4 cups vegetable broth ( I made my "broth" using 4 teaspoons Better than Bouillon vegetable broth paste.)
1, 14.5 ounce can diced tomatoes
1 1/4 cup red lentils
1/2 cup uncooked brown rice
1 T Italian Seasoning
1 T. dried celery flakes
1/4 tsp ground black pepper
1 tsp. dried marjoram
Adjust salt and pepper to your liking.
This soup is really delicious, nice and thick and comforting on this cold day in Indiana!
Thursday, November 8, 2018
Thanksgiving Dinner - another re-post!
Thanksgiving will be here (in the USA) before you know it. Just in case some of you Gentle Readers might not have seen the two following posts, I will share again. I hope all of you are able to have a nice Thanksgiving dinner and spend that time with people you love. And even if you have no other person to celebrate the day, pondering on the things you are grateful for can bring joy and warmth to the heart. God bless you all!

I had a frozen turkey that I had put by about a year ago. (Yes, a whole year!) I decided I'd better go ahead and use it, so I took it out of the freezer and into the refrigerator it went to thaw. It weighed about 14 pounds and I left it to thaw for 5 days. At that point I hadn't even decided for sure what I was going to do with it. But since we did not have Thanksgiving Dinner here at our home, we were not covered up with leftovers, so I chose to make a simple, traditional Thanksgiving Turkey Dinner just for me and my husband. (I mentioned using the carcass to make soup on an earlier post.) So, here is what I did.
The Turkey ~ Wash in cold water, remove the giblets and/or neck from the cavities, wash those and put them in a pan, cover with water, bring to a boil and simmer until thoroughly done. In the cavity of the turkey, place a large peeled onion and a mixture of dried parsley, sage, rosemary and thyme tied up in a little piece of cotton cloth. Put the bird in a roasting pan that has a lid. Rub the skin with olive oil, and sprinkle with salt, pepper and some more of that same herb mixture. Put the lid on the pan and place in a 350 degree F. oven on the middle rack.
"Stuffing"~ In a cast iron frying pan, melt 1/2 cup butter and add a large diced onion, 2 cups of diced celery (I pulled mine out of the freezer. I often dice and freeze celery so it won't go to waste and is ready to use in soups and things). Saute', stirring often until the vegetables start to get limp. Then, take about 1/2 loaf of bread (I used my homemade whole wheat, but you could use any bread you have, and it's a good way to use stale bread) and cut it into little cubes. Put them in the pan and continue to cook for a little while, stirring. Take some of the liquid from cooking the giblets/neck (my bird didn't come with giblets) and mix in an egg. Pour that over the stuffing. Add some more of that same herb mix mentioned above. Stir it all up well and turn off the heat. Add more of the broth if needed to make it moist but not soggy. Cover the pan with either parchment paper or waxed paper and then with aluminum foil. You could use a lid, but then your pan might not fit in the oven with the turkey. During the last hour of roasting the turkey, put this pan on the bottom rack of the oven. Then it will be done at the same time.
Mashed Potatoes ~ Scrub as many potatoes as you think you will need and cut them in quarters. Do not peel if the skins are decent. Put them all in a Crock Pot, cover with water and cook either on high for about 2 hours or low for 4 hours. Then when everything is done, drain off most of the water and add some butter, milk, salt and a little garlic powder and mash thoroughly.
Gravy ~ When the turkey is done, remove it from the oven and use your baster to take out the pan drippings. If you don't have a baster, with a little help, pour the drippings out. Put them all in a saucepan. Add enough of the aforementioned broth to make the amount of gravy you would like to have. You will have to gauge the amount of thickening by how much liquid you are now using. For 1 cup of liquid, use 1 Tablespoon non-GMO cornstarch or 2 Tablespoons of unbleached mixed in a little warm water. When it all comes to a boil, then slowly add the thickening, stirring carefully to prevent lumping. Add any little bits of meat from the neck and dice the giblets too. Simmer until thick, then taste it and see if it needs anything else, like a little more salt or pepper, but it probably won't.
Cranberry Sauce ~ I LOVE cranberry sauce! Put 2 cups of cranberries in a saucepan, 1/2 cup honey, or if you don't mind the mild molasses flavor, you can use 1 cup of Sucanat. Bring to a boil and simmer for 10 minutes. Pour into a bowl and chill if you like, but you don't have to have it cold if you are doing this at the last minute.
Vegetables ~ Just pick what you like off the shelf or out of the fridge and cook them! We had some home canned green beans with this meal. Corn and sweet potatoes are more traditional.
There you go! It sounds complicated, but it's simply not. Roast turkey is one of the easiest things to cook, and there are always nice leftovers for soup, sandwiches, salads, etc.
Here is one thing I like to do with some of the leftovers. Cut some of the turkey meat into bite sized pieces, and mix with enough stuffing to fill a pie plate. Pour some of the gravy over that and top with mashed potatoes and bake it at 350 degrees F. until heated through. I call it "Thanksgiving Pie."

I realize that Thanksgiving 2012 is now past. I want to show you this and tell you how I do "stuffing". After all, Christmas is not long from now and it might be helpful.
I have never used a recipe for stuffing and I don't actually stuff the poultry anymore. "They" have scared me off with all the warnings about possible salmonella exposure, so now I roast the bird and bake the stuffing separately.
Here is a list of what I use:
Stale homemade bread
Homemade poultry broth or stock
Chopped onion
Chopped celery
Butter
Salt and pepper
Parsley, sage, rosemary and thyme (whole, dried and rubbed until small)
A small amount of ground poultry seasoning (be careful with this. It is very strong.)
1. Slice the bread, as much as you like (for 12 people I use 2 loaves) and lay it out in trays to get stale and dry out some. You don't want it to be hard, just dried up a bit.
2. Break the bread into small pieces into a large bowl. Add celery and onion, as much as you like. For this amount I would use 2 medium onions and about 5 celery ribs.
3. For this amount, I pour on 1 cup of melted butter and enough broth to make it moist, not soggy.
4. I never measure the seasonings. I just put on "some" and keep tasting until I like the flavor. Do the salt first and then start adding bits of the other things, the parsley, sage, rosemary, thyme and black pepper. When that tastes nice to you, sprinkle on a little bit of ground poultry seasoning and stir it all well.
5. Taste it a few times and pay attention. You will know when it tastes right.
6. Pack it all into an oven-proof covered dish and bake at 350 for about an hour.
7. When it is time for your big dinner, reheat in the oven, just until warm. Serve with gravy that you make from the drippings from your roasted bird, as follows...
Remove the bird from the oven and use your baster to take out the pan drippings. If you don't have a baster, with a little help, pour the drippings out. Put them all in a saucepan. Add enough of the aforementioned broth to make the amount of gravy you would like to have. You will have to gauge the amount of thickening by how much liquid you are now using. For 1 cup of liquid, use 1 Tablespoon cornstarch or 2 Tablespoons of unbleached flour mixed in a little warm water. When it all comes to a boil, then slowly add the thickening, stirring carefully to prevent lumping. Add any little bits of meat from the neck and dice the giblets too if you like. Simmer until thick, then taste it and see if it needs anything else, like a little more salt or pepper, but it probably won't.
Leftover stuffing can be frozen and reheated for future meals. I like to make what I call "Thanksgiving pie." Cut up some of the leftover turkey, mix it with some leftover stuffing, pack it into a pie plate and pour gravy over it all, then top with mashed potatoes and bake at 350 until the potatoes start to brown a little bit. We love this!
I have even filled some pie plates, as above, without the potatoes, and wrapped them snugly and frozen them for later use. All you have to do is add the potatoes and bake.
A quick turkey dinner

I had a frozen turkey that I had put by about a year ago. (Yes, a whole year!) I decided I'd better go ahead and use it, so I took it out of the freezer and into the refrigerator it went to thaw. It weighed about 14 pounds and I left it to thaw for 5 days. At that point I hadn't even decided for sure what I was going to do with it. But since we did not have Thanksgiving Dinner here at our home, we were not covered up with leftovers, so I chose to make a simple, traditional Thanksgiving Turkey Dinner just for me and my husband. (I mentioned using the carcass to make soup on an earlier post.) So, here is what I did.
The Turkey ~ Wash in cold water, remove the giblets and/or neck from the cavities, wash those and put them in a pan, cover with water, bring to a boil and simmer until thoroughly done. In the cavity of the turkey, place a large peeled onion and a mixture of dried parsley, sage, rosemary and thyme tied up in a little piece of cotton cloth. Put the bird in a roasting pan that has a lid. Rub the skin with olive oil, and sprinkle with salt, pepper and some more of that same herb mixture. Put the lid on the pan and place in a 350 degree F. oven on the middle rack.
"Stuffing"~ In a cast iron frying pan, melt 1/2 cup butter and add a large diced onion, 2 cups of diced celery (I pulled mine out of the freezer. I often dice and freeze celery so it won't go to waste and is ready to use in soups and things). Saute', stirring often until the vegetables start to get limp. Then, take about 1/2 loaf of bread (I used my homemade whole wheat, but you could use any bread you have, and it's a good way to use stale bread) and cut it into little cubes. Put them in the pan and continue to cook for a little while, stirring. Take some of the liquid from cooking the giblets/neck (my bird didn't come with giblets) and mix in an egg. Pour that over the stuffing. Add some more of that same herb mix mentioned above. Stir it all up well and turn off the heat. Add more of the broth if needed to make it moist but not soggy. Cover the pan with either parchment paper or waxed paper and then with aluminum foil. You could use a lid, but then your pan might not fit in the oven with the turkey. During the last hour of roasting the turkey, put this pan on the bottom rack of the oven. Then it will be done at the same time.
Mashed Potatoes ~ Scrub as many potatoes as you think you will need and cut them in quarters. Do not peel if the skins are decent. Put them all in a Crock Pot, cover with water and cook either on high for about 2 hours or low for 4 hours. Then when everything is done, drain off most of the water and add some butter, milk, salt and a little garlic powder and mash thoroughly.
Gravy ~ When the turkey is done, remove it from the oven and use your baster to take out the pan drippings. If you don't have a baster, with a little help, pour the drippings out. Put them all in a saucepan. Add enough of the aforementioned broth to make the amount of gravy you would like to have. You will have to gauge the amount of thickening by how much liquid you are now using. For 1 cup of liquid, use 1 Tablespoon non-GMO cornstarch or 2 Tablespoons of unbleached mixed in a little warm water. When it all comes to a boil, then slowly add the thickening, stirring carefully to prevent lumping. Add any little bits of meat from the neck and dice the giblets too. Simmer until thick, then taste it and see if it needs anything else, like a little more salt or pepper, but it probably won't.
Cranberry Sauce ~ I LOVE cranberry sauce! Put 2 cups of cranberries in a saucepan, 1/2 cup honey, or if you don't mind the mild molasses flavor, you can use 1 cup of Sucanat. Bring to a boil and simmer for 10 minutes. Pour into a bowl and chill if you like, but you don't have to have it cold if you are doing this at the last minute.
Vegetables ~ Just pick what you like off the shelf or out of the fridge and cook them! We had some home canned green beans with this meal. Corn and sweet potatoes are more traditional.
There you go! It sounds complicated, but it's simply not. Roast turkey is one of the easiest things to cook, and there are always nice leftovers for soup, sandwiches, salads, etc.
Here is one thing I like to do with some of the leftovers. Cut some of the turkey meat into bite sized pieces, and mix with enough stuffing to fill a pie plate. Pour some of the gravy over that and top with mashed potatoes and bake it at 350 degrees F. until heated through. I call it "Thanksgiving Pie."
Un-stuffed stuffing...

I realize that Thanksgiving 2012 is now past. I want to show you this and tell you how I do "stuffing". After all, Christmas is not long from now and it might be helpful.
I have never used a recipe for stuffing and I don't actually stuff the poultry anymore. "They" have scared me off with all the warnings about possible salmonella exposure, so now I roast the bird and bake the stuffing separately.
Here is a list of what I use:
Stale homemade bread
Homemade poultry broth or stock
Chopped onion
Chopped celery
Butter
Salt and pepper
Parsley, sage, rosemary and thyme (whole, dried and rubbed until small)
A small amount of ground poultry seasoning (be careful with this. It is very strong.)
1. Slice the bread, as much as you like (for 12 people I use 2 loaves) and lay it out in trays to get stale and dry out some. You don't want it to be hard, just dried up a bit.
2. Break the bread into small pieces into a large bowl. Add celery and onion, as much as you like. For this amount I would use 2 medium onions and about 5 celery ribs.
3. For this amount, I pour on 1 cup of melted butter and enough broth to make it moist, not soggy.
4. I never measure the seasonings. I just put on "some" and keep tasting until I like the flavor. Do the salt first and then start adding bits of the other things, the parsley, sage, rosemary, thyme and black pepper. When that tastes nice to you, sprinkle on a little bit of ground poultry seasoning and stir it all well.
5. Taste it a few times and pay attention. You will know when it tastes right.
6. Pack it all into an oven-proof covered dish and bake at 350 for about an hour.
7. When it is time for your big dinner, reheat in the oven, just until warm. Serve with gravy that you make from the drippings from your roasted bird, as follows...
Remove the bird from the oven and use your baster to take out the pan drippings. If you don't have a baster, with a little help, pour the drippings out. Put them all in a saucepan. Add enough of the aforementioned broth to make the amount of gravy you would like to have. You will have to gauge the amount of thickening by how much liquid you are now using. For 1 cup of liquid, use 1 Tablespoon cornstarch or 2 Tablespoons of unbleached flour mixed in a little warm water. When it all comes to a boil, then slowly add the thickening, stirring carefully to prevent lumping. Add any little bits of meat from the neck and dice the giblets too if you like. Simmer until thick, then taste it and see if it needs anything else, like a little more salt or pepper, but it probably won't.
Leftover stuffing can be frozen and reheated for future meals. I like to make what I call "Thanksgiving pie." Cut up some of the leftover turkey, mix it with some leftover stuffing, pack it into a pie plate and pour gravy over it all, then top with mashed potatoes and bake at 350 until the potatoes start to brown a little bit. We love this!
I have even filled some pie plates, as above, without the potatoes, and wrapped them snugly and frozen them for later use. All you have to do is add the potatoes and bake.
Wednesday, October 24, 2018
Replacing a Zipper in a Coat or Jacket - re-post!
In case you are a new reader, you may have missed this post and as the days are getting shorter and colder, here, I thought I'd re-post this.
Here you can see a perfectly good jacket. The problem is, the zipper is broken! Replacing a zipper is really not difficult, but it is tedious and takes considerable time. If your coat/jacket is nice, and/or you love it, it is more than worth the trouble to replace the zipper.

Here is the zipper I ordered over the internet here. This company is wonderful. They have everything and excellent customer service!

A closer look at the invoice:

The zipper I purchased cost $6.03 including the shipping, and so for a nice coat, you can see that this would really be worthwhile.
Now, don't be afraid. Breath. Relax. Here we go.
FIRST ~ set your sewing machine to its longest stitch length. Sew a line of stitching along the jacket opening, far enough in from the edge that you do NOT catch in the existing zipper. This is to hold everything together nicely and make the reassembly easier. Do this on both sides of the jacket.

Here I am doing the same thing on the other side:

SECOND ~ take your little seam ripper and do (carefully and don't stab yourself) whatever it takes to remove the broken zipper:

Here I've gone a little farther in the process:

Here I am removing some stitching from the surface:

And here is what it looks like with the zipper removed. Now you will see the wisdom of doing that basting line of stitches so the jacket doesn't blow up and get all weird.

THIRD ~ carefully remove all the bits of loose thread:

FOURTH ~ Thread a sturdy hand sewing needle with a doubled thread and run it through some beeswax so it will be less likely to tangle while you are sewing. Rosin will work instead of the beeswax, too, or if you have neither, find a piece of candle or even hand soap to use!

FIFTH ~ I hope you took the time to observe how the old zipper was positioned. You are going to unzip the new zipper, and one side at a time, you will put the new zipper in, and pin it in place and then hand baste it in place:

See? Here is one side basted together:

And here is the other side:

Oh, yes, and it is very helpful to have a fuzzy cat walking around under your work table at this point:

SIXTH ~ Before you sew the zipper in with your machine, zip up the jacket to make sure it is going to work!

SEVENTH ~ Now, simply, using a normal stitch length, sew along the same line where the old zipper was sewn in like this:

Make sure to replace any seams or stitching you have removed:

Be sure to remove any basting stitches. On this one, there was the nice little tab on the old zipper, so I just transferred it to the new one:

That's all you need to do! Even if it doesn't turn out perfectly, it is better than throwing away a perfectly good coat.
Please feel free to ask questions if I can help.
Thursday, October 11, 2018
We finished the Sorghum "molasses" !
My garden fairy and her little boy came to our house and we all worked together and finished making the Sorghum.


I stayed up until midnight cooking the juice and finally gave up. I finished it the next morning. From approximately 5 gallons of juice, we got about 2.5 quarts of syrup. Oh, my, it's lovely stuff!

A job well done....

Tuesday, September 18, 2018
It's Pear Season....
We have a very generous and kind neighbor who has a wonderful pear tree and when there is a good crop, he always shares with me. Today, I canned 11 and 1/2 quarts of pears.


I blogged about how to do that a long time ago. Here is the link to those instructions.
These will taste very nice this coming winter.
Saturday, August 11, 2018
We made Sorghum Syrup!!!
This year, I decided I wanted to try growing sweet sorghum and making our own syrup. Where we live, we can tap maple trees and make syrup from the sap, but my husband and I really love sorghum and it is especially good for you. We can't grow sugar cane here in Indiana.
Yesterday, we cut down about a third of the row of sorghum cane.


Yesterday, we cut down about a third of the row of sorghum cane.
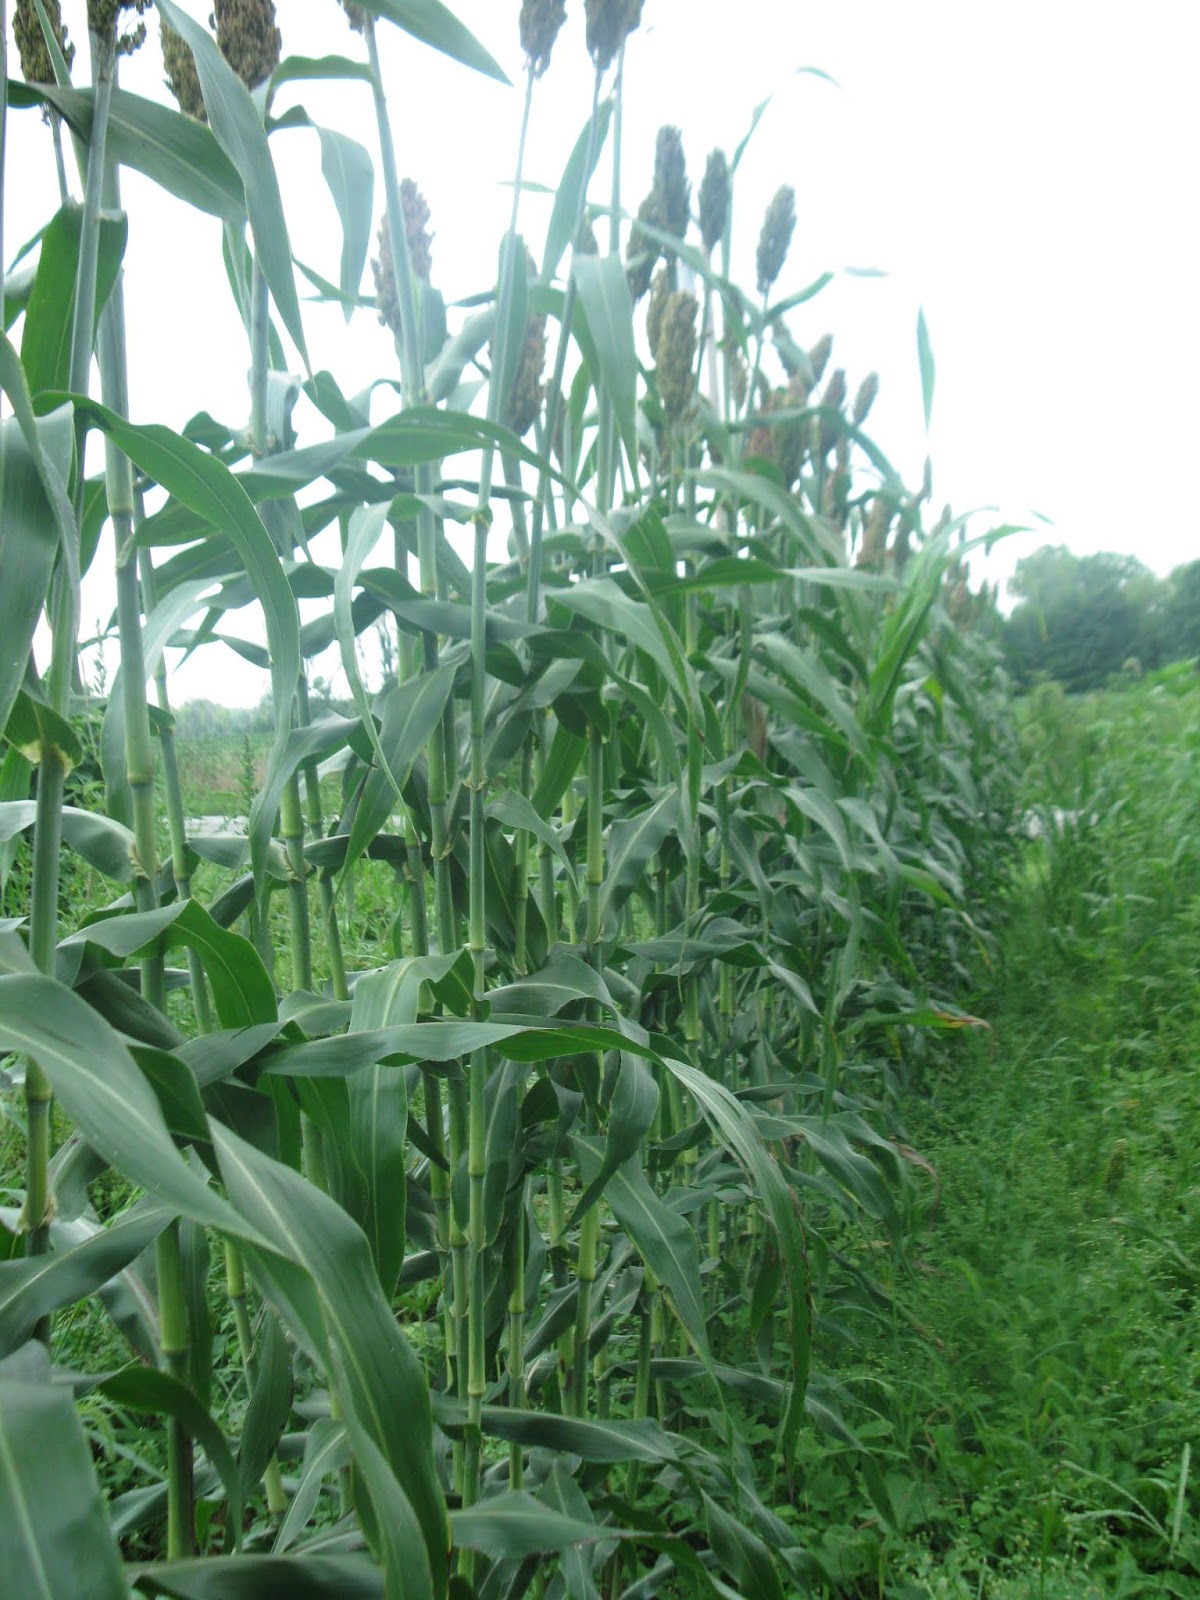
We stripped off the leaves and cut off the seed heads.


Next, it was time to squeeze the juice out of the canes. Here are some of the canes.

My husband took pity on me and we decided we would purchase a sugar cane juicer. I had tried my Champion juicer and that was NOT going to work. This new device will take about 4 years to pay for itself, and I hope I live that long!
Here he is running the machine.
There is a pan with a screen on top of it that collects the juice. Then you get it out through a little brass spigot.

Next, I boiled the juice down. It took HOURS. Typically, people that do this do it outside in a huge shallow stainless pan over a fire. Not only does that make it faster, but it saves having to use electricity. Maybe next year I'll do it outside.
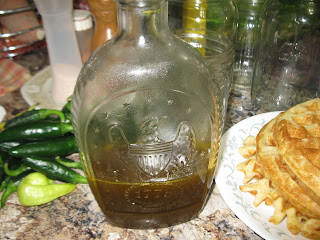
Once it turned into syrup, I turned it off and poured it into a Pyrex pitcher and let it sit all night to cool. I was afraid I might scorch it, but next time, I think I'll probably continue to cook it for a while and just tend it constantly at the end so it will be thicker. This syrup is slightly thicker than maple syrup. It is really different in taste, but we think it is delicious!
From 10 liters of juice we got a little over 1 liter of syrup. Most of it I put into an empty maple syrup bottle that holds a quart, and the rest you can see in the glass bottle here. Since I am not canning it, I will keep it in the refrigerator. The syrup I have purchased in the past did not need to be refrigerated. I just want to make sure.

And here is my husband's breakfast of Belgian waffles!

I believe this was a success. We will wait for a few weeks and process the rest of the sorghum cane then. I found out after it was too late that they typically process it later in the year.
Sorghum syrup has an impressive nutritional profile, too. That's a good thing!
Wednesday, July 25, 2018
Gardening does pay off... even if there are problems.
This year we have a terrible raccoon invasion. They ate ALL the sweet corn before it was even getting close to being ripe. And now they are eating and knocking down tomatoes that are green. Ugh! Next year we will have an electric fence to keep them out.
Nevertheless, in spite of the raccoons and weeds, there is lots of food out there. I went out and picked things today and cut up 7 different vegetables and one herb to make a stir-fry for supper. It was very good, by the way, served over rice with some soy sauce. Here is what I put in the stir fry. The big white blob is some frozen onions. My garden onions were starting to rot in the ground, so I pulled them all and sliced them and froze them in little packages. Clockwise from the onions are sugar snap peas, sweet banana peppers, tomato, parsley, leek, and okra. I also added some fresh garlic from the garden. I feel, well, privileged. There are so many of our brothers and sisters in the world that have so little to eat.


Monday, July 9, 2018
Tiny Tip - about onions
Today I am making cucumber relish to can. It calls for cucumbers, sweet peppers and onions - all ground up. You know how it is... if you deal with a lot of onions, pretty soon your eyes will be burning and tears will be coming out enthusiastically... very uncomfortable!
I am here to tell you I have discovered a solution! At least it works for me. I used a hand powered food grinder to prepare the vegetables. While I ground the onions, I kept munching on cucumbers. For some reason, then the onions did not bother my eyes. Voila! I hope it helps you too!

I am here to tell you I have discovered a solution! At least it works for me. I used a hand powered food grinder to prepare the vegetables. While I ground the onions, I kept munching on cucumbers. For some reason, then the onions did not bother my eyes. Voila! I hope it helps you too!

Friday, July 6, 2018
Repost - How to preserve fresh basil!
I grow quite a lot of basil in my vegetable garden. I grow it between the tomato plants. I love this easy method of preserving it and also, I like to make pesto and freeze it.
How to Preserve fresh Basil
I have never tried companion planting before. I grew my own Genovese basil transplants this year and so had quite a few and decided to plant them next to tomato plants, as I had heard that is a good combination. It must be. I've never had such glorious basil before! The basil is on the left next to the tomato plant.

I went out this afternoon and cut a basketful of the fresh basil.

Then I removed the leaves from the stems, washed them well and gave them a few spins in the salad spinner.

Next I chopped them in the food processor and put them into a quart jar.

Finally, I covered them with raw apple cider vinegar and put a lid on the jar.

If my house was cooler, I'd just let it sit in a cupboard, but the house gets pretty hot this time of year, so I will store it in the refrigerator. When I want basil for cooking (pesto, spaghetti sauce, pizza, soup, roast, chicken.. etc.) I can just retrieve what I need and it will be like having fresh basil all year!
Saturday, June 30, 2018
June 30, 2018 - Garden, Etc....
I went out this morning and took a lot of pictures of the garden and a few other things, so you can see how lovely everything is here on the last day of June.


Kitty greeted me when I went out the back door this morning...

...to hang up laundry. It is supposed to get well up in the 90's today!

And since we've had plenty of rain along with the heat, the sweet corn is VERY happy!

This year, for the first time, we are growing THIS squash. I am very excited to see how these turn out!

Here is some very nice eggplant growing on the hugulkultur bed..

A distant view of the whole vegetable garden:

My favorite day lilies:

Corn silk:

Cucumbers:

Okra - I love it. It looks quite exotic to me.

Okra blossom:

My one and only Jericho lettuce plant. It is a volunteer. Jericho lettuce is wonderful. It stands the heat and tastes very nice even in the heat of Summer. I pick off the outer leaves as I need them.

New spinach crop for fall:

Here is the row of sweet potatoes, inter-planted with onions to discourage bunny rabbits:

A row of sweet sorghum. I am going to attempt to make sorghum syrup.

Our sweet dog, Badger:

Crayfish hole in the grass:

Two of the chickens.. I was letting them free range... until they found the garden! Poor things.

I have begun experimenting with stinging nettles for fiber this year. Here are some of the fibers that I stripped and they are hanging to dry. I have no experience with this, at all, so I am trying to figure out what will work best for me. Did you know that during the 1st World War, the German army's uniforms were made from nettles?

A bit of cordage I made:

And a swatch I wove on my little pin loom:

It is hard to see here, but this is a side view of the bower my garden fairy and I made for her little boy out of basket willow branches. There are two benches in there.

I hope you enjoyed this glimpse into what is going on here right now.
.
Subscribe to:
Posts (Atom)
