Showing posts with label Bread. Show all posts

Saturday, December 7, 2024

Do you ever "tweak" recipes?


I bought this Fannie Farmer Cookbook in 1969 in Spokane, Washington.  I was 20 years old and had a summer job working for the United States Forest Service in Sandpoint, Idaho. My co-worker and I visited Spokane and went into a book store and I spied this book. I had never had one before. I wish I could remember what I paid for it. My mom used it for a year or two and then when my husband and I got married, she gave it back to me. By that time she had used it so much that the binding was failing and she put duct tape on it. I have added to that over the years.

Our daughters and I referred to this wonderful, basic, cookbook constantly. In fact, this book is how I learned to cook. My mom had taught me how to bake when I was growing up, and so I knew how to follow a recipe, but I didn't really know how to cook

This morning I had some bananas that were hopelessly ripe.  I didn't want to throw them away, so decided to make banana nut bread. The best recipe I've ever had for that is the one in this cookbook because it does not call for any oil.  Here it is. (Notice how dirty the page is!)


In order to use the recipe, I needed to "tweak" it because I no longer can eat wheat, and don't use eggs. Here is what I came up with:

BANANA NUT BREAD

3 ripe bananas, well mashed
6 Tablespoons aqua faba (the liquid from cooking chickpeas)
2 cups whole grain spelt flour
1/2 cup honey
3/4 teaspoon salt
1 teaspoon baking soda
1/2 cup finely chopped English walnuts

Preheat oven to 350 F

Using an electric mixer, mash the bananas well.  Use the mixer to also beat the aqua faba until it is foamy and add that to the bananas. Add the honey and mix well.

In a separate bowl, combine the spelt flour, salt and baking soda.

Add the wet ingredients to the dry ingredients and mix until everything is combined well.
Stir in the walnuts.

I used olive oil spray on my loaf pan and poured the batter in and smoothed it out. Bake for about 50 - 60 minutes until the loaf tests done with a toothpick.


It's delicious and nicely soft and moist!


Sunday, November 24, 2024

"Gluten Free" - chapter 2 - Not really.... Spelt bread


    The most dissapointing thing about going "gluten free" for me was not having "real" bread. I've been making our bread, almost exclusively, since 1972. Yes, I'm that old. At one time, when all of our children (6) were still at home, and we had another boy living with us, we would make 15 loaves of whole wheat bread all at one time, once a week. I have an enormous stainless steel bowl we used for that.

    I had read that some ancient grains, such as Spelt, could often be tolerated by people who are sensitive to wheat. I ordered a bag of organic whole grain Spelt flour from www.Azure.com, and so for the last week, I've been using it. I am very happy to tell you that it is not giving mw any trouble! Spelt DOES have gluten, but it is different, in some way, than the gluten in our modern wheat. Spelt is technically wheat. It's just thousands of years old. 

    The bread is very simple to make and is delicious. It is more tender than typical wheat bread. This bread rises in the bowl and then in the pan, but does not rise any more when you bake it. It makes very nice toast and sandwiches. I do not know how long it would "keep" because I sliced it, put small pieces of parchment baking paper between the slices so they won't stick together, put it in a freezer bag and into the freezer. That way I can take out just what we need and either let it thaw or make toast. 

    I found the recipe and instructions on YouTube and here it is: https://suemareep.com/how-to-make-spelt-flour-wholegrain-bread/

    I did not use the stand mixer like she did. I just worked the dough for maybe 2 minutes with my hands. I used 1 Tablespoon of olive oil in the dough, but I did not grease the bowl or my hands like she did. When I formed the loaf, I just put a little water on the counter so the dough would not stick. Also, I ended up using just a little more water than she did so the dough seemed right. Like any other flour, I imagine spelt flour can vary in the amount of water needed.

    I've also been usinng the spelt flour in other things that call for flour, like my cornbread. I'm very pleased. Thank you, Sue Maree P. !!!


Thursday, October 24, 2024

"Gluten Free" - I thought it was silly, until.... Chapter 1


I don't know when the current "gluten free" craze began, but for the longest time, I thought it was just another trend that would fizzle out.  Now... I've had to repent of that attitude. I have no idea what portion of the population might be sensitive to gluten. It may be that it's being overdone. Nevertheless, I discovered not long ago, that I am gluten sensitive. For a few years, off and on, I had been having episodes of extreme achiness in my body. It was not sore muscles. It didn't seem to be connected to anything I was or was not doing. It "came to a head" a couple of months ago. I was riding with my husband in his pick-up truck one evening. The pain was exquisite and intense and I was thinking "What is this???  I eat a very clean diet. I go to the gym 3 times a week. My bloodwork came back perfect. I really try hard to take care of myself, so WHAT in the WORLD is going on?"  Then it came to me. "Gluten."  Aha.  Yes.  Perhaps... so I went home and eliminated gluten from my diet. Within 2 days, all of that pain was gone. And it has stayed gone. I have been experimenting with making long fermented sourdough bread, and the jury is still out on that. 

I'd like to share with you some of the things that I've been cooking and eating instead of the grains that have gluten in them.  The first chapter is - 

CORNBREAD MUFFINS

1 cup cornmeal (I use the freshly ground from what we grow in our garden)

1 cup almond flour

3/4  teaspoon salt

1 Tablespoon sugar

5 teaspoons aluminum-free baking powder

1 Tablespoon ground flaxseed (I grind mine fresh and keep it in the fridge. I use a little electric coffee grinder) - this is the egg substiture

1/3 cup unsweetened applesauce (oil substitute)

1 cup soy milk 

Mix the dry ingredients

Mix the wet ingredients

Combine well

This will make 12 muffins. Bake at 425 F. for about 15 minutes.  Check to see if they are done by tapping the top to make sure there's no liquidy stuff in the middle. I use pan spray on my muffin tin. This is one of two times I ever use oil  in cooking anymore!  The other is when I make Belgian waffles.  I spray a little on the waffle iron. If you have the little paper liners, you could use those.

My favorite way to eat these is with Navy Bean soup. OH... that's heavenly!  Sometimes I put a little honey on a muffin. These keep well in the refrigerator for a few days. My husband likes to break the muffins up into his soup. 


Wednesday, April 29, 2020

Whole Wheat Sourdough Bagels !


Whole wheat sourdough bagels  4/29/2020

Ingredients:
½ cup bubbly sourdough starter
1 medium potato
1 Tablespoon honey
2 eggs (save back one of the yolks)
3 Tablespoons oil (I used avocado)
2 teaspoons salt
4 cups whole wheat flour

For the glaze:
The reserved egg yolk
1 teaspoon cold water
Poppy or sesame seeds (optional)

Directions:
1.      Slice the potato thickly and boil it in 2 ½ cups water until tender.  Drain, reserving the water and you can eat the potato.  It doesn’t go in the bagels. Let the water cool until warm.
2.      Combine the starter, honey, eggs (reserving one yolk), oil, salt and flour.  Stir, and add enough of the potato water to make a nice kneadable dough.
3.      Knead, on a surface dusted with all-purpose flour for 8 – 10 minutes.
4.      Wash and oil bowl. Put in the dough and turn it over so the top is oiled.  Cover tightly with plastic wrap.
5.      Let the bowl sit on the counter overnight (or all day).
6.      In the morning, on a floured surface, dump out the dough.  Knead a little bit, and then break off equal pieces.  I ended up with 12.  Form them into balls and let them rest for 10 minutes on floured surface.
7.      Form into bagels by flattening a bit and then poke a hole in the middle and stretch out.
8.      Place them on a greased or Silpat covered cookie pan and allow to rise until they are nice and puffy… maybe half an hour? 
9.      In the meantime, bring a large pan of water, maybe 3 quarts to a boil and add ½ teaspoon baking soda. 
10.  A few at a time (don’t crowd them) gently place the bagels in the boiling water and boil for 2 minutes, flip over and boil for 2 more minutes. Remove with slotted spoon.
11.  Make the glaze and brush their tops and sprinkle with the seeds, if you wish.
12.  You can put 6 of the 12 per baking sheet.  Bake in a preheated 425 F oven on two racks for 13 minutes.  Switch the pans to the other rack and bake for 13 more minutes. Should be lightly brown
13.  Cool them on wire racks. 
14.  Eat.  We love them toasted with cream cheese or butter.


Friday, December 20, 2019

Purple Sweet Potato Star Bread...


I took this picture before it was baked and then neglected to take one after it was done!
I made two of these yesterday and gave them to our two closest neighbors for Christmas.
Light the World!
Merry Christmas to all of my Gentle Readers.
I appreciate you all so much.

Friday, January 6, 2017

Bread boxes - - - I never knew this!

.... I can't remember now how it came to be, but I started reading online about bread boxes.  I always just assumed a bread box was a place to store your bread so the counter wouldn't look messy.  Not so!  I have discovered that the traditional Bread Box helps to keep bread fresh longer.  How did I not know this?  I guess my mom didn't use one and I simply never talked with anyone about it.  I thought I would put it to the test.  I don't have an official Bread Box (yet), so I cleaned up this old "tin" to use:


It's a nice big old cookie tin that I've had for a number of years and have used to store canning rings in.  I thought, "Well, if this works, then I'll see if I can get a real Bread Box."  The article I was reading suggests wrapping the loaf of bread in a cotton cloth, so that's what I did.  I put my loaf of whole wheat sourdough bread in the tin, wrapped in a nice cotton cloth.  Here is what is left today.  I put it in there on Tuesday, so that was 3 days ago.


Let's unwrap it!


And here I cut off a nice slice.


The bread is still nice and moist and nearly as fresh as the day I made it.  Now, I do understand that sourdough bread (true, long - fermented bread) has better keeping qualities than "normal" bread, but even so... this is much much better!

If you store your fresh breads in plastic bags, it simply doesn't work.  I don't know why.  It just doesn't.  And if you pre-slice your bread, that's not a good idea either.

I can't tell you how pleased I am!  The extra bread that I made is in a plastic bag in the freezer.  When I need some, I will just get it out and let it thaw and then wrap it in the cloth and put it in the tin.  

A small thing, again, but I am easily entertained.  ;)

Tuesday, December 29, 2015

Money saving bread making tip...


I like to use honey in my homemade bread.  I also like to use blackstrap molasses.  See that bread there?  It is kind of dark in color.  I used the blackstrap molasses this time.  It is delicious.  Honey costs over $40 a gallon.  Blackstrap molasses costs about $9 a gallon.  It is also very high in minerals.  If you make bread, you might want to give it a try.  It has a significantly lower glycemic index than sugar, and just a little lower than honey.  Since I use natural yeast now, almost exclusively, this makes it so my bread has a very low glycemic index.  This is all good news. 

Saturday, September 26, 2015

Bread, again...

I see that as of this moment, I have 54 different posts under the "Bread" category.  I have had a love affair with making homemade breads since 1972.  Yes.  43 years!  A dear friend showed me how to make whole wheat bread back then, and with very few exceptions, we've been eating exclusively homemade bread ever since.  We really depended on it (and still do) when the children came along and were growing up.  If someone quipped "We ain't go no bread!" it meant - there's nothing to eat!  At one time, we would bake 15 loaves a week and all on one day.  One of our daughters, when she was 12 years old, was able to do that all by her little self.  Pretty amazing.  By the way, she grew up to become my "garden fairy."


A while back, I purchased a copy of The Art of Baking with Natural Yeast  by Caleb Warnock and Melissa Richardson.  My garden fairy actually helped me understand how to make the bread in that book.  I got a sourdough starter from Caleb.  You can get some of his starter, for free, by going to this link: http://calebwarnock.com/sp/free-natural-yeast/ . It is wonderful stuff.  Vigorous, easy to care for, and it really doesn't make your bread sour if you feed the starter often enough. Their book is an education, but you don't have to buy one to get the starter.  Get one!  You won't regret it!

This will not be an exhaustive presentation on how to make bread, but I want to show you my "everyday bread" that I make now.  I usually only make 2 loaves at a time, let them cool, slice them and freeze one.  The other, we enjoy, and after a few days I keep it in the fridge so it won't get moldy, and we use it for toast.  It is so good.  I can't even tell you!

Here is the basic recipe and a few pictures.

My Everyday Bread - 9/26/2015 - 2 loaves

In the morning, get your starter out of the refrigerator, feed it, and let it sit all day on the counter.
7:30 p.m. - time to mix up the bread.

In a bowl, combine the following:
1/2 cup starter (then put your starter back in the fridge.)
2 1/2 cups lukewarm water
2 teaspoon sea salt
1/4 cup extra-virgin olive oil
1/4 cup honey
4 cups whole wheat flour (I keep mine in the freezer, so I have to get it out ahead of time to let it warm up.)
"enough" unbleached white bread flour (this is where you need to know, basically, how to make bread.)

Mix it all up well, adding the bread flour as needed until it seems right.  Then pour it onto a well-floured surface and knead for about 6 minutes, adding bits of bread flour to keep it from sticking.  When it is ready, and you slap it, it's kind of like a baby's bottom.  :)  Not that I go around slapping babies.  But you know what I mean, surely.

Wash out your bowl and dry.  Pour a little more EVOO in there and coat the bowl.  Then put the dough in, and turn it over so the top will be oiled.  Cover tightly with plastic wrap, and let it sit on the counter overnight.  I get up about 6 a.m. and by then, it looks like this:

 I pour a little bit of olive oil on my bread board (or the counter, if that is what you have) so the dough won't stick.  Pour the dough onto your work surface and divide it in half.  Form into two loaves and place them in 2 well-buttered bread pans. Cover them with the plastic wrap that was on your bowl so it will have a little oil on it and not stick to the loaves.  If it doesn't have enough, add a little oil.
Let the loaves sit on the counter until they have raised to "double", whatever that is.  Here is what it looks like in my pans:
Bake in a pre-heated 350 F oven for 40 minutes.  Here is what it looks like in the oven after the first 10 minutes:
Remove from oven and turn your loaves onto a cooling rack.
You can see they are not exactly the same size.  That is ok.  It won't affect the taste.  Being sourdough, it has better keeping qualities than bread made with commercial yeast.  I hope this is helpful and that you will try it.

When I was a young teenager, I wanted to learn to make bread.  I didn't have anyone to show me, as my mom was hospitalized with Tuberculosis for a year at the time.  I was 16 years old.  I don't know what cookbook I looked in, but I tried.  It was a dismal failure.  It would have made splendid door stops.  Sigh... I never tried again until I was 23 years old and my friend showed me what to do.  It may sound a bit silly, but that experience when I was 16 was very disappointing and learning to make it successfully later meant a lot to me.  Back then, of course, it was just me and my husband, and I would make bread for us once a week.  It was 100% whole wheat bread - from scratch.  Good stuff.

Just in case you don't know this - sourdough bread - REAL sourdough bread is easier to digest and people that are gluten sensitive can often eat it without any ill effects.  Caleb believes that if we always soaked and soured our grains that we would not have "metabolic syndrome."  Whether or not that is true, I have no idea, but I do have a couple of friends who struggle terribly with their weight, and both of them have a history of being sensitive to eating very much wheat.  There could be a connection.  For such individuals, according to Caleb, the problem develops over time and eventually overwhelms their body's defenses.  Just something to think about.

I wish you were here and I could give you a slice of this wonderful bread with some butter and honey on it.  You would be so happy!


Saturday, July 18, 2015

Raisin Bread!

Have you ever made raisin bread?  Well, if not, and you like to make bread, then you are all set.... assuming you also like raisins.  ;)

Just make whatever bread dough you prefer.  This batch is about 1/4 whole wheat and the rest of the flour is King Arthur's unbleached bread flour - my favorite.

When the bread dough is ready to put in the pans, THEN is the time to add the raisins and cinnamon.  Just roll your loaf of bread dough into a nice rectangle, sprinkle with raisins and a little cinnamon and roll it up tightly and form a loaf.  Very easy.

Here it is baking in the oven.

It just came out of the oven and I brushed the top of the crust with butter.

Here is what it looks like sliced.

Now, can't you just smell the goodness?  It makes fabulous toast for breakfast too, slathered with nice butter.  Oh.... yum.

Unfortunately (?) I made this for a pitch-in lunch after Church tomorrow, so we have to wait.


Friday, April 3, 2015

Biscuits, again, with the new flour...


My last post was about substituting King Arthur Whole Wheat Pasty Flour for unbleached flour in my cornbread.  I was able to go to the bulk food store yesterday and buy some more of this flour.  I used it to make some baking powder biscuits for supper last night.  Success!!  The biscuits were tender and light and delicious.  Not only that, but I just heated one up that was left over and it is still yummy!  Usually, the next day, biscuits are nothing to write home about.

Here is the recipe I used:

BISCUITS - preheat oven to 500 F.

1.  Sift about 2 cups of King Arthur Whole Wheat Pastry flour onto your work surface.
2.  Gently (I use a long straight spatula) lift up the flour into a measuring cup.  Measure 2 cups of the sifted flour into your sifter (I use a wire strainer for this.)
3. To the flour, add 3/4 teaspoon sea salt and 1 Tablespoon aluminum-free baking powder. Sift all the dry ingredients into a bowl.
4. Grate 1/3 cup COLD butter, a little at a time, into the flour mixture.  Mix it in lightly with your fingers as you go.
5. Pour in 3/4 cup cold whole milk or half-and-half.
6. Stir until moist.  You might have to add a tiny bit more milk or a tiny bit more sifted flour.
7. Turn dough onto floured work surface and knead 3 strokes.
8. Roll out 3/4 inch thick and cut with a biscuit cutter, placing the biscuits upside-down on your metal baking tray.
9. Bake at 500F for 8 minutes.

That's it!

Please let me know what you think if you make these.  I love them with butter and honey.

Saturday, March 28, 2015

A Tiny Baking Tip...

I accidentally discovered something that has improved my baking considerably! When I can, I like to use whole grains (as opposed to white flour) in baking.  For years I've gone back and forth between using whole wheat flour in our cornbread and was never happy with it, so then I'd relent and go back to using unbleached white flour... until today!

Ta Da!!!

A while back I purchased some King Arthur Whole Wheat Pastry Flour to use in pie crusts.  It is very nice.  It is also a wonderful substitute for unbleached white flour!  (If you are not a baker, you will not quite understand my elation.)  I buy this flour at a bulk food store about a half-hour's drive away.

I made corn bread.


It is moist and tender and wonderful, as opposed to dry and crumbly.  

Here is my recipe:

Corn Bread

Pre-heat oven to 425 F.
Butter a pyrex 9 x 9 baking pan

In a mixing bowl, combine the following:

1 cup whole ground yellow corn meal
1 cup King Arthur's whole wheat pastry flour
1/3 cup sugar
5 teaspoons baking powder
1/2 teaspoon sea salt

Whisk together, then add:

1 large egg
2 Tablespoons extra-virgin olive oil (or melted butter)
1 cup whole milk

Stir it all together with a fork and then pour batter into prepared pan.

Bake for 20 - 25 minutes until it tests done.

Serve with butter!

Tuesday, March 17, 2015

Irish Soda Bread - March 17, 2015


When our children lived with us, we made somewhat of a celebration of St. Patrick's Day and would always rehearse his history and selfless contributions that he made to the Irish people in his lifetime.  Then we always had corned beef, cabbage, potatoes and Irish Soda Bread for dinner!

Now that it is just my husband and me, I have opted for making a batch of Irish Soda Bread.  I just ate some.  It is wonderful and I wanted to share my most recent method and recipe with you, Gentle Readers.

IRISH SODA BREAD

Preheat oven to 375 F.

In a bowl, combine the following

2 cups unbleached all-purpose flour (I love King Arthur's)
1/2 teaspoon sea salt
2 Tablespoons white sugar
2 teaspoons baking powder
1 teaspoon baking soda

Whisk that together well, then...

Grate in 3 Tablespoons of COLD butter, mixing it in with your fingers, a bit at a time.

Then, combine the following:

3/4 cup plain full-fat yogurt (my favorite is Dannon)
1/4 cup whole milk

Add the liquid, all at once, to the dry ingredients and stir with a fork.

The dough needs to be moist but not sloppy.  Adjust the amount of flour, or add a little more milk if needed.

Turn dough out onto a floured surface and only knead it a LITTLE BIT.  Just enough to get it into sort of a big round thing.  Don't work it much, as it will get tougher then.

Place on an ungreased baking sheet.  Press into a 7 inch circle.  Using a sharp knife, cut a cross in the top.

Place the baking sheet into your oven and bake for 30 minutes.  When it is getting browned, it is done.  Don't over bake.

Remove and allow to cool on the pan.

Slice, serve with butter and enjoy!

Wednesday, March 4, 2015

A Tiny (embarassing) tip, more about my Phang spindle, some new bread pans, and hankies...

Do you see what I'm holding there?  That is the plug assembly for our kitchen sink.  It is a replacement for the original, which finally broke last year.  Now.... here is the embarrassing  part, and I am telling you this just in case it happens to you.  For quite a while, I've been complaining to my husband that the sink drain seems to smell really awful.  I had tried a variety of things to "sanitize" it and it never did any good.  Then I discovered something a few days ago.  See, on the original plug, the black rubber part on the bottom was a solid piece.  But, on this cheapy, you can actually open it up like this:
I didn't know that!  And there was all kinds of icky gooey nasty stuff in there.  Now that I have thoroughly cleaned it out, the bad odor has disappeared.  Sigh....  Now, I clean it every time I clean the sink. *blush.*

Ok, on to more salubrious topics...

I have done some more spinning on my Phang spindle and I don't have a Nostepinne (yet) so I used the handle of a wooden spoon to wind the single ply yarn off of the spindle.  In order to do that, I rested the spindle in the larger bowl you see in this picture:

Here is the center pull ball I made on the makeshift Nostepinne:
Then I removed the ball of yarn and used the spindle to make a 2-ply yarn.
Here it is all wrapped onto the spindle:
This is not very much yarn.  I was too curious to wait until I had spun more. 
35 grams of yarn, wrapped into a little skein:
It is certainly not the best yarn I've ever made, but I am new to using a support spindle, so it's not too bad.

Lately, I've been making bread using natural yeast that I got from Caleb Warnock who wrote The Art of Baking With Natural Yeast .  A wonderful book, by the way. Sourdough (this is really not sour) is much more easily digested, and often, those with gluten sensitivities can eat genuine sourdough without any trouble.  Yesterday I was shopping with our daughter for baby things (she is expecting a baby boy in a month) and saw some new Pyrex pans, that I thought would work nicely for bread.  I bought two of them and used them to make my bread this morning.  They are not technically bread pans, but I like that they are a bit shorter than usual bread pans, from end to end, and the handles are nice.  Here is one of the pans - not washed, after the bread was removed:
and here are the two loaves of bread:
This recipe is Caleb's "Grandma's Bread" that I love so much.  The only thing I changed, is I add 1 cup of King Arthur's unbleached bread flour along with the whole wheat flour when I make it.  That is not necessary.  I have made the 100% whole wheat bread very successfully too, but I like the higher rise the unbleached gives it. 

I am 66 years old.  When I was a young child, there were no "facial tissues."  We used handkerchiefs to blow our noses.  This past month, I had influenza, followed by pneumonia and bronchitis.  It took the whole month, and in that time, I went through two whole boxes of tissues.  I know, I know... so what's the big deal?  I'm such a penny pincher.  So, for the price of the two boxes of tissues, I bought 3 yards of cotton print fabrics and am making 12 hankies for myself.  I have 4 of them finished and have been using them and am very pleased. 

Here is one that is finished, on top of the fabrics I have not sewn yet:
I am making them from 18 inch squares of fabric, sewing up a narrow hem and doing the corners like so:
I carry one in my pocket and use it all day and then throw it into the wash.  Don't be alarmed.  We must wash our hands after blowing our noses, even if we use disposable tissues.  This will save me several dollars a year, they are softer on my nose, too, and make my frugal heart happy.  :)


Wednesday, February 25, 2015

I made some Banana Bread today....


I had 3 very ripe bananas sitting on the counter, so I made some of my really yummy and healthy Banana Bread.  Here is my recipe:

BANANA "NUT" BREAD

Pre-heat oven to 325 F

1/3 cup coconut oil, melted
1/2 cup honey
2 eggs
3 ripe bananas, mashed
2 cups whole wheat flour
1/2 teaspoon salt
1 teaspoon baking soda
2 Tablespoons flax seed (freshly ground- I do it in a little coffee grinder)
1 teaspoon powdered kelp
1/3 cup hot water
1/2 cup sunflower seeds, lightly toasted in a skillet  (If you don't toast them, they turn green when baked.)

Sift the dry ingredients together.

In a separate bowl, mix the oil and honey.

Add the eggs and mix well.

Then, add the bananas and mix well.

Now, to the banana mixture, add the dry ingredients (not the sunnies yet) alternately with the hot water and mix well.  Then, mix in the sunflower seeds.

Butter a medium sized loaf pan, and spread the batter in it.  Bake for 55 - 60 minutes, and test with a toothpick that you stick in the middle of the loaf.  If it comes out clean, then the banana bread is done.

Cook for 10 minutes in the pan and then on a cooling rack or towel (have you ever noticed that some recipes you read say, "a clean towel?"  Good grief!  Do they think we'd use a soiled towel?) 

When cool, slice, wrap and keep it in the fridge.  Serve with butter.  Oh, my, this is good!

Of course, the kelp powder and flax seed are optional.  And you can change out the flour and sweetener if you wish.  This is just the way I prefer to make it.  If you don't use the flax seed, then reduce the hot water to 1/4 cup.

Tuesday, July 22, 2014

Canning Peaches Without Sugar and.... Outdoor cooking!

Here is a view of my kitchen when I got up this morning.  Yesterday, I canned 38 quarts of peaches, with no sugar, like THIS.  It took me 6 hours, start to finish and they are beautiful!  In case you are new to this way of canning them, you will be pleasantly surprised.  They are healthier, of course, but also it's more economical, as you don't have to buy any sugar, and more peaches fit in the jars.  All that is in the jars is peeled peaches.  No Water.  No Syrup. Nothing to prevent darkening.  If you do it my way, they will be wonderful.  I promise!  They do have to be ripe enough, of course.  I even did it one year when I bought 60 pounds of peaches and when I went to can them, found out they were cling peaches.  :-0   HERE is how I did that.

I worked so hard yesterday that today I decided to "play."  I have never, before, baked a loaf of bread over a fire, but my son sent me a link to a YouTube video on how to do that, so I had to try it!  I also made a wonderful beef stew over the fire.  I really love cooking over a fire outdoors.  It is so versatile.  The bread got a little too done on the outside, but it was still delicious.  Next time, I'll hang the Dutch oven not quite so close to the fire.  By the way, HERE is the link to that video.  I used my own bread recipe, but followed his method for baking.

Here is the bread...


Here I am stirring the stew.  The bread is hanging over the fire at this point.


Here is the stew, right before I stirred in the pint of beef chunks.  You can see that it is simmering there next to the fire.


It was a wonderful meal and so much fun to cook!

Now, I think I'll do the dishes and then read a book.  We are having sweet corn from the garden for supper.

Friday, June 13, 2014

For Lance - Buttermilk whole wheat pancakes!


We just returned from a trip to Florida to spend time with our oldest son and his family.  #3 son, Lance, helped me make buttermilk pancakes while I was there and I promised to send him the recipe.  This is for you, Lance!

Whole Wheat Buttermilk Pancakes

Beat together in a small bowl:

1 and 1/8 cup cultured buttermilk
2 eggs
2 Tablespoons melted butter

Mix together well in a larger bowl:

3/4 cup whole wheat flour
1/4 cup all purpose flour
1 teaspoon salt
1 teaspoon baking soda

Add the wet ingredients to the flour mixture and stir with a fork just until everything is wet.  Do NOT try to get the lumps out!

Heat a griddle or frying pan on medium heat.
If your griddle or pan is not non-stick, spray with pan spray.
Scoop up the batter with a 1/4 cup measuring cup.
Pour the batter on the pan and spread it out a little.
When the top has bubbles, the edges are looking dry, and the bottom is browning nicely, carefully flip the pancakes over and cook the other side.

Check to see if they are done, once or twice, so you'll know what they look like when cooked all the way through.

I made 4 times this much at your house, so without me and Grandpa there, you might want to just make 3 times as much for your family.

It takes a little practice, but even if they get all buggered up and look funny, it won't affect the taste.

Please let me know how they turn out!  I love you so much love and miss all of you tons!!


Friday, February 7, 2014

A tiny bread-making tip...


I made bread today.  Can you smell it just looking at that picture?  It just came out of the oven.  Ok... on to the tip.  I tried something a little different.  After I mixed the whole wheat flour, water, yeast, black strap molasses, salt and extra-virgin olive oil in my big bread bowl, I let it rest for 15 minutes before I proceeded with the kneading.  It made it a lot easier to manage the dough.  Hard to describe the difference, but I'll be doing this from now on, and thought I'd share.

Friday, January 17, 2014

Pressure Cooking - Chapter 3

In 1976 we were living in rural Nebraska.  I loved it there.  The neighbors were very kind and that was where I had my first real vegetable garden.  Our little girl, April, who was 2-years-old would follow me out to the garden, pick a big ripe tomato and eat it out of hand, saying, over and over "Mato...mato...mato."  Of course, the front of her clothing would get a little, *cough*, messy.  :)

When we first moved to that house, we did not have a kitchen stove.  I cooked on a 2-burner hot plate for quite a while.  I had written to a dear old friend and asked her for ideas of things I could cook without an oven.  She introduced me to "no-bake oatmeal cookies" and told me how to cook a meatloaf in a pressure cooker.

One day we went to a Sears catalog store.  Do any of you know what that is?  I don't know if they still exist, but back then, it was a small store with only a few items actually for sale in it, but you could peruse the catalog and order things there.  My husband needed to order something, and they happened to have an electric kitchen range on display.  It was on sale at the time.  I was looking at it, and a store clerk asked if I needed any help.  I mentioned to her that I was cooking on a 2-burner hotplate.  She asked, "Don't you ever complain??"  I don't know what I said, but I was thinking something like, "Why would I complain?  I know we don't have money for a stove."  When my husband finished his business, he came over and saw me admiring the stove.  He then proceeded to buy it for me!  Kitchen appliances are the ONLY thing we ever went into debt for.  He opened a Sears credit account, put the thing on payments and we had it delivered to our home.  Oh, my... that was SO nice.  That was the year I learned to can food.  It had a self-cleaning oven!  I used that stove until 1986 when we moved into a house that had a bigger stove in place. Forgive me while I continue to ramble, please... this is a blog, after all.  ;)  When we were first married, we lived in a very small mobile home which was married student housing at Indiana University.  The kitchen appliances were provided.  Then, we moved after I graduated and I was expecting our first child.  We lived in the country near Martinsville, Indiana.  My husband was a high school Earth Science teacher there.  Our landlord offered us an old propane kitchen range which had been stored in a garage.  DH completely dismantled it, took out the insulation which mice had invaded, replaced it with new insulation, cleaned it all up nicely and put it back together and into our kitchen.  It was great.  It had pilot lights.  I was already baking all of our bread by that time, so an oven was important to me.  Enough about ovens..... for now.

Yesterday I decided to go further along on the path of making breads in a Pressure Cooker.  I made cornbread in it for the first time on Wednesday.  Yesterday I baked banana bread and regular whole wheat bread in it with great success!  Here is what happened...

I have this nifty little baking container that actually is for use in a crock pot, and it fits nicely, on the trivet, in my 6-quart pressure cooker.  I have to remove the lid, though, as it is too tall, but that's fine, since it is necessary to cover any bread you are steaming with aluminum foil tightly.


Mixing the batter...


Here is the banana bread batter poured into the well-buttered pan (recipe follows) ready to go into the pressure cooker.


Trivet and 2 cups of water are in the pressure cooker.


The pan is carefully and tightly covered with foil.  I buttered the inside of the foil, just in case, not knowing how high the bread might raise, but as it turned out, that wasn't necessary this time.


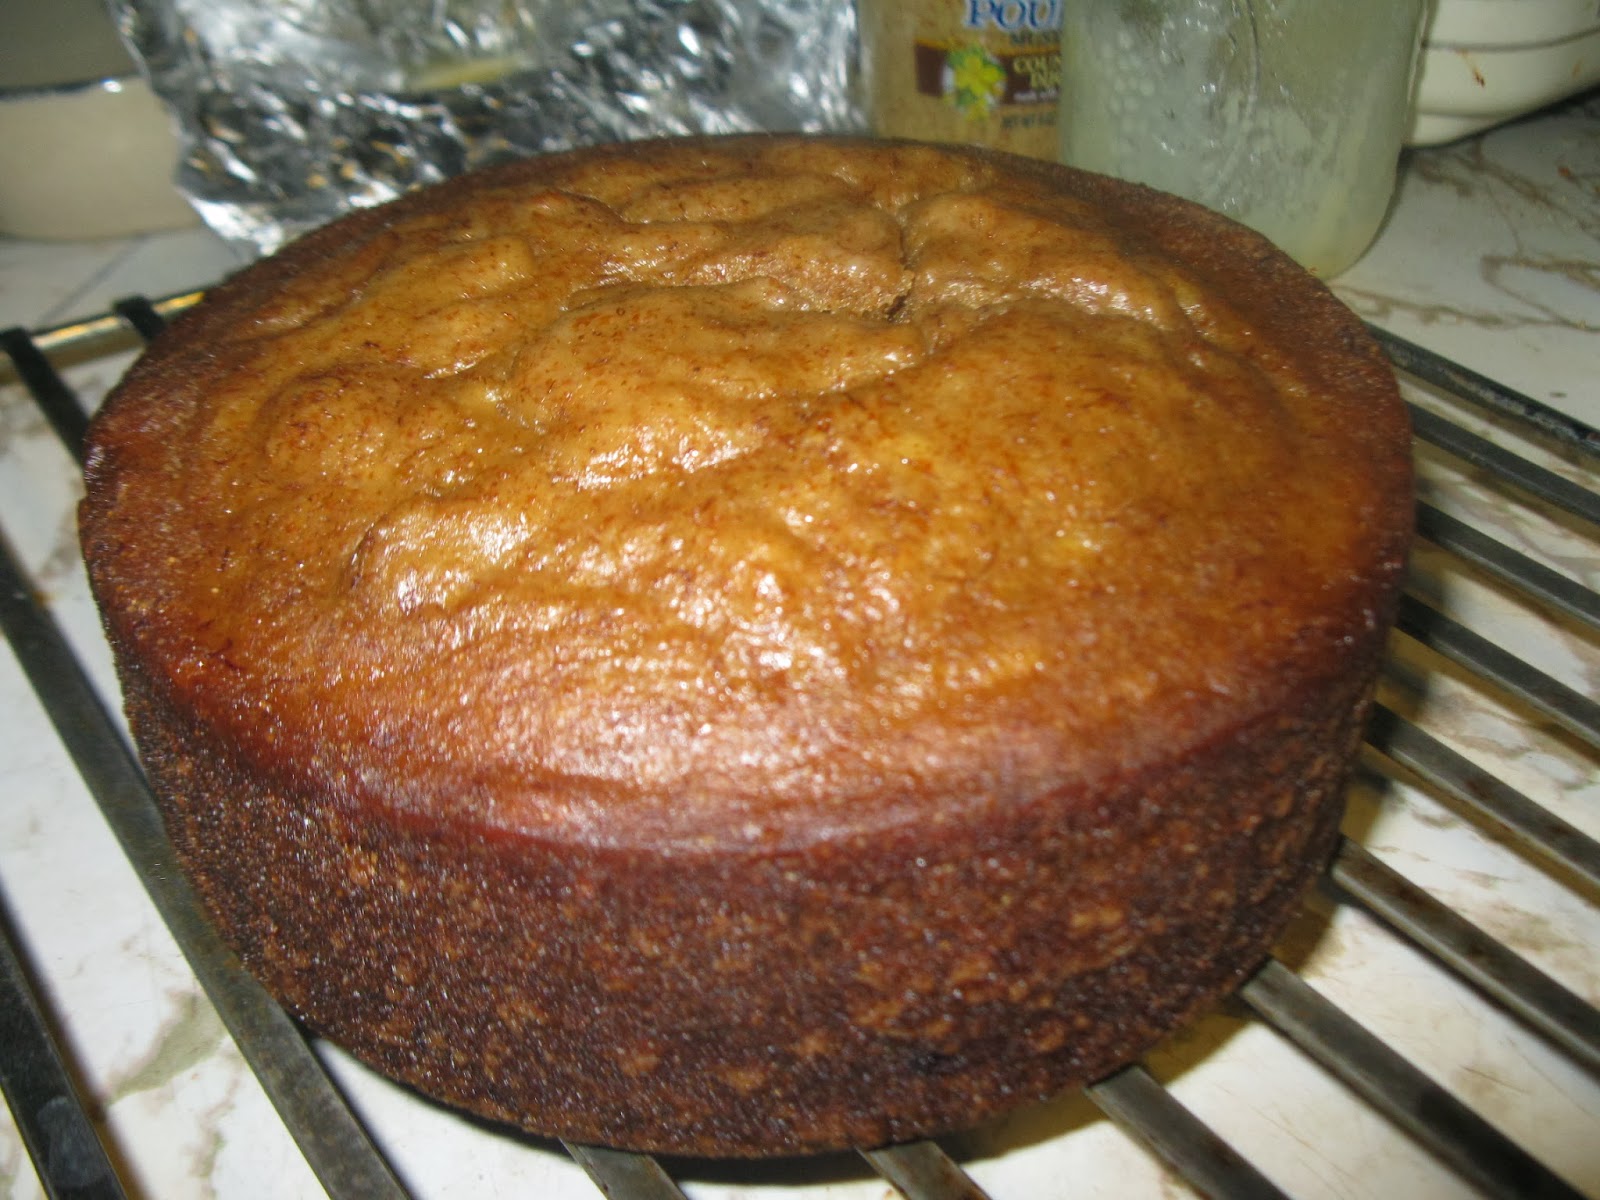
Banana bread in pan after cooking:


Here it is cooling on a cooling rack.


Here it is sliced into.  Oh, my!  It is moist and delicious!  We all like it very much.  I really think the quality is superior to that baked in a conventional oven, and it also saves energy in the baking process.


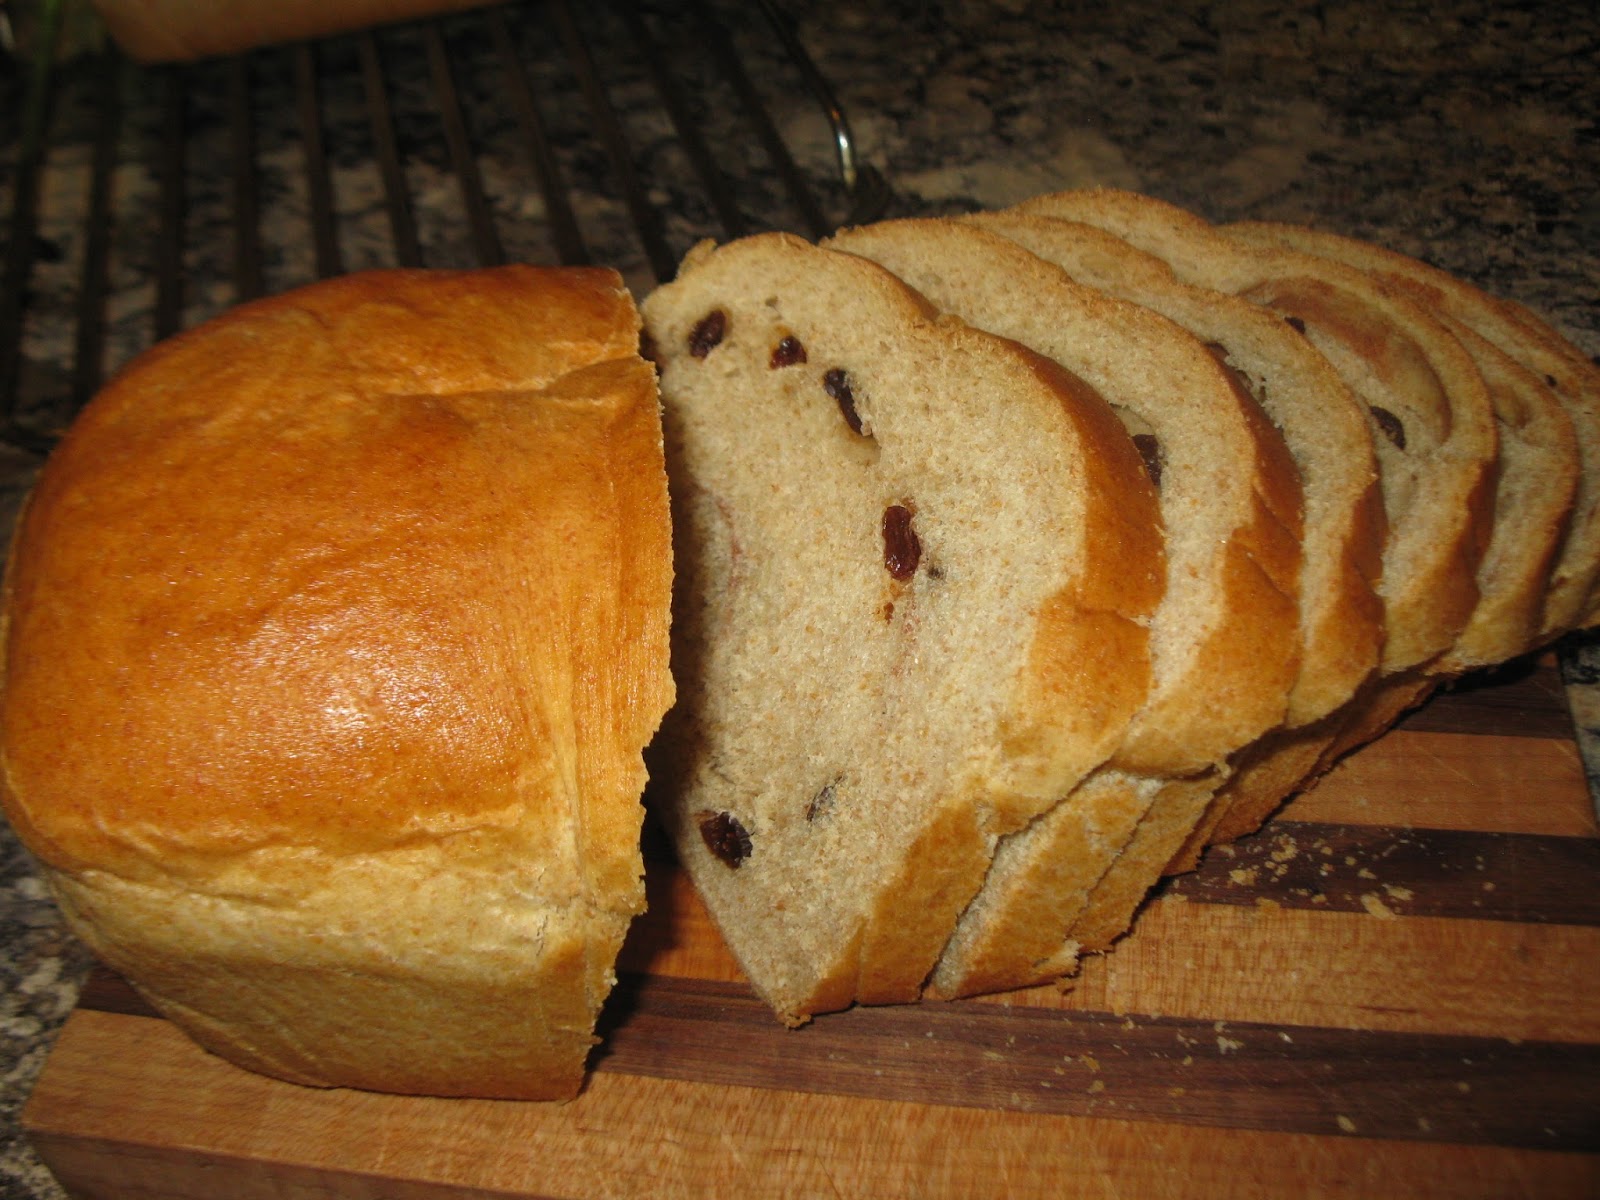
Later in the day, I made 5 loaves of whole wheat bread.  (Recipe follows.)  Here are the balls of dough ready to be shaped into loaves.


I put 4 of the loaves in my regular bread pans and one in the pan for the pressure cooker.


The loaves have risen and are ready to bake.


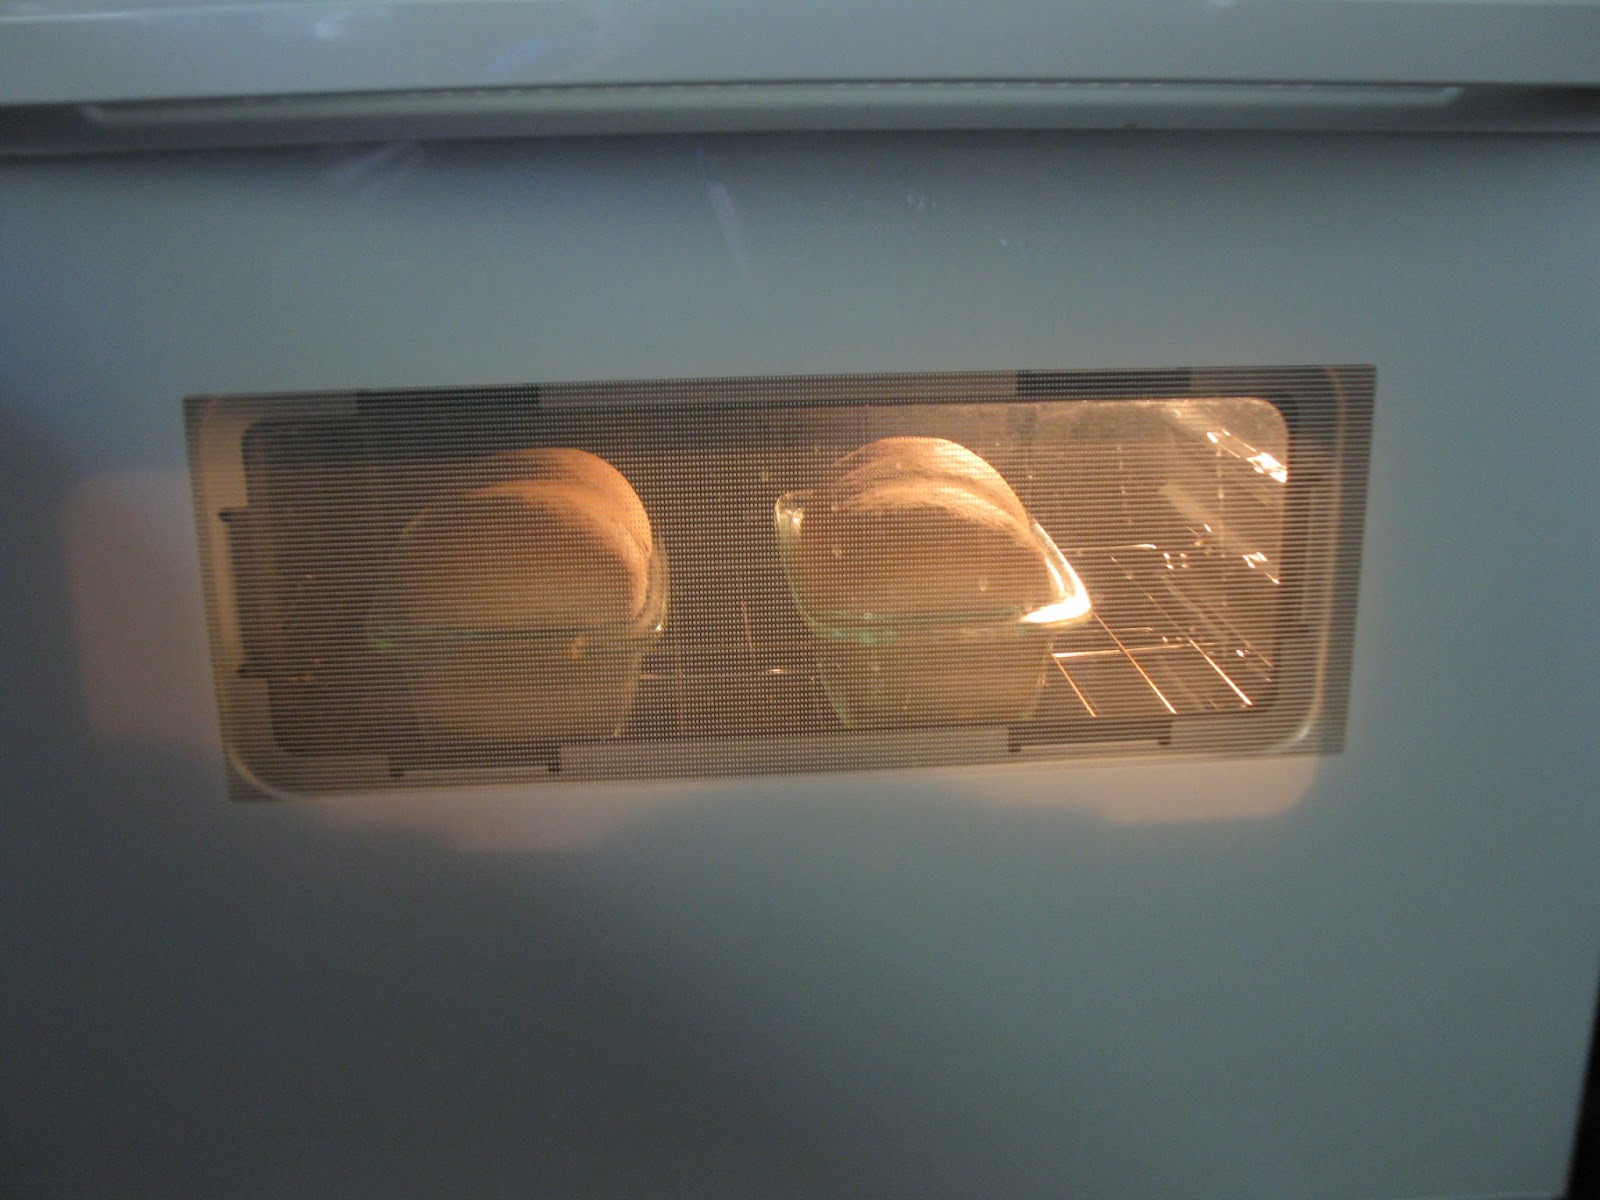
Cooling on racks after baking... see the pretty round loaf?  The pressure cooker worked splendidly!


Here is that loaf, showing the wonderful texture.  The bread is not at all soggy, it is nicely browned, but the crust and the crumb are more tender than in the oven-baked bread.  I couldn't be more pleased.


Baking breads this way does not save time, but it does save energy and also if you don't happen to have an oven, this would be so nice to know how to do, and you can also bake things easily with a camp stove as well... or a hot plate!  Here are the recipes:

Pressure-Cooker Banana Bread (You can easily tweak this recipe for the ingredients you have on hand.)

1/2 cup brown sugar
1/3 cup coconut oil
2 large eggs
3 very ripe bananas, thoroughly mashed
1 3/4 cups whole wheat flour
1 teaspoon baking soda
1/2 teaspoon salt
1/4 cup hot water

Beat the oil and sugar together.  Add eggs, mix well.  Stir in bananas.  Add sifted dry ingredients alternately with hot water.  Mix until smooth.  Thoroughly coat the inside of your baking vessel with butter. Pour in the batter.  You can use a pyrex or metal item, that will fit with plenty of room around it to let the steam circulate.  A small taller cake pan would work well.  You could even use metal food cans or wide mouth PINT canning jars, but would have to divide the batter into maybe 3 of them and adjust the cooking time accordingly.  IF you ever take some bread out of the pressure cooker and it is not done enough, just put it back in and give it a little more time.  It works just fine.

After you put the batter in the baking pan, cover it tightly with foil and place it on the trivet with 2 cups of water in the pressure cooker.  Put on the lid, bring up to pressure and reduce heat so the petcock is rocking gently.  Bake for 35 minutes.  Remove from heat and let the pressure escape on its own.  Then, open the cooker, take out the pan, take off the foil and let it rest for 10 minutes.  Then you can put the banana bread on a wire rack to cool.  Wrap tightly and store in the refrigerator.  It is tender, sweet, and very nice.  Banana bread is sometimes best eaten the next day!

Pressure Cooker Whole Wheat Bread 

1 1/4 cup water (110 - 115 degrees F)
1 1/2 teaspoons active dry or instant baking yeast
3 cups whole wheat flour
unbleached flour for kneading
1 1/2 teaspoons salt
2 Tablespoons extra-virgin olive oil
2 Tablespoons blackstrap molasses

Put the whole wheat flour in your bread bowl.  Make a well in the center, pour in the warm water and sprinkle the yeast over it.  Stir in gently with a fork.  Let that sit while you gather your other ingredients.  Then add the salt, oil and molasses.  Stir together thoroughly.  Sprinkle some unbleached flour on your kneading surface and knead vigorously for 10 minutes, sprinkling a little more flour under the dough as you knead to keep it from sticking.  Wash and dry the bowl.  Grease the bowl with more oil.  Put in the dough and turn it over, so the top is oiled.  Cover tightly with plastic wrap.  Let the dough rise, in a warm place, until when you poke it, it "sighs."  If it springs back when you poke it, let it rise some more.  Punch down the dough.  Re-cover and let it rise again.  Shape into a loaf.  Place the loaf in the well-buttered baking pan/bowl. Cover tightly with aluminum foil, that has been buttered on the inside. Place on trivet with 2 cups of water in the pressure cooker.  Put on the lid.  Bring up to pressure and cook, with the petcock gently jiggling, for 30 minutes.  Remove from heat and allow the pressure to escape naturally.  Remove pan from cooker and put your loaf on a wire rack to cool.


Related Posts Plugin for WordPress, Blogger...