Showing posts with label Breakfast. Show all posts
Tuesday, May 2, 2017
Are you tired of tips yet? - Saving salad....
When I make a tossed salad of raw vegetables, I usually make quite a bit, and it lasts for a few days for us. Then, once in a while, it doesn't get eaten before it starts to oxidize and look rather pathetic. It would not be a bad thing to eat it, but it just doesn't look very nice, if you understand...
This morning, I chopped up some oyster mushrooms that I had gathered and part of a red onion that was in the refrigerator and mixed it together with the salad (leaf lettuce, onion, radish, sweet peppers, celery, carrots) and I stir fried it all in extra-virgin olive oil. I cooked some brown rice in my Instant Pot and served it with Soy Sauce.
It was very good. :)
Labels:
Breakfast,
Gluten-free,
Healthy Fats,
Mushrooms,
Salad,
Tips,
vegetables
Thursday, April 20, 2017
My New Favorite Breakfast...
When I was about 14 years old, my grandmother gave me a copy of An Old Fashioned Girl by Louisa May Alcott. I loved the story and it had a profound affect on my life. In the book, the main character, "Polly", preferred to eat oatmeal for breakfast. To this day (54 years later) oatmeal is still my favorite breakfast. I have cooked and served it in many different ways through the years, but always enjoy oats for breakfast.
I had some leftover fruit salad that I had made and decided to experiment. When I put together a fruit salad, I just use what I have on hand. This time, it included banana, apple, orange, mango, raisins, strawberries, grapes, blackberries and a few walnuts. I usually cut up the oranges first, as the juice from them will prevent the other fruits from oxidizing and turning brown. The banana, papaya and apple were fresh. The strawberries, grapes and blackberries I had saved in the freezer.
So, here is how I made my oatmeal this morning. In a microwave-safe bowl (large enough not to let it spill over as it cooks!) I combined 1/3 cup quick oats, a very small pinch of salt and 2/3 cup water. This I cooked on "high" in the microwave oven for about 1.5 minutes. In the meantime, I cracked an egg into a small bowl and whisked it thoroughly with a fork. As soon as the oats were done, I quickly stirred in the whisked egg. Next, I measured out 1/2 cup fruit salad and mixed that in. Oh.. my... this is so delicious!
I had some leftover fruit salad that I had made and decided to experiment. When I put together a fruit salad, I just use what I have on hand. This time, it included banana, apple, orange, mango, raisins, strawberries, grapes, blackberries and a few walnuts. I usually cut up the oranges first, as the juice from them will prevent the other fruits from oxidizing and turning brown. The banana, papaya and apple were fresh. The strawberries, grapes and blackberries I had saved in the freezer.
So, here is how I made my oatmeal this morning. In a microwave-safe bowl (large enough not to let it spill over as it cooks!) I combined 1/3 cup quick oats, a very small pinch of salt and 2/3 cup water. This I cooked on "high" in the microwave oven for about 1.5 minutes. In the meantime, I cracked an egg into a small bowl and whisked it thoroughly with a fork. As soon as the oats were done, I quickly stirred in the whisked egg. Next, I measured out 1/2 cup fruit salad and mixed that in. Oh.. my... this is so delicious!
By the way, that bowl is from my first mother's dishes, so it is probably about 70 years old. It says "Bavaria" on the bottom. That makes my oatmeal even more special to me.
This post is linked to "The Chicken Chicks Blog Hop." http://www.the-chicken-chick.com/2017/04/brinsea-ecoglow-chick-brooder-giveaway.html
Wednesday, September 28, 2016
What to do with extra sourdough....
I don't wash out the jar I keep my sourdough starter in very often, but eventually, it becomes somewhat crunchy looking. Here is what I like to do when I have extra sourdough starter. I poured off the "hootch" that was in the jar (the dark liquid that accumulates after I neglect it for several days) and then dumped the remainder into a bowl. After carefully washing the jar and lid, I added some water to it, because it was now too thick, and stirred that in and then took 1/3 cup of that and returned it to the clean jar. Next, I added 1/2 cup whole wheat flour and about 1/3 cup water and stirred that altogether in the jar, put on the lid and returned it to the refrigerator.
What was left in the bowl was about 1.5 cups of leftover sourdough starter. To that, I added:
1 egg
1/4 teaspoon salt
1/2 teaspoon baking soda
about 2 teaspoons of honey
2 Tablespoons melted butter
Then I stirred it all well. In the meantime, I had my Belgian waffle-maker heating up. When it was up to temperature, I baked the waffles by adding 1/2 cup of the batter each time. On my iron, the device is heated enough when the light on the top goes out. After adding the batter, the light will come back on and then turn off again when the waffle is done and I remove it and start another one.
Of course, this could also be made into pancakes!
These waffles are delicious and it is a good way NOT to waste that extra sourdough starter.
I serve them with butter and real maple syrup.
Saturday, October 31, 2015
Late Garden "Foraging"....
Our vegetable garden is finished for the year, but not yet cleaned up. I knew there was some kale and Swiss chard peaking above the ground. I wanted to make some stir-fry, Jasmine rice and scrambled eggs for breakfast, so I went to see what I could find. Here is what I came in with!
I fired up my little rice cooker,
Chopped up some of all the vegetables I could find,
and made the stir-fry.
Oh, my, it was good!
Monday, September 21, 2015
Today's Breakfast...
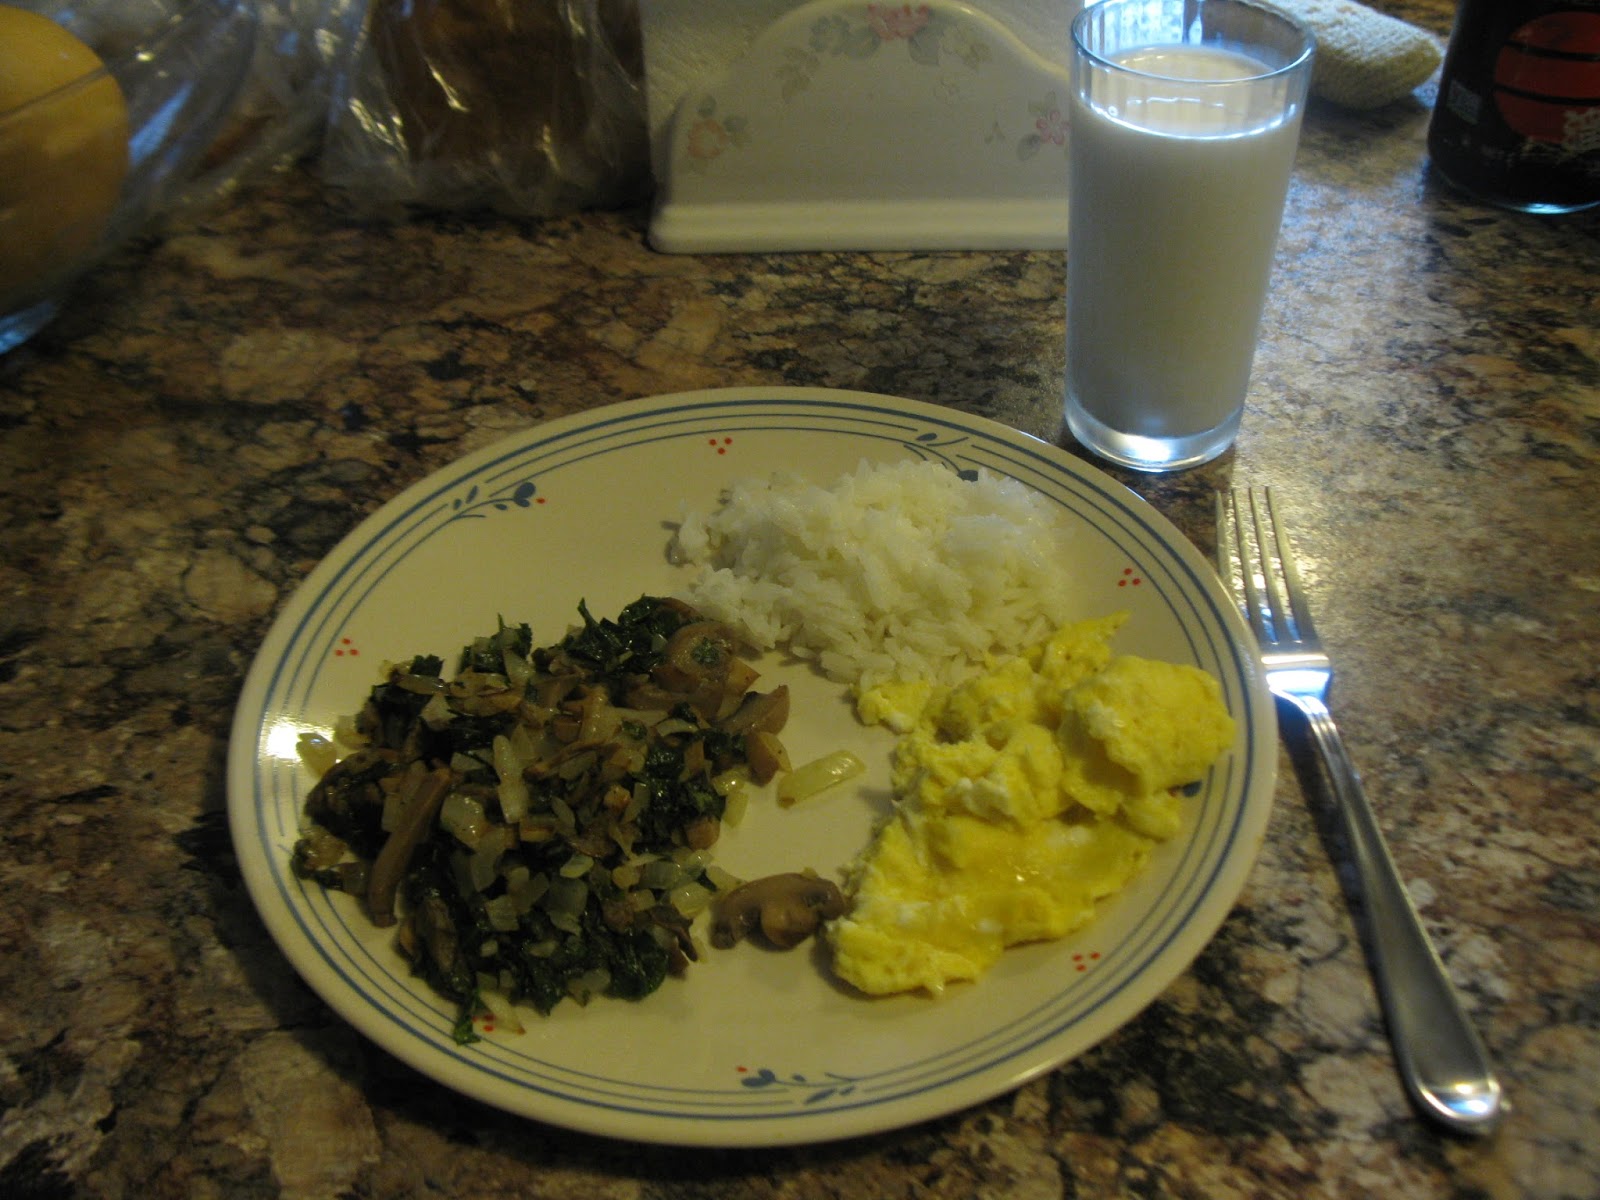
This is one of our favorite breakfast meals. Fresh, raw, cold goat milk, scrambled eggs from our chickens, a bit of Jasmine rice, and some stir-fried vegetables... in this case, fresh kale from the garden, chopped onion, minced garlic, fresh basil and mushrooms. Salt and pepper. Also, we use a little Tamari. Oh, it's so good.
Thursday, July 30, 2015
Breakfast musings.... bread & milk
Go into any grocery store in the USA and you will find a dizzying array of "cold cereal" choices. Breakfast - made easy! And many of them we find to be quite appealing, i.e. our beloved Cherrios, Fruit Loops, and even Shredded Wheat! Ah.... no cooking, very little cleanup, kids and hubby are happy! So, what's the downside if there is one (or more?) Well, first of all, they are expensive. Very expensive. At our local Walmart, an 18 ounce box of Cherrios is $3.52 today. 27 ounces of Fruit Loops is $3.98. 15 ounces of Shredded Wheat is $2.48, and you can feel so virtuous eating this "healthy" choice, right? Sorry. It's not healthy. Read on below.
" Cold breakfast cereals are produced by a process called extrusion. Grains are mixed with water, processed into a slurry and placed in a machine called an extruder. The grains are forced out of a tiny hole at high temperature and pressure, which shapes them into little o’s or flakes or shreds. Individual grains passed through the extruder expand to produce puffed wheat, oats and rice. These products are then subjected to sprays that give a coating of oil and sugar to seal off the cereal from the ravages of milk and to give it crunch.
In his book Fighting the Food Giants, biochemist Paul Stitt describes the extrusion process, which treats the grains with very high heat and pressure, and notes that the processing destroys much of their nutrients. It denatures the fatty acids; it even destroys the synthetic vitamins that are added at the end of the process. The amino acid lysine, a crucial nutrient, is especially damaged by the extrusion process."
Well, now that I've shot down your delusions about breakfast cereal.... (sigh), what can we do? I mean, look, most of us not only are moms or dads, but we work full-time too. Who has time to cook breakfast every morning? I have an idea for you. You may never have heard of this. It's called "Bread and Milk."
What in the world is "Bread and Milk?" Ah... I thought you'd never ask. Here is how you make it: Get a bowl, a spoon, some of your favorite bread, some milk of your choice, honey, raisins or other sweetening or chopped up fresh fruit. Break the bread into little pieces into your bowl. Drizzle on a little honey, and top with cold milk. That's it! I use homemade bread because that's what I have, but any bread is good and if you want a little more crunch, then toast it first!
I not only love this for breakfast, but sometimes have it in place of other meals. It's always available, quick and comforting. I know... the kids are going to miss their extruded, overheated, denatured grains, but when did we, as parents, start making our decisions based upon what the children want. Look, they don't want to brush their teeth, and they probably would choose to eat candy and drink soda for 3 meals a day. Nope. Not gonna happen on my watch!
When I was a young girl, whenever I would get sick, like with a cold, or mumps, or measles or Rubella... (yep, I had all of those) my sweet Daddy would make me something called "milk toast." He would toast a slice of bread, heat some milk with a little butter and pepper and salt in a saucepan and pour it over the toast on a plate. That was very appealing to me and so sweet of him. I miss my Daddy very much. So, there's another variety of bread and milk.
I am certain that you, my Gentle Readers, can come up with lots of other similar ideas.
According to the Weston A. Price Foundation's website:
" Cold breakfast cereals are produced by a process called extrusion. Grains are mixed with water, processed into a slurry and placed in a machine called an extruder. The grains are forced out of a tiny hole at high temperature and pressure, which shapes them into little o’s or flakes or shreds. Individual grains passed through the extruder expand to produce puffed wheat, oats and rice. These products are then subjected to sprays that give a coating of oil and sugar to seal off the cereal from the ravages of milk and to give it crunch.
In his book Fighting the Food Giants, biochemist Paul Stitt describes the extrusion process, which treats the grains with very high heat and pressure, and notes that the processing destroys much of their nutrients. It denatures the fatty acids; it even destroys the synthetic vitamins that are added at the end of the process. The amino acid lysine, a crucial nutrient, is especially damaged by the extrusion process."
Well, now that I've shot down your delusions about breakfast cereal.... (sigh), what can we do? I mean, look, most of us not only are moms or dads, but we work full-time too. Who has time to cook breakfast every morning? I have an idea for you. You may never have heard of this. It's called "Bread and Milk."
What in the world is "Bread and Milk?" Ah... I thought you'd never ask. Here is how you make it: Get a bowl, a spoon, some of your favorite bread, some milk of your choice, honey, raisins or other sweetening or chopped up fresh fruit. Break the bread into little pieces into your bowl. Drizzle on a little honey, and top with cold milk. That's it! I use homemade bread because that's what I have, but any bread is good and if you want a little more crunch, then toast it first!
I not only love this for breakfast, but sometimes have it in place of other meals. It's always available, quick and comforting. I know... the kids are going to miss their extruded, overheated, denatured grains, but when did we, as parents, start making our decisions based upon what the children want. Look, they don't want to brush their teeth, and they probably would choose to eat candy and drink soda for 3 meals a day. Nope. Not gonna happen on my watch!
When I was a young girl, whenever I would get sick, like with a cold, or mumps, or measles or Rubella... (yep, I had all of those) my sweet Daddy would make me something called "milk toast." He would toast a slice of bread, heat some milk with a little butter and pepper and salt in a saucepan and pour it over the toast on a plate. That was very appealing to me and so sweet of him. I miss my Daddy very much. So, there's another variety of bread and milk.
I am certain that you, my Gentle Readers, can come up with lots of other similar ideas.
Saturday, July 18, 2015
Raisin Bread!
Have you ever made raisin bread? Well, if not, and you like to make bread, then you are all set.... assuming you also like raisins. ;)
Just make whatever bread dough you prefer. This batch is about 1/4 whole wheat and the rest of the flour is King Arthur's unbleached bread flour - my favorite.
When the bread dough is ready to put in the pans, THEN is the time to add the raisins and cinnamon. Just roll your loaf of bread dough into a nice rectangle, sprinkle with raisins and a little cinnamon and roll it up tightly and form a loaf. Very easy.
Just make whatever bread dough you prefer. This batch is about 1/4 whole wheat and the rest of the flour is King Arthur's unbleached bread flour - my favorite.
When the bread dough is ready to put in the pans, THEN is the time to add the raisins and cinnamon. Just roll your loaf of bread dough into a nice rectangle, sprinkle with raisins and a little cinnamon and roll it up tightly and form a loaf. Very easy.
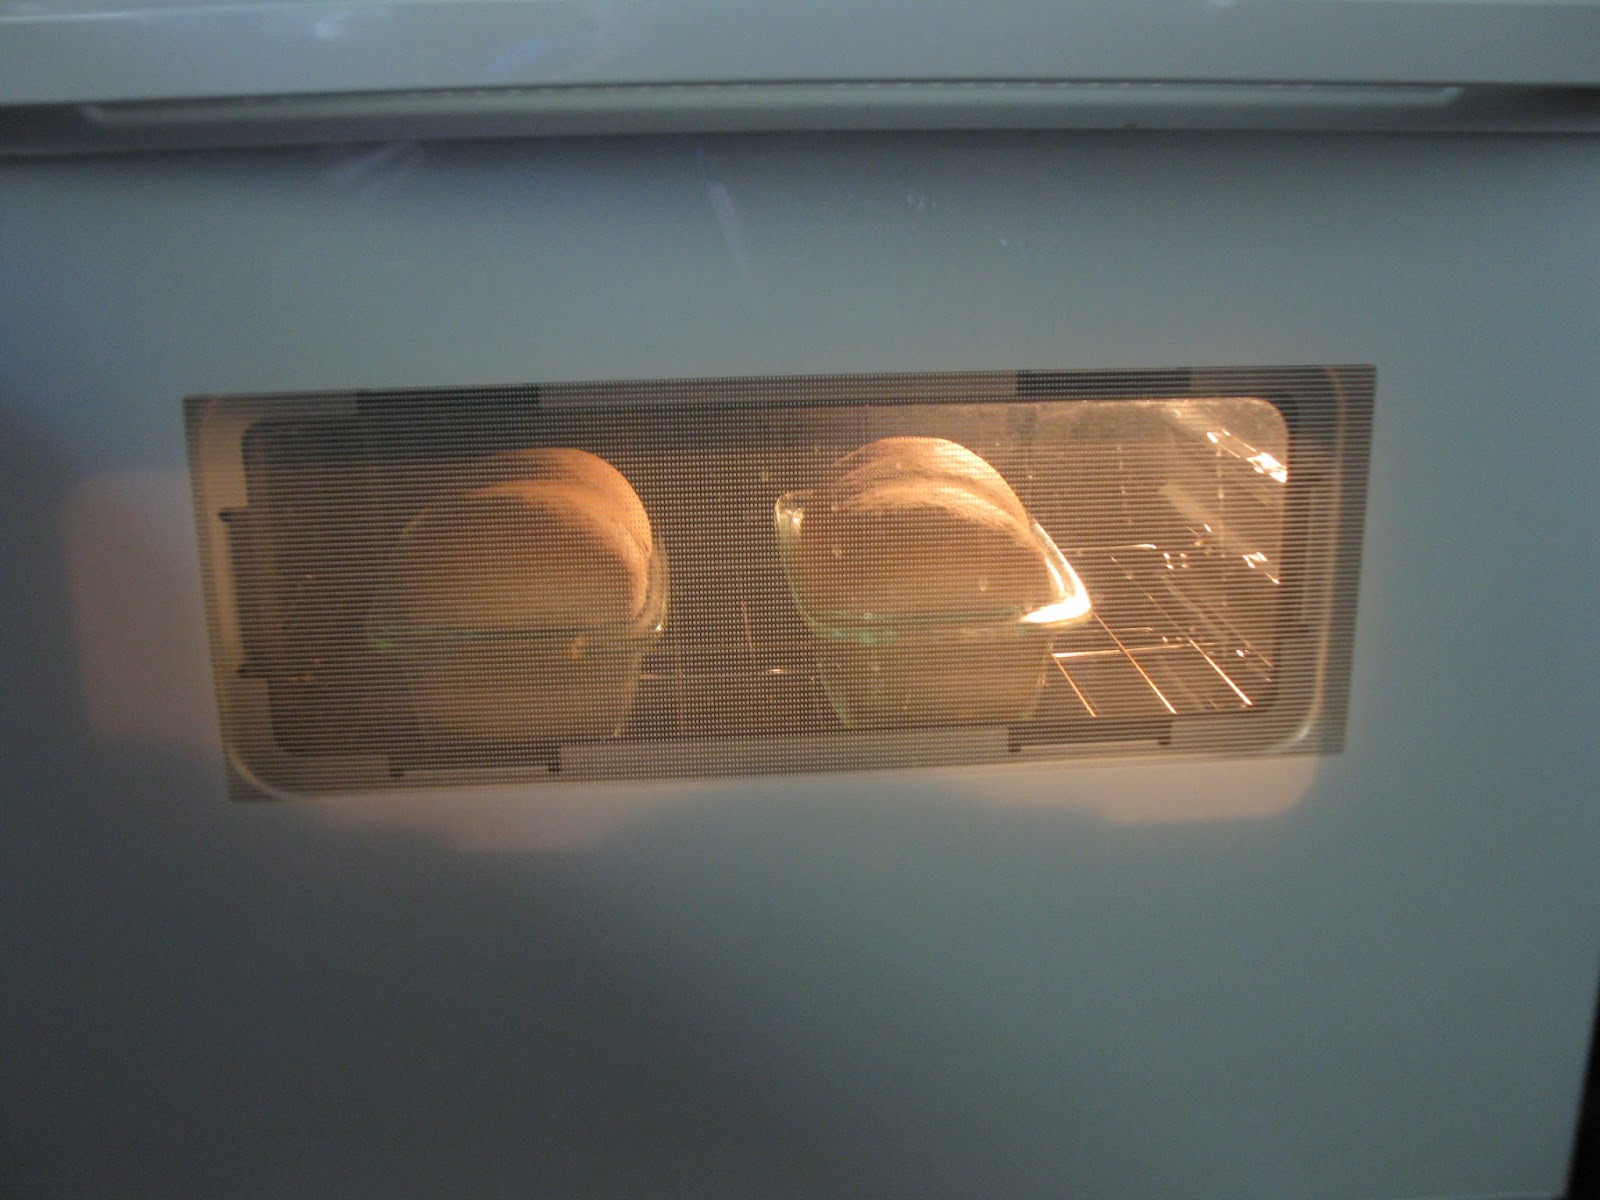
Here it is baking in the oven.
It just came out of the oven and I brushed the top of the crust with butter.
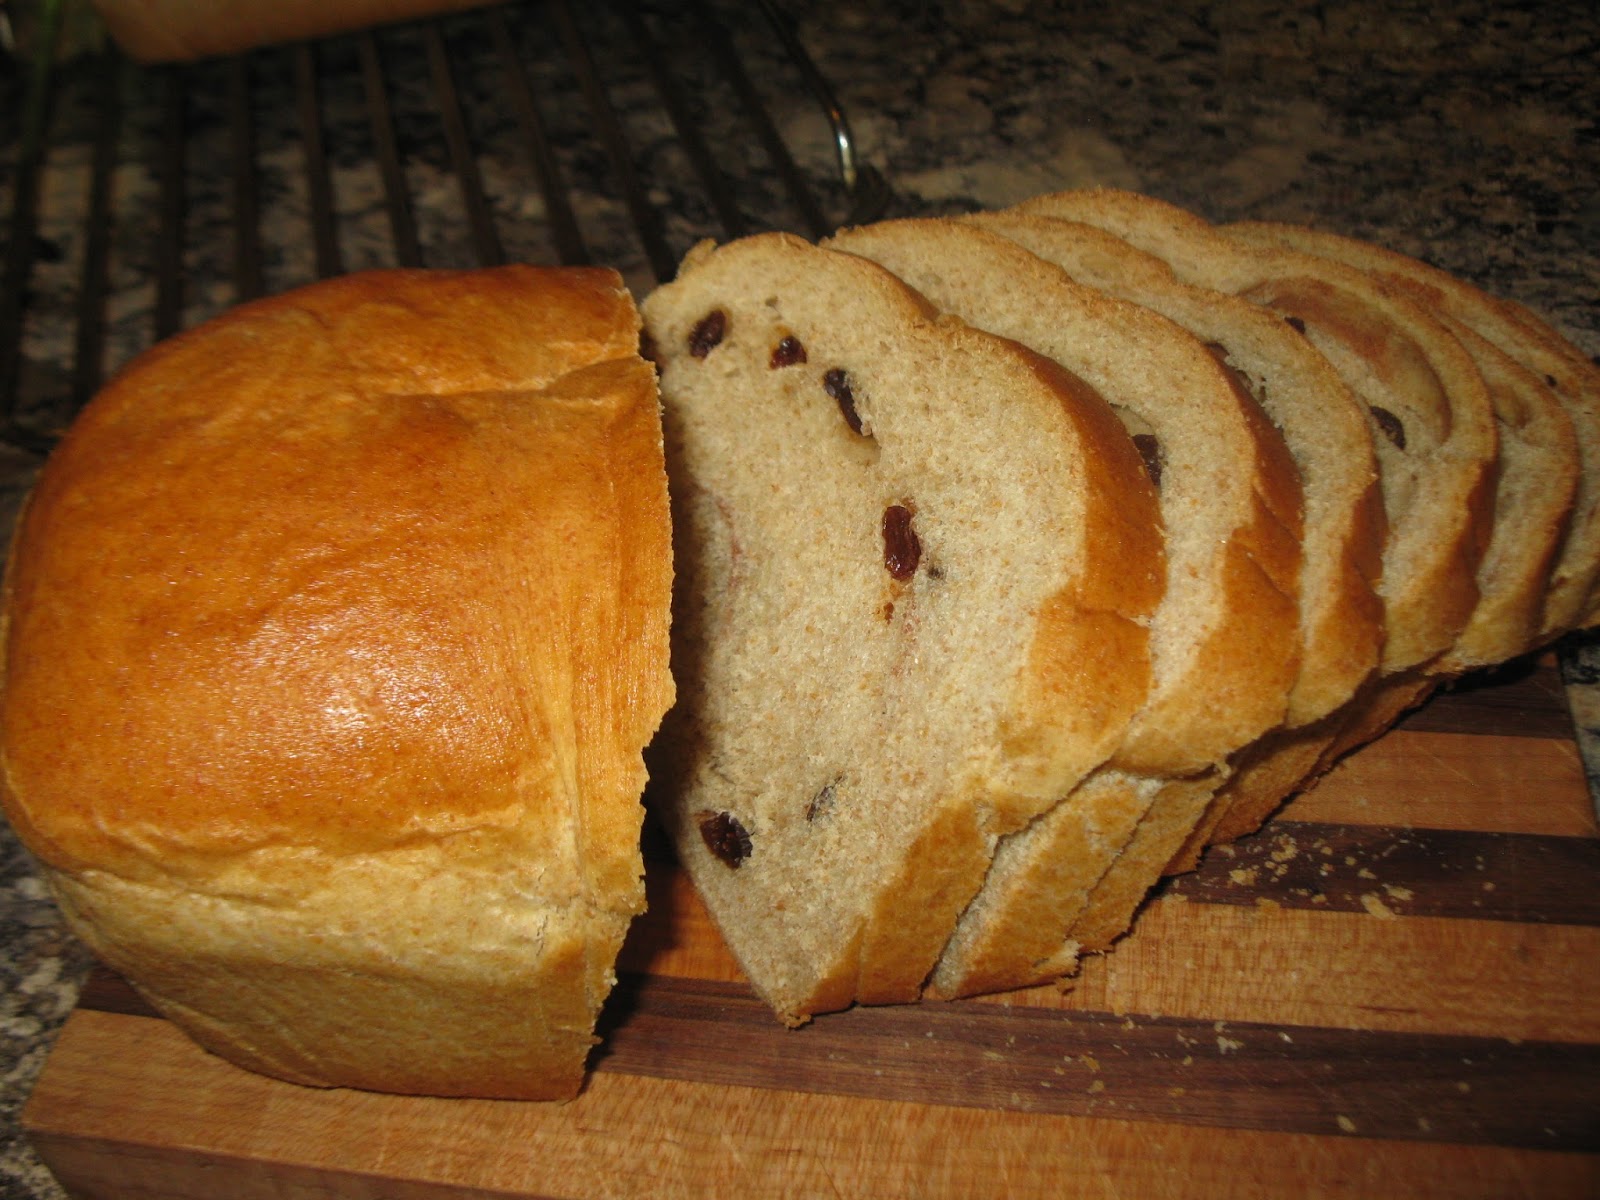
Here is what it looks like sliced.
Now, can't you just smell the goodness? It makes fabulous toast for breakfast too, slathered with nice butter. Oh.... yum.
Unfortunately (?) I made this for a pitch-in lunch after Church tomorrow, so we have to wait.
Friday, April 3, 2015
Biscuits, again, with the new flour...
My last post was about substituting King Arthur Whole Wheat Pasty Flour for unbleached flour in my cornbread. I was able to go to the bulk food store yesterday and buy some more of this flour. I used it to make some baking powder biscuits for supper last night. Success!! The biscuits were tender and light and delicious. Not only that, but I just heated one up that was left over and it is still yummy! Usually, the next day, biscuits are nothing to write home about.
Here is the recipe I used:
BISCUITS - preheat oven to 500 F.
1. Sift about 2 cups of King Arthur Whole Wheat Pastry flour onto your work surface.
2. Gently (I use a long straight spatula) lift up the flour into a measuring cup. Measure 2 cups of the sifted flour into your sifter (I use a wire strainer for this.)
3. To the flour, add 3/4 teaspoon sea salt and 1 Tablespoon aluminum-free baking powder. Sift all the dry ingredients into a bowl.
4. Grate 1/3 cup COLD butter, a little at a time, into the flour mixture. Mix it in lightly with your fingers as you go.
5. Pour in 3/4 cup cold whole milk or half-and-half.
6. Stir until moist. You might have to add a tiny bit more milk or a tiny bit more sifted flour.
7. Turn dough onto floured work surface and knead 3 strokes.
8. Roll out 3/4 inch thick and cut with a biscuit cutter, placing the biscuits upside-down on your metal baking tray.
9. Bake at 500F for 8 minutes.
That's it!
Please let me know what you think if you make these. I love them with butter and honey.
Friday, June 13, 2014
For Lance - Buttermilk whole wheat pancakes!
Whole Wheat Buttermilk Pancakes
Beat together in a small bowl:
1 and 1/8 cup cultured buttermilk
2 eggs
2 Tablespoons melted butter
Mix together well in a larger bowl:
3/4 cup whole wheat flour
1/4 cup all purpose flour
1 teaspoon salt
1 teaspoon baking soda
Add the wet ingredients to the flour mixture and stir with a fork just until everything is wet. Do NOT try to get the lumps out!
Heat a griddle or frying pan on medium heat.
If your griddle or pan is not non-stick, spray with pan spray.
Scoop up the batter with a 1/4 cup measuring cup.
Pour the batter on the pan and spread it out a little.
When the top has bubbles, the edges are looking dry, and the bottom is browning nicely, carefully flip the pancakes over and cook the other side.
Check to see if they are done, once or twice, so you'll know what they look like when cooked all the way through.
I made 4 times this much at your house, so without me and Grandpa there, you might want to just make 3 times as much for your family.
It takes a little practice, but even if they get all buggered up and look funny, it won't affect the taste.
Please let me know how they turn out! I love you so much love and miss all of you tons!!
Wednesday, November 20, 2013
Homemade pancake syrup
This is not Log Cabin syrup. Our daughter and her family are living with us currently, and I want to share with you how she makes pancake syrup. Indeed, it is healthier, in some ways, to eat REAL maple syrup, but it can also be too expensive for many of us. Long ago, I taught her how to make pancake syrup, but she has improved the process. Read the recipe carefully. The success is in doing it properly.
Homemade Pancake Syrup
1 cup white sugar
1 cup brown sugar
1 cup water
Combine all of the ingredients in a saucepan with a heavy bottom. DO NOT STIR...EVER.
Bring it to a boil, reduce heat and boil for 5 minutes.
Allow to cool. Pour into serving bottle.
It will sit at room temperature and NOT crystallize. The secret is in not stirring it while it is cooking.
No HFCS, no other scary things. Just "real" sugar and some ambient molasses in the brown sugar.
Use sparingly and enjoy!
Saturday, October 12, 2013
The best Granola I've ever made!
I love granola. Well, I love GOOD granola. It's actually been quite a number of years since I made any. I ran across a recipe the other day, changed it up to suit my taste and what I had on hand, and here it is. It is SO good!
Best Granola Recipe
5 cups old-fashioned rolled oats
3 1/2 cups almonds, coarsely chopped
3/4 cup unhulled, untoasted sesame seeds
1/2 cup Sucanat
2 teaspoons ground cinnamon
1 teaspoon dried ground ginger
1 teaspoon Realsalt
3/4 cup unsweetened applesauce
1/3 cup real maple syrup
1/4 cup honey
2 Tablespoons virgin coconut oil
Set the oven to 300 F. Get a really big bowl and combine all the the dry ingredients. Then, put the wet ingredients in a saucepan and heat that, stirring, until it is good and hot, not boiling. Pour the liquid over the dry mixture and combine thoroughly.
You will need two big baking trays with the little sides. Grease them with coconut oil. Divide the mixture between the two. Bake, stirring every 10 minutes until the granola is getting brown. Mine took about 45 minutes, but keep an eye on it. You don't want it to burn!
Remove from oven. Cool thoroughly. Store in an air-tight container. It should keep for a few weeks.
Monday, August 5, 2013
Guess what?
Our little chickens have grown up and started laying eggs just over a week ago! So far, we've had 29 eggs. New layers make smallish eggs, but last night we got a big one! Check out the color that the yolks make for our scrambled eggs! That is because they are in a chicken tractor and my husband moves it to fresh grass each morning. We've also been giving them some of the extras from the garden and they love watermelon rinds, too! I am SO happy!
My husband started building the chicken house today. He is a very clever man.
Thursday, July 4, 2013
Eggplant for breakfast...
I spent a little time picking things for a salad in the vegetable garden yesterday. AND, I found two sweet little eggplant (s)!! I texted my daughter and asked her if she thought eggplant would be good in a salad. No, we decided. Cut up, they oxidize quickly and turn an ugly, mottled brown. Ewww... but since they were shiny and ready to pick, I picked them. She suggested I fry them in butter with onion and salt and pepper.
So, that's what I did. I thinly sliced 1/2 of a medium onion, peeled an eggplant and cut it into thin little quarter-slices, sauteed all of it in a couple Tablespoons of butter (eggplant will absorb a lot of fat) until it was getting a little brown. Then I added Realsalt and freshly ground black pepper.
Then I ate it for breakfast! You can also see my glass of goat milk and a small glass of milk kefir there.
Ahhh... Perfect!
Monday, June 24, 2013
Egg Storage...
I have read about several different methods of storing fresh eggs on the internet. I have tried a few of them and mostly, the results were less than stellar. I have found a method that works very well for me. This would be an excellent way to save some money on your grocery bill. You can take advantage of good sales on eggs, and if you happen to have chickens, when they are laying more than you can use, you could save some of them!
On February 20th of this year, I bought some eggs at a very low price and here is what I did:
Dip each egg into mineral oil. Place it back in the egg carton. Set the carton(s) on a shelf in a cool room. My storage room never gets above 70 degrees or below 40 degrees F. Mark the date on your calendar, and each month, turn the egg cartons over.
It has been 4 months now. The eggs are fine and taste delicious!
When they were at least half done, I flipped them upside-down with a metal spatula:
On February 20th of this year, I bought some eggs at a very low price and here is what I did:
Dip each egg into mineral oil. Place it back in the egg carton. Set the carton(s) on a shelf in a cool room. My storage room never gets above 70 degrees or below 40 degrees F. Mark the date on your calendar, and each month, turn the egg cartons over.
It has been 4 months now. The eggs are fine and taste delicious!
Here are two eggs that I cracked into a bowl this morning:
I heated my nice Griswold cast iron skillet until it was fairly hot, added a pat of butter, spread that around, sprinkled in salt and pepper and then carefully poured in the eggs:
When they were at least half done, I flipped them upside-down with a metal spatula:
When the top was done as I like it, they went onto a plate:
Very yummy. I will keep checking them each month. So far, so good, and this will really make it easy for me to save eggs. It's very cheap to do, too. Mineral oil can be purchased at any pharmacy.
Please let me know if you try this and what you think!
Monday, January 21, 2013
Oats.... again :)
If you've read my blog for very long, you might recall that I LOVE oatmeal. When I was a young teen, my sweet grandmother gave me a copy of An Old-Fashioned Girl, by Louisa May Alcott.
The main character, "Fannie," is a wonderful young girl and I was fascinated by her. She ate oatmeal for breakfast every day. That is why I learned to love oatmeal. :)
Here is my "new" way to make it:
Real Oatmeal - 2 servings
1 cut oat groats (that is just the oat grain, not rolled or steel cut or anything.)
1 Tablespoon whole wheat flour
1 Tablespoon live whey
nice clean water
pinch of salt
Rinse your oats and place them in a stainless or glass bowl, covered with at least 2 inches of water. Add the whole wheat flour and whey. Stir together, cover and let it soak for 24 hours.
Drain in a colander and rinse well.
Put the oats, the salt and 2 cups of water in a crock pot and let it cook on low all night.
In the morning it will be ready to eat. It's very tender and nice.
I eat mine with butter and a little maple syrup.
I think you'd like it too if you enjoy oatmeal!
Leftovers can be eaten on subsequent days, but also make a nice addition to meatloaf or bread.
Wednesday, December 5, 2012
A Healthy Dry Cereal !
Please go over to THIS blog and check out the recipe for soaked and dried breakfast cereal. I ran across it yesterday. One thing I've missed, since learning that "dried cereal" is not a healthy food, is not only the ease of having it for breakfast, but the crunchy goodness too.
I just completed making a batch of this cereal and it is wonderful. I am delighted and a bit surprised! The recipe originates with Sarah, the Healthy Home Economist. I have tweaked it for what I have on hand to use. Karey mentioned that she likes to use a 7 grain mix. I didn't have that, so instead, I used the 3 grains I do have on hand. It tastes just right. Here is the recipe I used, with some pictures!
2 cups fresh goat milk and 2 cups milk kefir (Karey has used cultured buttermilk instead.)
2 pounds of freshly ground flour (1/3 wheat, 1/3 oat groats and 1/3 spelt)
I weighed the flour, but if you don't have a good scale, it should be about 8 cups total.
Combine those ingredients, and stir together well in a large glass mixing bowl.
Cover tightly with plastic wrap and allow to soak at room temperature for 24 hours.
24 hours later, add:
1 C extra-virgin coconut oil
1 C pure maple syrup (grade B is best)
1 1/2 teaspoon sea salt
3 teaspoons baking soda
1 1/2 teaspoon pure vanilla extract
1 Tablespoon ground cinnamon
Mix all of this together thoroughly. It will then look like this:
Grease two 9 x 13 glass baking pans with the coconut oil, and spread the batter into the pans.
Preheat your oven to 350 F and bake the dough until when you insert a toothpick in the center, it comes out clean. In my oven, that took 1 hour. I suggest you start checking it after 40 minutes or so. You don't want to bake it too much.
Here is what it looked like right out of the oven:
When it is completely cool, break it into small pieces:
I have an Excalibur food dehydrator, and this amount filled 6 trays lined with the fruit-roll sheets. I dried it at 150 F. Karey says you can do it at 200 F in your oven with the door cracked open also.
Here is some of the dried cereal in a little bowl. I have to tell you, for my taste, it is Just Right. Lightly sweet and nicely crunchy without being hard to bite.
Next morning update, it does NOT get soggy in milk!
This post is linked to Simple Lives Thursday #124
I just completed making a batch of this cereal and it is wonderful. I am delighted and a bit surprised! The recipe originates with Sarah, the Healthy Home Economist. I have tweaked it for what I have on hand to use. Karey mentioned that she likes to use a 7 grain mix. I didn't have that, so instead, I used the 3 grains I do have on hand. It tastes just right. Here is the recipe I used, with some pictures!
HEALTHY COLD CEREAL
2 pounds of freshly ground flour (1/3 wheat, 1/3 oat groats and 1/3 spelt)
I weighed the flour, but if you don't have a good scale, it should be about 8 cups total.
Combine those ingredients, and stir together well in a large glass mixing bowl.
Cover tightly with plastic wrap and allow to soak at room temperature for 24 hours.
24 hours later, add:
1 C extra-virgin coconut oil
1 C pure maple syrup (grade B is best)
1 1/2 teaspoon sea salt
3 teaspoons baking soda
1 1/2 teaspoon pure vanilla extract
1 Tablespoon ground cinnamon
Mix all of this together thoroughly. It will then look like this:
Grease two 9 x 13 glass baking pans with the coconut oil, and spread the batter into the pans.
Preheat your oven to 350 F and bake the dough until when you insert a toothpick in the center, it comes out clean. In my oven, that took 1 hour. I suggest you start checking it after 40 minutes or so. You don't want to bake it too much.
Here is what it looked like right out of the oven:
When it is completely cool, break it into small pieces:
I have an Excalibur food dehydrator, and this amount filled 6 trays lined with the fruit-roll sheets. I dried it at 150 F. Karey says you can do it at 200 F in your oven with the door cracked open also.
Here is some of the dried cereal in a little bowl. I have to tell you, for my taste, it is Just Right. Lightly sweet and nicely crunchy without being hard to bite.
The whole point is that if you want to easily absorb and digest whole grains, they need to be either sprouted or properly soaked. This deactivates "anti-nutrients" such as phytic acid, that prevent the grain from sprouting before being introduced to "soaking" with water. Phytic acid actually interferes with mineral absorption. If you would like to know more about this, please read the following book:
Nourishing Traditions by Sally Fallon

This post is linked to Simple Lives Thursday #124
Monday, November 19, 2012
Bone Broth...
Often, in movies that are set in days gone by, if someone is an invalid and bedridden, a caregiver can be seen carefully feeding broth to the invalid. For instance, in "Little Women," Jo says to Beth, who is very ill, "Drink up all this good broth."
I never understood that until just the last year or so. It made no sense to me why some watery soup would be considered nourishment. Now I understand. In the past, family cooks understood the importance of broth made properly with bones. Not only are properly prepared stocks and broths delicious and versatile additions to soups, stews and sauces, they have important health benefits.
In Nourishing Traditions by Sally Fallon, there is an excellent article on the benefits of "Stocks." I will not quote the whole article here, but will just list a few things that are mentioned.
1. "...the use of homemade meat broths to produce nourishing and flavorful soups and sauces has almost completely disappeared from the American culinary tradition."
2." Properly prepared, meat stocks are extremely nutritious, containing the minerals of bone, cartilage, marrow..."
3. "Acidic wine or vinegar added during cooking helps to draw minerals, particularly calcium, magnesium and potassium, into the broth."
4. "...stock is also of great value because it supplies hydrophilic colloids to the diet... Gelatin acts first and foremost as an aid to digestion and has been used successfully in the treatment of many initestinal disorders, including hyperacidity, colitis and Crohn's disease. Although gelatin is by no means a complete protein... it acts as a protein sparer, allowing the body to more fully utilize the complete proteins that are taken in. Gelatin rich broths are a must for those who cannot afford large amounts of meat in their diets."
The article goes on to explain a number of other health benefits of properly prepared bone broth. So, how can it be "properly" prepared? Here is how I do it. Do you recall that last week I ended up with the bones, etc. of 6 roosters that we butchered? I stuffed all of the bones into my 2 gallon soup pot, covered them with filtered water and added 1/2 cup of raw apple cider vinegar. I simmered it for about 24 hours, let it cool, strained it through a cotton cloth and refrigerated it.
I never understood that until just the last year or so. It made no sense to me why some watery soup would be considered nourishment. Now I understand. In the past, family cooks understood the importance of broth made properly with bones. Not only are properly prepared stocks and broths delicious and versatile additions to soups, stews and sauces, they have important health benefits.
In Nourishing Traditions by Sally Fallon, there is an excellent article on the benefits of "Stocks." I will not quote the whole article here, but will just list a few things that are mentioned.
1. "...the use of homemade meat broths to produce nourishing and flavorful soups and sauces has almost completely disappeared from the American culinary tradition."
2." Properly prepared, meat stocks are extremely nutritious, containing the minerals of bone, cartilage, marrow..."
3. "Acidic wine or vinegar added during cooking helps to draw minerals, particularly calcium, magnesium and potassium, into the broth."
4. "...stock is also of great value because it supplies hydrophilic colloids to the diet... Gelatin acts first and foremost as an aid to digestion and has been used successfully in the treatment of many initestinal disorders, including hyperacidity, colitis and Crohn's disease. Although gelatin is by no means a complete protein... it acts as a protein sparer, allowing the body to more fully utilize the complete proteins that are taken in. Gelatin rich broths are a must for those who cannot afford large amounts of meat in their diets."
The article goes on to explain a number of other health benefits of properly prepared bone broth. So, how can it be "properly" prepared? Here is how I do it. Do you recall that last week I ended up with the bones, etc. of 6 roosters that we butchered? I stuffed all of the bones into my 2 gallon soup pot, covered them with filtered water and added 1/2 cup of raw apple cider vinegar. I simmered it for about 24 hours, let it cool, strained it through a cotton cloth and refrigerated it.
Here is a picture of what it looked like when I took it out of the refrigerator:
You can see the lovely gelatinous consistency of it, as I am ladling it there.
We drank some with our breakfast, some is in the fridge and I pressure canned 3 quarts for later. Sometimes I freeze broth and stocks, but not this time. Here is a picture of this morning's breakfast... warm, salted chicken bone broth, hard boiled eggs (still warm - so nice!), goat milk and goat milk kefir. We both used Realsalt in our broth, to taste. If you are not familiar with unrefined sea salt, please go to that link and see how good for you it can be!
Yes, I do pull back the table cloth when we eat. Sigh... ;)
This post is linked to the Homemaker Hop #5
Tuesday, September 25, 2012
Easy Granola
This nice Granola is cooked in a crock pot instead of the oven!
Easy Granola
5 cups Old-Fashioned rolled oats
1 cup coarsely chopped walnuts
1/2 cup sunflower seed kernels
1/2 cup coarsely chopped pecans
2 teaspoons ground cinnamon (or more, if you prefer)
1/2 teaspoon sea salt
1/2 cup extra-virgin coconut oil
1/2 cup honey
2 teaspoons pure vanilla extract
In a crock pot, mix together the oats, nuts, seeds, cinnamon and salt.
Gently heat together the oil, honey and vanilla until combined. Stir that into the dry mix in the crock pot.
Set the crock pot on "high" and put on the lid, using a wooden spoon to keep the lid partially open. Use this spoon to stir the contents occasionally. After the first 2 hours, stir quite often and be sure to get everything down on the bottom and in the "corners" stirred up well so it won't burn.
Cook for 3 hours.
Spread on a tray or the counter to cool.
Store in an airtight container. If you want to keep it longer than a week, refrigerate it.
Easy Granola
5 cups Old-Fashioned rolled oats
1 cup coarsely chopped walnuts
1/2 cup sunflower seed kernels
1/2 cup coarsely chopped pecans
2 teaspoons ground cinnamon (or more, if you prefer)
1/2 teaspoon sea salt
1/2 cup extra-virgin coconut oil
1/2 cup honey
2 teaspoons pure vanilla extract
In a crock pot, mix together the oats, nuts, seeds, cinnamon and salt.
Gently heat together the oil, honey and vanilla until combined. Stir that into the dry mix in the crock pot.
Set the crock pot on "high" and put on the lid, using a wooden spoon to keep the lid partially open. Use this spoon to stir the contents occasionally. After the first 2 hours, stir quite often and be sure to get everything down on the bottom and in the "corners" stirred up well so it won't burn.
Cook for 3 hours.
Spread on a tray or the counter to cool.
Store in an airtight container. If you want to keep it longer than a week, refrigerate it.
Tuesday, August 14, 2012
French Toast Report
Remember yesterday's post about the white bread?? Oh my..... this morning I made French toast for breakfast. It was perfect. The bread is tender... just right for making French toast. I have sliced and frozen the rest of it just for this.
Do you see the little glob of scrambled eggs there? That is what was leftover from the egg mixture I dip the bread slices in. When I was done (I eat 1 piece, DH eats 2) I just went ahead and cooked that and ate it with my French toast.
I didn't take a picture with the butter and real Maple Syrup, so use your imagination.
Here is roughly how I do it:
French Toast
For 3 - 4 slices of bread, use 2 large eggs and about 1/4 cup milk. I put that in a square baking dish so that I can easily soak the bread in it. Whisk that together and then add just a pinch of salt, 1 teaspoon of sugar and 1/4 teaspoon ground nutmeg (I use freshly ground!) and stir well.
Then, one or two at a time, lay the bread slices in the mixture. Let them soak for a bit and then turn them over. In the meantime, be heating up your griddle on medium/low heat. Spray or grease the griddle and then put the soaked bread slices on it and cook until one side is brown and using a spatula, turn them over. When the other sides are brown, they are done!
Serve with REAL butter and maple syrup, jam, apple butter, or whatever you like. :) These may be frozen and then re-heated in a toaster or oven or on a griddle.
Monday, August 13, 2012
Sometimes I make White Bread...
I've been wanting to make some French toast. In my opinion, the very Best bread for French toast is homemade white bread. I ran across this recipe today and decided to give it a try. The only things I would add to her instructions are that if you use raw milk (I do) it needs to be scalded first, and... use at least 2 teaspoons salt. I don't think 3 teaspoons would have been too much. Also, on the second kneading, I only did it for 3 minutes, not the 10 suggested. Her recipe is very easy and as you can see, the results are spectacular! Thank you, Stacy!
Subscribe to:
Posts (Atom)