I would like to share with you something my daughter e-mailed to me today. She has been brewing water kefir and making kefir soda for quite a while now, and it's been a real blessing to her and her family. Recently, she was having troubles with it... Here, read what she says:
"Remember how I was having trouble with my water kefir grains not growing? Well, I tried tap water, letting the chlorine dissipate first. That didn’t work. I had read that reverse osmosis water is too alkaline for the grains and will eventually kill them. So as a last resort I tried our soft water, and it works! They are growing like crazy again. I had to murder about 2/3 of the grains this morning. Also, because of the temperature drop of around 10 degrees in the house, it takes a lot longer for the entire process. I have to wait until I don’t see any of the Sucanat left in the jar, which takes at least 36 hours, maybe longer. Plus, to make the kefir soda it takes longer, over 12 hours. "
I have realized, over time, that there are so many variables in brewing kefir of both types (milk and water) that it is more of an art than a science. You need to figure out what works for YOU and what pleases you. There are no exact formulas that you have to follow!
Friday, November 12, 2010


Tuesday, November 9, 2010
Saving the Beans

I was in the storage room yesterday and noticed a 10 pound bag of pinto beans that I had bought well over a year ago and had not used. Dried beans, if they are left long enough, get too dry and no matter how long you cook or soak them, they never cook up nice and mushy. I think maybe the seeds actually die, but I don't know that as a fact.
I didn't want to have to throw away the beans, so I soaked them in warm water with some lemon juice for about 10 hours and then I canned them and got 18 quarts. That will be very handy when I am in a hurry and want to whip up some burritos, or need them for quick soup.
I did it like this:
Sort and rinse the dry beans.
Soak the beans at least overnight or up to 48 hours.
Drain and rinse thoroughly.
Cover with water and boil for 30 minutes.
Fill clean quart canning jars to within 1 inch of top.
Adjust caps.
Process 90 minutes in pressure canner at 11 pounds pressure. (Please consult a good canning book for more detailed instructions.)
Tooth Soap
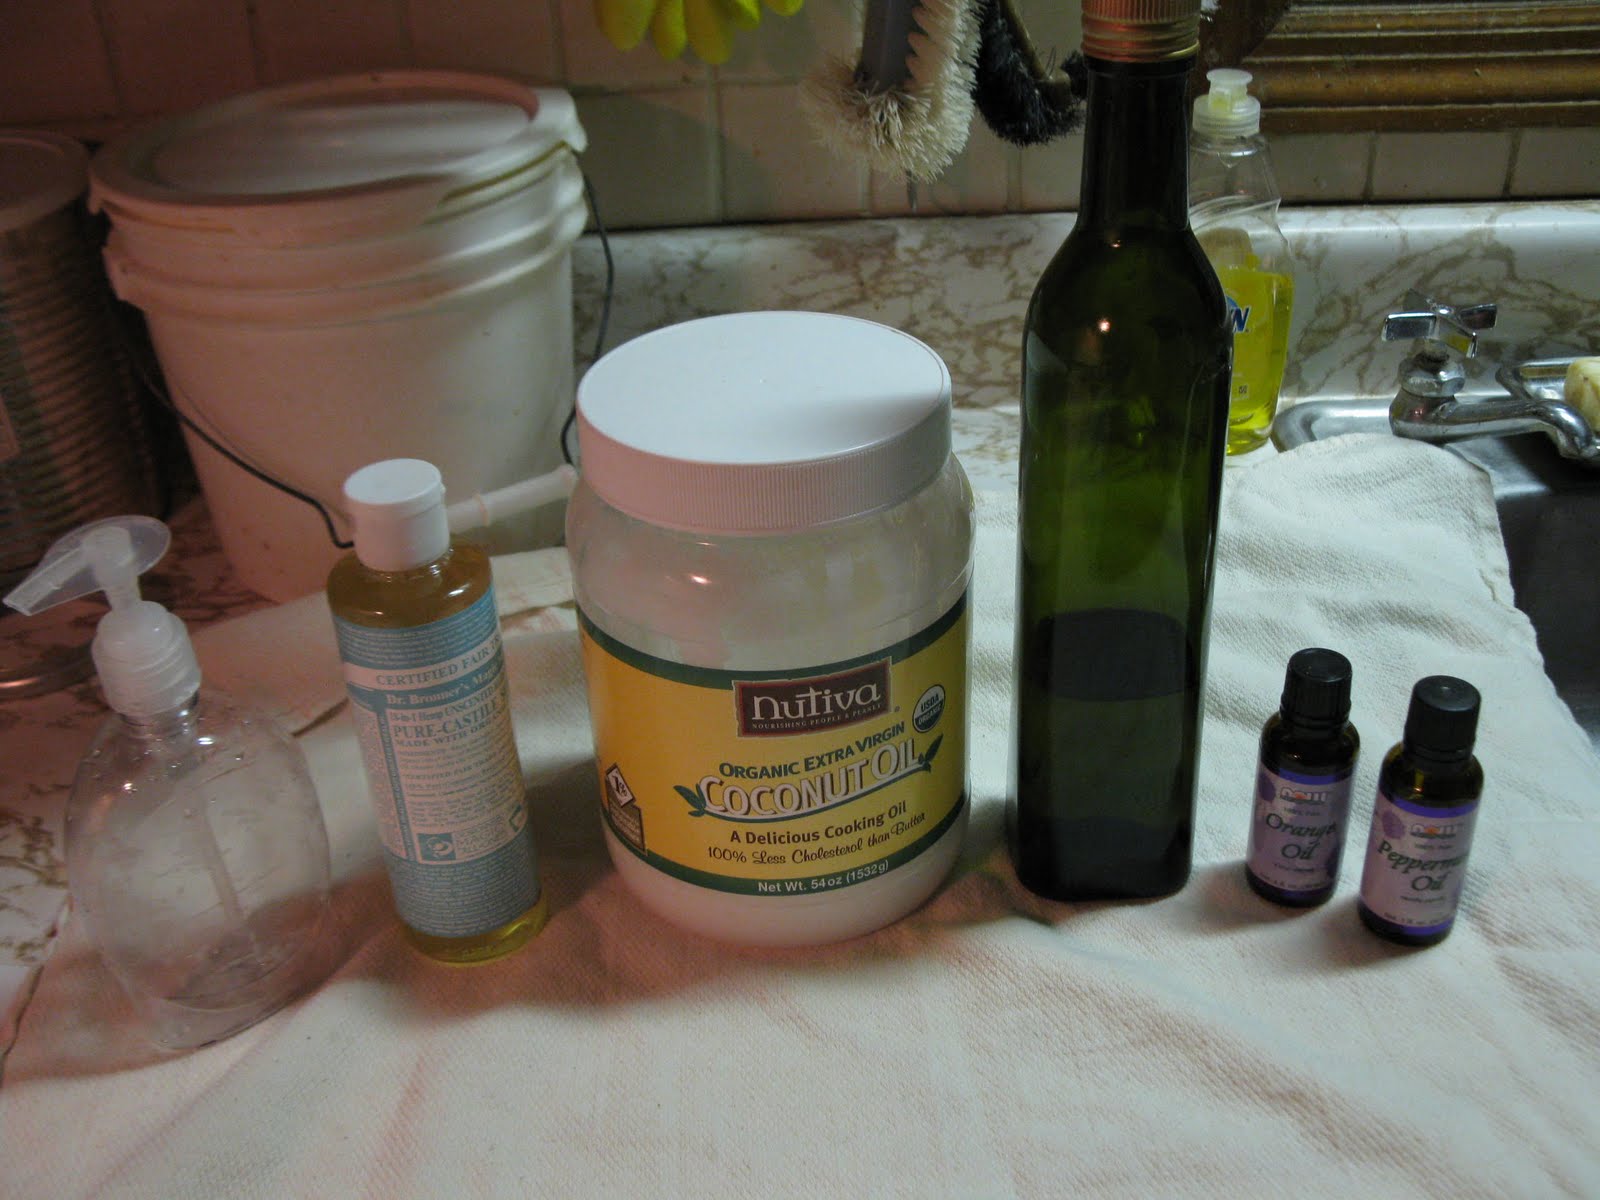
A number of months ago I ran across an idea on the internet that intrigued me. There are people who believe that commercial toothpaste is unhealthy for us. I guess it makes sense, since the toothpastes are not made out of safe ingredients. You can buy "Tooth Soap" online, but it is rather expensive, so I looked for a recipe and found several. The one I used is made of all safe, nice, gentle ingredients. I found the recipe here. I chose the recipe called "Flavorful Tooth Soap Recipe."
Above is a picture of my ingredients ~ Dr. Bronner's castile liquid soap , extra-virgin coconut oil, extra-virgin olive oil, orange essential oil and peppermint essential oil.
I measured out all the ingredients in the recipe (see below) into a small bowl and mixed it all up thoroughly with a fork:

After mixing it looked like this:

It was too thick at that point to flow at all, so I ended up adding 1 more teaspoon of the extra-virgin olive oil, and a Tablespoon of water. Then I used a funnel to put it into a small, very clean liquid hand soap dispenser that I bought just for this purpose.

I had to tap the funnel on the bottle to get the paste to go in, but it did go in and will last a long time, so the tapping was well worth the effort.

The thing to do is wet your toothbrush, apply a small amount of the tooth soap and then brush and rinse as usual.

The recipe is called "Flavorful." That is odd, because I think I would be more inclined to call it "Flavorless." It has almost no taste at all and is very easy and pleasant to use. And I am pleased with it. It does a good job and it seems to me that my teeth feel cleaner longer, and even after a night's sleep, I don't have that feeling in my mouth when I get up that is urging me to brush as soon as possible.
Here is the recipe:
Flavorful Tooth Soap Recipe
1 Tablespoon of Dr. Bronner's castile liquid soap (the best price I found was on Amazon.com - I bought the kind for babies that has no scent or anything strange added to it.)
5 Tablespoons of coconut oil
1 Tablespoon of olive oil
10 - 12 drops of orange essential oil
10 - 12 drops of peppermint essential oil
Blend the ingredients together thoroughly. If the consistency is thicker than desired, more olive oil or water can be added until it reaches a pourable texture.
Store in a clean soap dispenser.
I recommend it!
I am sharing this post at Wardeh's Simple Lives Thursday over at GNOWFGLINS
Saturday, November 6, 2010
Early November in the Garden

It's cold outside! The greenhouse is all closed up now. You can see the outside kale to the right of it.
Since it has gotten well below freezing a few times, I covered up the greenhouse bed with wire wickets and floating row cover:

If you lift the row cover and peak inside:

Have you ever heard of "manure tea?" (yum...?) I filled a five -gallon bucket with horse manure (you can use any kind of animal manure.) Then fill it up with water and let it sit with a lid on it for at least 1 month. Then you can dilute it and use it to water your garden plants. It is wonderful fertilizer:

Below are some of the little garlics I started from seeds a dear friend in Finland sent to me last fall. They will be ready to harvest next August:

Some of the leeks are still in the garden. I will leave them there and they should come up again next Spring:

And here is the strawberry patch that we planted this year. I kept the berries picked off, so the strength would go to the plants, but next year, we should have lots of nice strawberries to eat!

This next exciting picture is where I planted the garlic for next year. After the ground freezes, I will put some mulch on this patch. I also spread some spinach seeds here and worked them into the soil just a little bit. I hope they do well!

Here is a closer view of the outside kale. I have kale growing in the greenhouse too, but kale is so hardy that it can usually survive the winter, so I left this to grow:

Things are winding down.... not much to do out there but putter around in the greenhouse and pick things to eat. I love this time of year.
Canning Milk ~ "Not Recommended."

Once again, here is something that is not "recommended," as far as I know, by the authorities. During the early Spring, there will be at least 2 months when I am not milking my goats. I have 60 quarts in the freezer to get us by during that time, but what if the freezer fails?
I looked around on the internet, and found various recipes for canning milk and settled on this one:
Fill pint jars with fresh milk to within 1/2 inch of top. Clean rims. Adjust caps. Place in pressure canner with 2 quarts of water in the bottom. (Add a splash of vinegar to the water so it doesn't deposit unattractive ickies on your jars.) Exhaust canner for 10 minutes, close vent, then bring up to 5 pounds of pressure and turn off the heat. Allow pressure to return to normal and then carefully open the top. Place the jars in a draft-free location to cool.
These will be very nice when I need milk for soup.
Again, I say, the is NOT recommended, so be your own judge.
Wednesday, November 3, 2010

Another use for stale bread

We talked about bread pudding in a recent post. Here is another use for stale bread. I try very hard not to throw food away. I used to have chickens. They would eat almost any scraps from the kitchen, and of course you've seen my compost bins. I have a garbage disposal. I hardly use it at all.... really only if some little tiny bits fall down in there... I call it my "electric chicken." :)
Here is a pan with homemade croutons which I made from a few slices of stale bread. Some of it was the sourdough rye and then there were 2 whole wheat bread heels. Homemade croutons are far superior to anything you could buy in a store.
Croutons
Stale bread
butter
salt and pepper
dried parsley and ground poultry seasoning (or other herbs of your choice)
Cut your bread into little cubes (or bigger ones if you prefer.)
Melt some butter (I used 1/4 cup for this lot) in a skillet and add the bread. Cook, stirring, over medium heat until the bread is thoroughly toasted. Add the seasonings and herbs and stir.
You can use more butter if you like. This is really more of a method than an exact recipe. Store these in an airtight container. Use soon, or freeze for later and re-crisp them in an oven.
Marvelous on a salad!
I am sharing this post on Wardeh's Simple Lives Thursday over at GNOWFGLINS.
Subscribe to:
Posts (Atom)
