Friday, August 27, 2010

Report on Fermented Egyptian Onions

Do you remember my attempt to ferment Egyptian Onions? I promised to let you know how it turned out. This morning I opened the jar:


You can see the two rocks and the wild grape leaves in there:


And here are a few of the cute little fermented onions!


They are crunchy, mild and a nice little nibbly. I think I will save them and put them on the table for a special occassion. Or, if I can't resist, I might just nibble them away one at a time. Here is the conversation I had with my DH this morning:

DH ~ "What is that?"

Me ~ "This is the fermented Egyptian Onions I made a while back."

DH ~ "Are those rocks?"

Me ~ "Yep."

DH ~ "What is THAT?"

Me ~ "Wild grape leaves. I put them in there to hold the onions under the brine."

DH ~ "Oh."

Me ~ "Do you want to try one of the onions."

DH ~ "No."

Me ~ "Why?"

DH ~ "I'm going out in public."

Me ~ "A coward dies many times before his death..."

DH ~ "A brave man dies only once."

So.... a glimpse at life in my neck of the swamp. :-)

Saturday, August 21, 2010

Little Knobbly Cabbages

Here is a recipe my neighbor gave me last year:


In the garden, I found a few smallish, pathetic looking cabbages and also a few little green peppers:


I trimmed the damaged parts of the cabbages off, and quartered them and cut out the cores. Here is one of the tiny red cabbages on the cutting board:


The recipe calls for celery, which I don't have, so I decided onions might be nice. Here they are:


Here are all the vegetables waiting to be shredded in the food processor. You could just as well use a sharp knife, if you don't own a processor.


Compared with the original recipe, I could only estimate how much cabbage I actually had. I put all the vegetables in a large bowl, added 1 Tablespoon of sea salt and stirred it together, then put two trays of ice on top and covered it with a cloth and let it rest for an hour.


Next, I removed the ice and poured the contents of the bowl into a big colander to drain and I pushed down on the vegetables to get the water out:


In a large saucepan I combined 3 cups honey, 1 cup sugar, 3 cups apple cider vinegar, 1 Tablespoon celery seed, 1 Tablespoon mustard seed and 1 cup water. I brought that to a boil and then simmered it for a couple of minutes:


When it was done, I let it cool for 20 minutes and then poured it over the vegetables:


Then I filled 3 quart-sized Zip-Lock freezer bags, and put them in the freezer:


It is so nice to have this to pull out for special occasions, like Thanksgiving dinner.

So, here is the recipe, tweaked for what I had on hand ~

Frozen Slaw

Approximately 3 heads of cabbage
2 green peppers
3 red onions

Trim cabbages and peppers, peel onions. Shred all in a food processor or with a sharp knife.

Place all the the vegetables into a large bowl and add 1 Tablespoon of sea salt and stir together. Place 2 trays of ice on top of the vegetables and let them sit for 1 hour, covered.

In the meantime, combine the following:

3 cups apple cider vinegar
3 cups honey
1 cup sugar
1 cup water
1 Tablespoon celery seed
1 Tablespoon mustard seed

In a large saucepan, bring this mixture to a boil and then simmer for 2 minutes. Let it sit off the heat for at least 20 minutes.

Remove ice and drain the vegetables in a colander very well. Return them to the bowl.

Pour the dressing over the vegetables and then fill freezer bags.

It is good, partially or thoroughly thawed, and if you like, you can drain it and add a little mayonnaise when you serve it.

Thursday, August 19, 2010

A BIG Surprise!


It was relatively cool this morning, so I thought it would be a good time to clean out the greenhouse and start getting it ready for fall planting in a couple of weeks.

I grew my own sweet potato plants this year. What you do is put some sweet potatoes, that have not been treated to prevent sprouting, down into some nice loose soil and keep them watered. Here in Indiana I do that the 1st of May. Then at the end of May you can pull off the little plants and transplant them outside.

After I used them all, I just left the seed potatoes in place. It never occurred to me that they would make more sweet potatoes. I was pulling out the huge and vigorous vines to put into the compost pile when lo and behold out comes this behemoth! It weighs in at 5# 2.4 oz.

I exclaimed, "Well, for heaven's sake!"

Why don't you all come for dinner and I'll make sweet potato pie. :)

Tuesday, August 17, 2010

A New Recipe

My husband is not a picky eater. That being said, however, he is hard to please. There are certain things he's enthralled with that I make; for instance, biscuits and gravy, homemade bean burritos, my chicken and noodles... and if you are a follower of this blog, you will know that I experiment quite a lot in my cooking. Last night, wonder of wonders, I made up something new and he loved it, and asked, "Can you recreate this?" with a wistful look on his dear face. Not thinking it would be something noteworthy, I did not take pictures. But here is a picture of the little bit of leftovers that we still have:


It really was quite good, and so I will share the recipe.

1 cup white Basmati rice
2 cups water
1/2 teaspoon sea salt

Place the water in a small saucepan and bring it to a boil. Add the rice and salt, stir, cover, reduce heat to barely simmering and let it cook for 20 minutes. Remove from heat and let it stand for a while before using.

Saute the following in some extra-virgin coconut oil:

5 leeks, cleaned and sliced (this is explained here.)
A handful of kale leaves, thick ribs removed, chopped
1 cup peeled diced zucchini squash

Cook those vegetables until tender, and then add some sea salt and freshly ground black pepper.

Remove the vegetables from the frying pan and put them in a covered bowl to keep warm.

Next, make the "fish balls" like this:

1 can salmon, partially drained
2 eggs
2 teaspoons liquid smoke
Enough fresh bread crumbs such that you can roll the mixture into little balls that will hold together

Mash this all up well with a fork and then make it into little balls. Fry them until brown all around in some more extra-virgin coconut oil.

Spread the rice in a large platter or 9 x 13 baking dish.
Spread the vegetables on top of the rice.
Distribute the fish balls on top of that.

Serve with a good soy sauce or barbecue sauce.

Reheats very well!

I am sharing this on Wardeh's Tuesday Twister over at GNOWFGLINS!

Saturday, August 14, 2010

Cooking with Fire


One of my favorite things to do, although I don't do it very often, is to cook outside over a fire. We have a place in our backyard that has an old steel tire rim and we use that as our fire "pit." It has seen many weenie roasts through the years, and an occasional complete meal.

Two years ago we experienced very high winds because of a hurricane that hit down south. We live in Indiana, but it was strong enough that it knocked our electric power out for a week, and left the yard littered with branches and leaves. Fortunately, the only trees that fell on our property were in the woodlot, and we didn't sustain any damage to our home.

Our oldest daughter and her 3 little girls were visiting us at the time. We were blessed all week with warm (not hot) days, and cool nights and no rain. It was perfect! I kept a fire going and cooked outside for us the whole time. It was so much fun! You know how it is, when the power is out, there isn't all that much to do in the house anyway. I can't remember everything, but here is what I do remember cooking ~ bean with bacon soup, Johnny cakes, biscuits, cherry pie, scrambled eggs, and on the last night I made steak and baked potatoes and some vegetables. My daughter is somewhat of an expert at outdoor cooking, so her advice was invaluable.

I LOVE cooking with real fire. When I was growing up, I remember my mother saying "NOW you're cooking with gas!" I don't know where that originated, but what it meant was that you are doing something in a very effective manner.

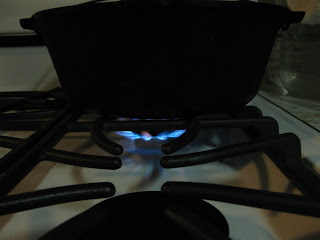
Wonder of wonders ~ we have a new stove and it is not electric. It is propane! For me, it is a dream come true. It is a wonderful stove and is so much easier to use than my old worn out electric range. Don't get me wrong, I have always been grateful for whatever stove I had; partly because I have not always had a stove. And yet... oh, my... this new one has me smiling ear-to-ear. When you turn it on, it is ON. When you turn it off, it is OFF. It heats things up much more quickly than the old range. It bakes like a dream. If you are a cook, I am sure you can understand my excitement and gratitude.

Today I am making some simple bean with bacon soup.

BEAN WITH BACON SOUP

1 pound Great Northern Beans
3 thick slices of bacon
1 onion
Water
Salt and pepper

The day before, soak the beans in plenty of water with 1/4 cup lemon juice added.


When you are ready to make the soup, drain and rinse the beans.

Slice the bacon into little pieces.


Chop the onion.


Put a heavy bottomed pan on your stove and fry the bacon and onions together.


Add the drained beans and enough water to cover by a couple of inches.


Bring to a simmer and carefully skim off as much of the foam as you can.


Cover the pot and set on a low heat and cook for at least 2 hours, and if you like, you can cook it a lot longer, but check from time to time and see if you need to add more boiling water.


Season with salt and pepper to taste and enjoy! We like ours with homemade cornbread and butter. We also like to eat some raw onion slices on the side.

This is a very simple, homely meal, very satisfying and economical.

Enjoy!

Monday, August 9, 2010

Slow Pizza


I know I have blogged about pizza 2 times before. The first one was "Pizza for a Crowd" and the second was "Pizza in a Hurry." But today I am presenting "Slow Pizza."

This is what I made just for my husband and myself for dinner and it is very good. And very healthy. And it took a long time to make. Actually, it took next to no time to throw together, but the approach was gradual and long. Ok, so here we go:

First comes the sauce.

Here are some lovely tomatoes:


I washed them and cut them in half and put as many as would fit in the steam juicer. When they were nice and soft, I drained off all of the clear liquid.


Next, I put them through the Foley food mill:


This liquid then went into my big crock-pot and I added 3 minced onions, 2 crushed garlic cloves, 1 seeded and minced jalapeno pepper, 3 small cans of tomato paste, 2 Tablespoons Italian seasoning, 3 teaspoons sea salt, a few cranks of pepper and some minced fresh basil:


Then I let it cook on low, with the lid off, overnight and the next day, I put it into pint jars and processed them in my pressure canner for 25 minutes at 10 pounds of pressure. Since this is not a tested, approved recipe, I didn't feel safe doing it in a water bath canner.

So, that is the sauce.

Next (and I'm sorry I don't have any pictures of this) Here is the recipe for the crust. It is best to make it at least 1 day ahead of time, and the dough will keep in the refrigerator for a week in any case.

The crust recipe came from this book (which I love.)

In a big bowl, mix the following:

5.5 cups Whole wheat flour
2 cups Unbleached all-purpose flour
1.5 Tablespoons granulated yeast
1 Tablespoon sea salt
1/4 cup vital wheat gluten

Stir that together and then add:

4 cups lukewarm water

Stir that thoroughly and cover, loosely with plastic wrap, or put it in a plastic container with a lid and leave the lid cracked open. Let it sit at room temperature for 2 hours and then keep it in the refirgerator, loosely covered as before.

Let it sit there at least overnight, and you may use it for up to a week.

The next ingredient I had to prepare ahead of time was the mozzarella cheese. I've been trying to learn to make really nice mozzarella for some time now, and I think I'm getting close. In any case, what I made this morning made lovely pizza. Here is a very good tutorial on how to do it. I made mine from 1 gallon of raw goat milk and had more than enough for one large pizza.

The other ingredients for the pizza are:

6 Roma tomatoes, sliced thinly (eat the ends)
a good handful of fresh basil leaves, chopped
a small amount of nitrate-free pepperoni sausage slices

On baking day, do it like this. Preheat the oven to 400 degrees. Get a large pizza pan and grease it well with coconut oil.

Take the dough out of the fridge and with floured hands, pull off a 1 pound lump. Form it into a ball and place it on the pizza pan. Using some flour, roll it out there and you can use your fingers to push it around where you want it.

Spread some of the sauce on the dough, and then add, in this order:

pepperoni
tomato slices
chopped basil
mozzarella slices

Now, bake it at 400 degrees F. for about 20 minutes. Slice, let it cool a bit and enjoy!

This recipe is being shared over at GNOWFGLINS Tuesday Twister!

Friday, August 6, 2010

Lest you think...

that I am some sort of super woman... oh my goodness! I sort of overdid it last week and got too tired, so decided to take this week "off", which meant no gardening or canning. I went out this morning to dig a few potatoes and get some cucumbers for a friend. :-0 The weeds, in my absence, have grown up above my head! This is due, in part, to former years of neglect. They say that if you are able to take care of things properly and control the weeds thoroughly, it will take at least 7 years to get rid of a crop of weed seeds. I imagine it would actually take longer than that. In spite of the condition of everything, there are still tomatoes, in abundance, cucumbers, beans, potatoes, sweet potatoes, corn, squashes and pumpkins, broccoli, leeks, peppers and basil waiting for "someone" to harvest them. I picked the current marigold blossoms this morning and put them in the freezer. I plan to have an outdoor dye day within a few weeks - to dye wool for spinning. I am too embarrassed to post a photo of the garden. Sigh... well, I guess if the weeds are this happy, the soil must be pretty healthy too. Yes, let's look on the bright side!
Related Posts Plugin for WordPress, Blogger...