Saturday, January 25, 2014

Pressure Cooking - Chapter 7

In chapter 1 I mentioned that I made some soup in the pressure cooker.  I did the same thing this evening and want to tell you how I did it.  Now, my soup recipes really are more about method than ingredients, so please don't  not make some if you don't have the same ingredients I do.  Just use what you have!

Here is what I used: A quart of homemade bone broth, 1 medium onion - sliced, 2 stalks celery - sliced, 3 carrots peeled and sliced, pint of home-canned shell-out beans (Musica pole beans), handful of sliced dried mushrooms,  pint of home-canned sweet corn, quart of home-canned green beans - drained, 1/2 pint home-canned bacon ends and pieces, pint home-canned salsa, 1/2 teaspoon salt, a few cranks of freshly-ground pepper.

Put the bacon in the cooker on medium heat and saute the onion and celery for a few minutes.  Then, add everything else.  Put on the lid and petcock and bring up to pressure, reduce heat and allow to cook for 12 minutes.  Remove from heat and bring pressure down under cold running water.  That's it!


Here is what it looked like when I opened the pot.  It got rave reviews!


Thursday, January 23, 2014

Pressure Cooking - Chapter 6

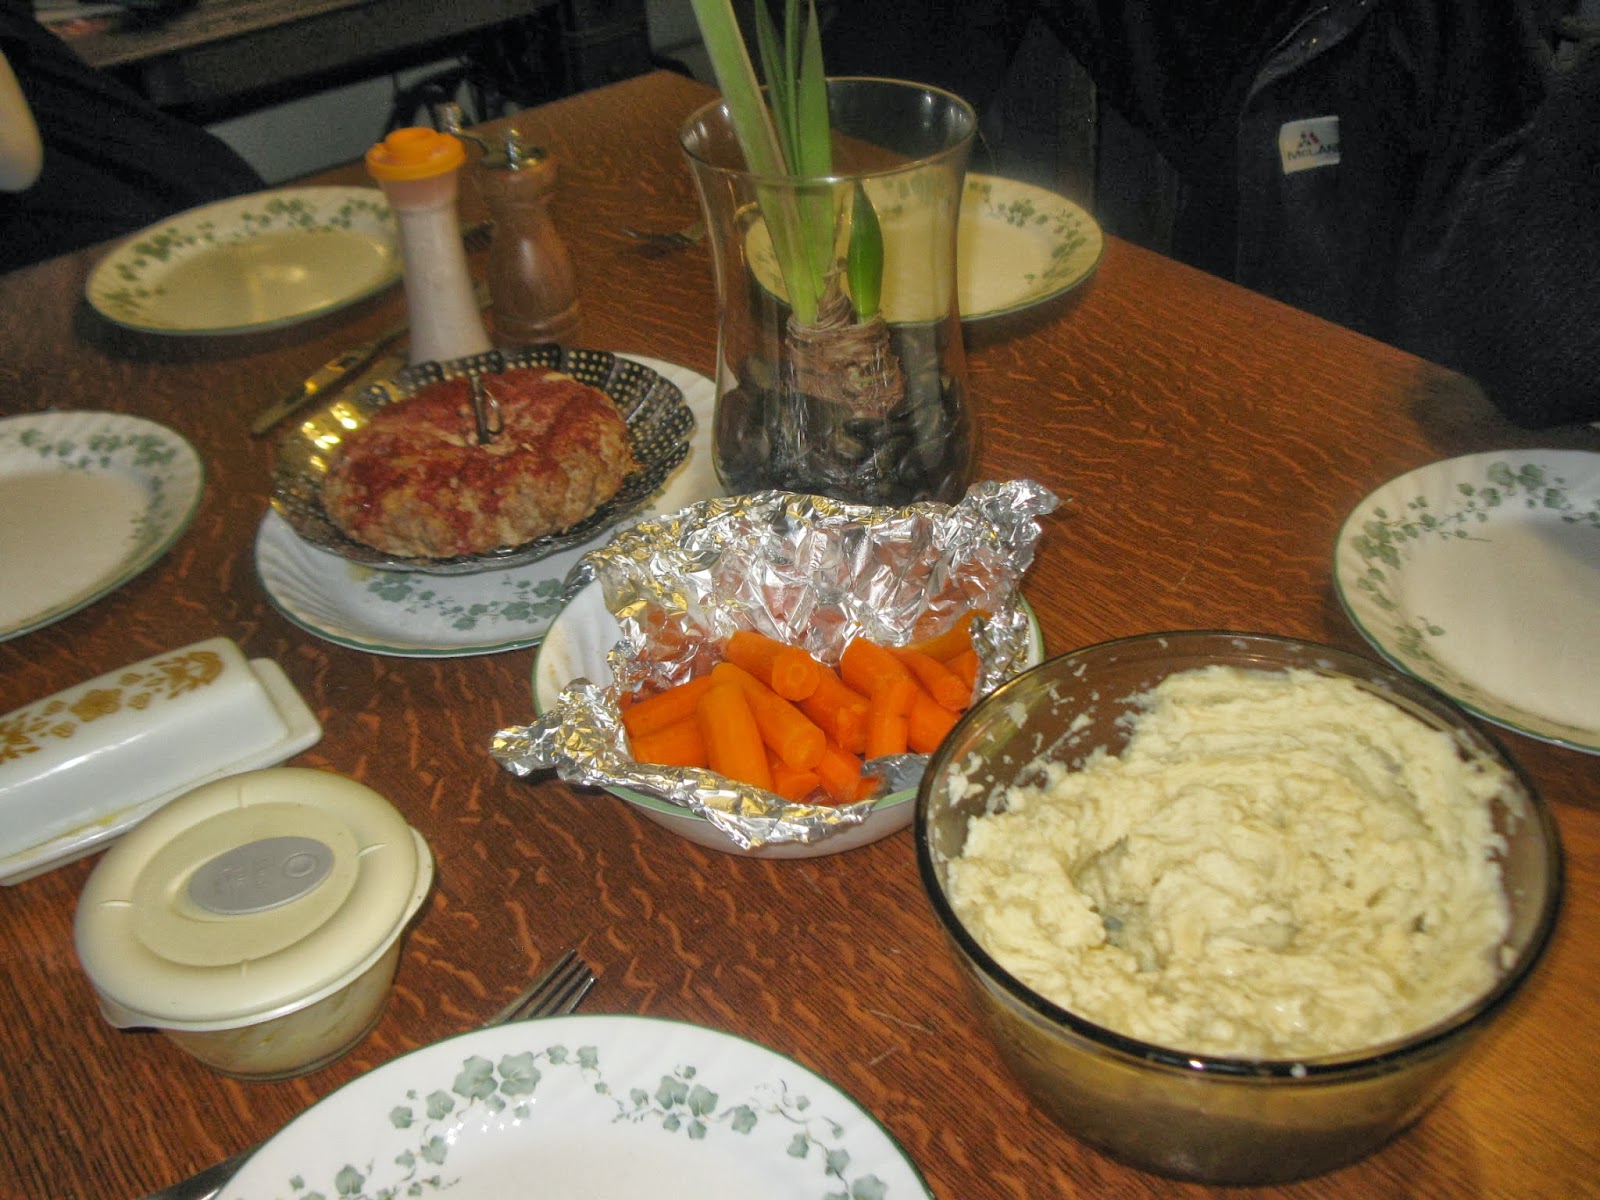
Here is a One-Pot meal I made in the pressure cooker for supper tonight.  It was delicious! Everything turned out very nicely - but next time I will make a couple of changes, which I will explain below:

Pressure Cooker Meatloaf, Carrots and Mashed Potatoes
In a 6-quart pressure cooker - pour in two cups of water and place the trivet.


Scrub potatoes and add them in one layer on top of the trivet.


Combine for the meatloaf: 1.5# ground meat (I had lamb so that's what I used), 2 eggs, 1 medium onion, finely chopped, 1 cup soft whole-wheat bread crumbs, 1 teaspoon salt, 1/4 teaspoon freshly-ground pepper.  Stir together with a fork and then finish up the mixing with your hands so the ingredients are thoroughly mixed.


Butter another trivet.  Next time I will use the steamer rack that I show you below, to make it easier to lift the meat from the pan.


Form the meat mixture into a squat donut shape.


Place it on the buttered trivet or steamer rack.


Here is 3/4 cup tomato sauce.


Pour it over the meatloaf.


Peel some carrots and wrap them tightly in foil.  NEXT time I will slice the carrots as they were not quite done enough.


Place the packet of carrots on top of the meat. Put on the lid, bring up to pressure.  Reduce heat until the petcock is rocking gently.  Cook, at pressure, for 15 minutes.  Remove from heat and cool quickly under cold running water until the pressure is gone.


Open the cooker, remove the carrots.  Check the internal temperature of the meatloaf with a thermometer.  It needs to be at least 155 degrees F.  If it is not, after you remove the potatoes, place the steamer basket back in the cooker, put the lid on loosely and put the cooker back on the stove and steam the meat for a few more minutes.  Check the temperature again.  


While you are steaming the meatloaf, remove the skins from the potatoes and prepare mashed potatoes.  I like to add butter, cream cheese, milk and salt to ours.

Here is the meal.  We ate it all!  (There are 6 of us.)


This was easy and economical, and as I said above, next time I will slice the carrots and use the steamer basket for the meatloaf instead of the trivet.  

Monday, January 20, 2014

Pressure Cooking - Chapter 5

I am here today to humbly acknowledge a pressure cooking failure.  :'(  It's ok.  I rescued it, but I want to tell you what happened so you will avoid my mistake.

On the third Sunday of each month, our congregation at Church has a potluck dinner after our 3-hour block of meetings.  Saturday evening, about 7 p.m., I suddenly gasped and said, "Oh!  Tomorrow is the pitch-in lunch!"  Fortunately, it was early enough in the evening that I could make some food to take without having to stay up half the night.

I made a triple batch of chocolate brownies, without walnuts, because our grandson is allergic to walnuts.  I also made a batch of WHITE "Jiffy Buns" from the wonderful Whole Foods for the Whole Family cookbook.  Mine was published in 1981 by La Leche League. There are more recent editions available.  That recipe calls for whole wheat flour and makes wonderful buns, but for this occasion I decided to make white flour buns. Oh, my goodness they were soft and lovely.  It only takes an hour from start to finish.  Fabulous when you are in a hurry, and the dough can be used to make buns, rolls, cinnamon rolls or bread or whatever you like.

I had a large pork sirloin roast.  I decided to make pulled barbecue pork for sandwiches.  That is why I made the buns.  However the roast was frozen solid.  I thought... "Aha!  I could cook this in the pressure cooker real fast!"  THAT was a Big Mistake.  I cooked it, on the trivet, with 2 cups of water for an hour at pressure.  Still raw in the middle, so I gave it 30 more minutes.  Still not done enough and the outside was getting overcooked.  What to do... what to do... so I put it in the crockpot and poured the cooking liquid and quite a bit of barbecue sauce over the top of it and cooked it on low overnight.  In the morning, it was nicely done.  I did have to discard some of the very very done bits from the outside, but the rest of it was fine.  I pulled it apart, added barbecue sauce, and it was yummy.  No One Complained and it was All Gone at the end of the meal, as were the buns.

So, don't do what I did.  If your roast or large piece of meat is frozen. please thaw it first if you wish to pressure cook it.  OR, just do it in the crockpot from the start.

Here is the frozen roast.


Here is what it looked like after 90 minutes of cooking.  Still not done enough.


Saturday, January 18, 2014

Pressure Cooking - Chapter 4

I used the pressure cookers for dinner again yesterday.  This time, it was pork loin chops in one cooker and potatoes, carrots and cabbage in the other.  I learned something new.  I filled the 4-quart cooker with potatoes, carrots and a large chunk of cabbage, the trivet and 2 cups of water.  It was cooked at pressure for 10 minutes, and quickly cooled under running cold water.  When I opened it, the cabbage was not done.  :(  So I gave it two more minutes.  It was done then, but the potatoes and carrots were too done.  It all still tasted good, but next time I'll cut the cabbage into smaller pieces.


I browned the pork loin chops in lard in a cast iron skillet,


placed them all in the pressure cooker with two cups of water under the trivet, cooked them at pressure for 12 minutes and let the pressure go down naturally.  They were wonderfully tender. 


I also made a batch of  Melynda Brown's wonderful sourdough biscuits and baked them in our toaster oven, thus not heating up the large oven for a small item.  I love these.  They are substantial, keep well and worth eating.  You can even split and toast them!  Thanks, Melynda!


So, that was our meal, and was enjoyed by all.  Have a wonderful weekend!

Friday, January 17, 2014

Pressure Cooking - Chapter 3

In 1976 we were living in rural Nebraska.  I loved it there.  The neighbors were very kind and that was where I had my first real vegetable garden.  Our little girl, April, who was 2-years-old would follow me out to the garden, pick a big ripe tomato and eat it out of hand, saying, over and over "Mato...mato...mato."  Of course, the front of her clothing would get a little, *cough*, messy.  :)

When we first moved to that house, we did not have a kitchen stove.  I cooked on a 2-burner hot plate for quite a while.  I had written to a dear old friend and asked her for ideas of things I could cook without an oven.  She introduced me to "no-bake oatmeal cookies" and told me how to cook a meatloaf in a pressure cooker.

One day we went to a Sears catalog store.  Do any of you know what that is?  I don't know if they still exist, but back then, it was a small store with only a few items actually for sale in it, but you could peruse the catalog and order things there.  My husband needed to order something, and they happened to have an electric kitchen range on display.  It was on sale at the time.  I was looking at it, and a store clerk asked if I needed any help.  I mentioned to her that I was cooking on a 2-burner hotplate.  She asked, "Don't you ever complain??"  I don't know what I said, but I was thinking something like, "Why would I complain?  I know we don't have money for a stove."  When my husband finished his business, he came over and saw me admiring the stove.  He then proceeded to buy it for me!  Kitchen appliances are the ONLY thing we ever went into debt for.  He opened a Sears credit account, put the thing on payments and we had it delivered to our home.  Oh, my... that was SO nice.  That was the year I learned to can food.  It had a self-cleaning oven!  I used that stove until 1986 when we moved into a house that had a bigger stove in place. Forgive me while I continue to ramble, please... this is a blog, after all.  ;)  When we were first married, we lived in a very small mobile home which was married student housing at Indiana University.  The kitchen appliances were provided.  Then, we moved after I graduated and I was expecting our first child.  We lived in the country near Martinsville, Indiana.  My husband was a high school Earth Science teacher there.  Our landlord offered us an old propane kitchen range which had been stored in a garage.  DH completely dismantled it, took out the insulation which mice had invaded, replaced it with new insulation, cleaned it all up nicely and put it back together and into our kitchen.  It was great.  It had pilot lights.  I was already baking all of our bread by that time, so an oven was important to me.  Enough about ovens..... for now.

Yesterday I decided to go further along on the path of making breads in a Pressure Cooker.  I made cornbread in it for the first time on Wednesday.  Yesterday I baked banana bread and regular whole wheat bread in it with great success!  Here is what happened...

I have this nifty little baking container that actually is for use in a crock pot, and it fits nicely, on the trivet, in my 6-quart pressure cooker.  I have to remove the lid, though, as it is too tall, but that's fine, since it is necessary to cover any bread you are steaming with aluminum foil tightly.


Mixing the batter...


Here is the banana bread batter poured into the well-buttered pan (recipe follows) ready to go into the pressure cooker.


Trivet and 2 cups of water are in the pressure cooker.


The pan is carefully and tightly covered with foil.  I buttered the inside of the foil, just in case, not knowing how high the bread might raise, but as it turned out, that wasn't necessary this time.


Banana bread in pan after cooking:


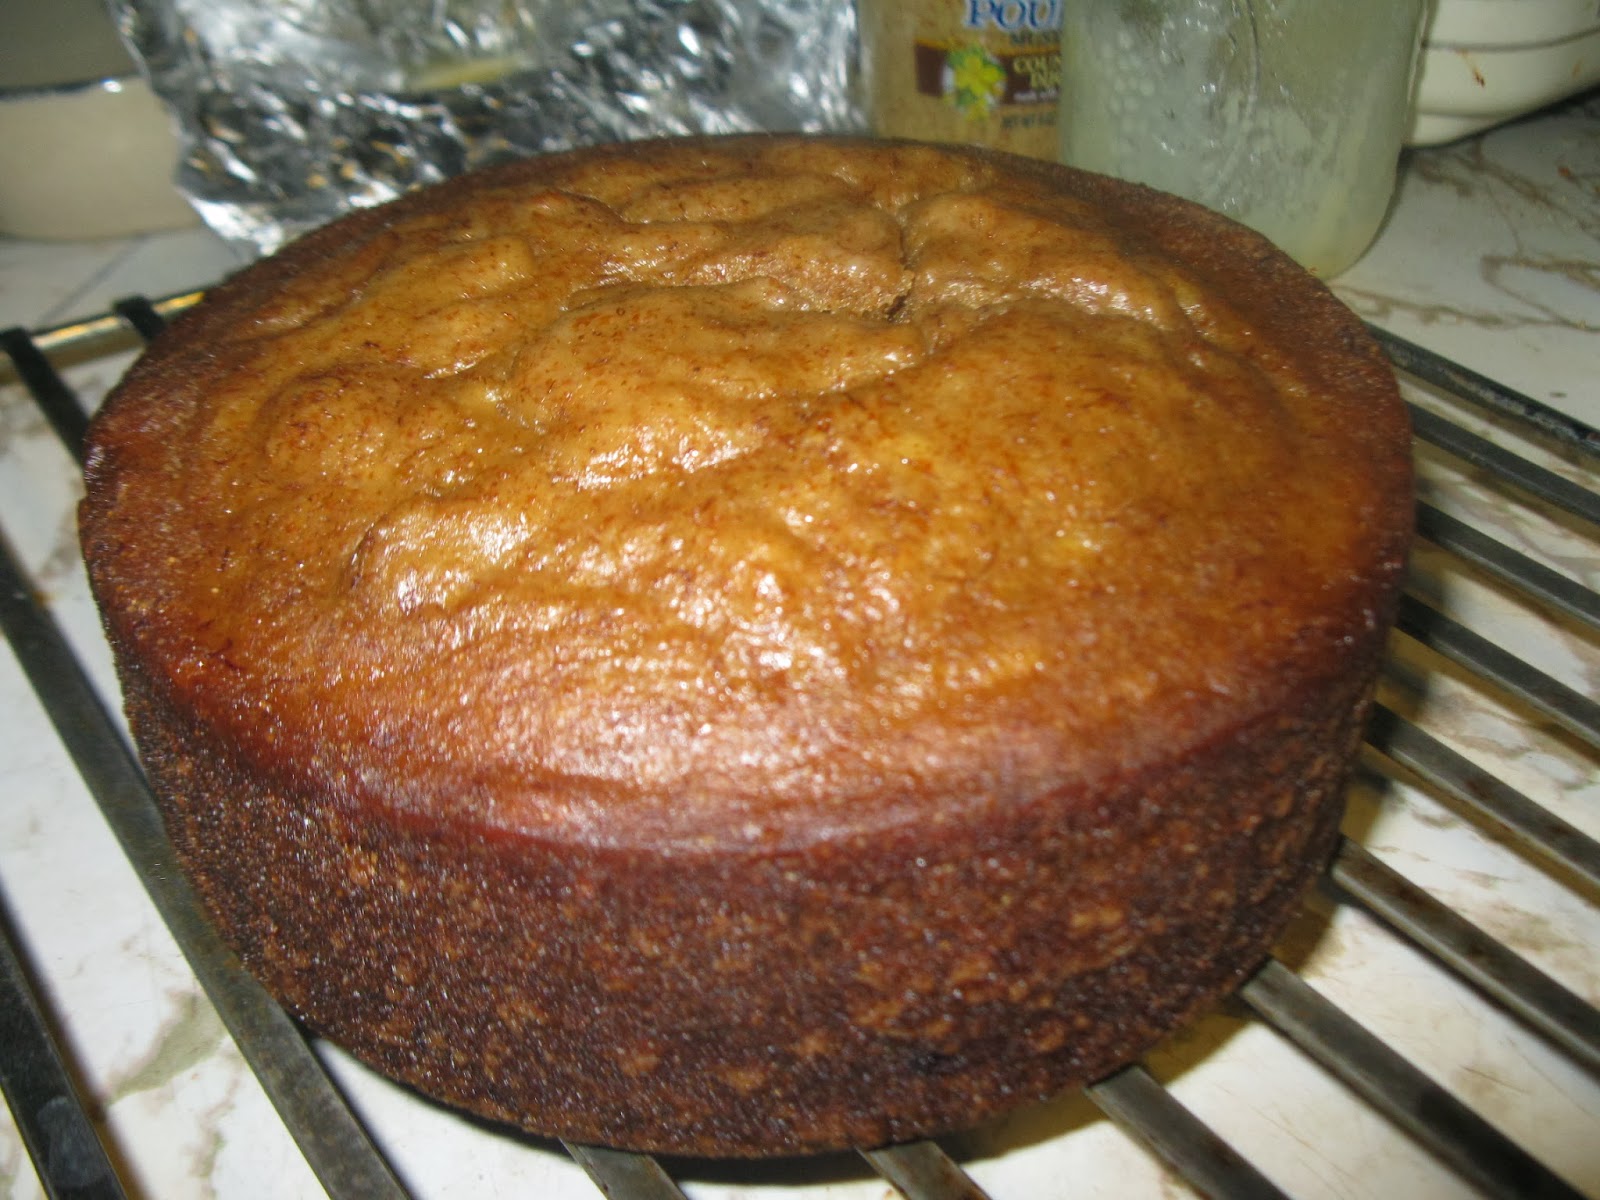
Here it is cooling on a cooling rack.


Here it is sliced into.  Oh, my!  It is moist and delicious!  We all like it very much.  I really think the quality is superior to that baked in a conventional oven, and it also saves energy in the baking process.


Later in the day, I made 5 loaves of whole wheat bread.  (Recipe follows.)  Here are the balls of dough ready to be shaped into loaves.


I put 4 of the loaves in my regular bread pans and one in the pan for the pressure cooker.


The loaves have risen and are ready to bake.


Cooling on racks after baking... see the pretty round loaf?  The pressure cooker worked splendidly!


Here is that loaf, showing the wonderful texture.  The bread is not at all soggy, it is nicely browned, but the crust and the crumb are more tender than in the oven-baked bread.  I couldn't be more pleased.


Baking breads this way does not save time, but it does save energy and also if you don't happen to have an oven, this would be so nice to know how to do, and you can also bake things easily with a camp stove as well... or a hot plate!  Here are the recipes:

Pressure-Cooker Banana Bread (You can easily tweak this recipe for the ingredients you have on hand.)

1/2 cup brown sugar
1/3 cup coconut oil
2 large eggs
3 very ripe bananas, thoroughly mashed
1 3/4 cups whole wheat flour
1 teaspoon baking soda
1/2 teaspoon salt
1/4 cup hot water

Beat the oil and sugar together.  Add eggs, mix well.  Stir in bananas.  Add sifted dry ingredients alternately with hot water.  Mix until smooth.  Thoroughly coat the inside of your baking vessel with butter. Pour in the batter.  You can use a pyrex or metal item, that will fit with plenty of room around it to let the steam circulate.  A small taller cake pan would work well.  You could even use metal food cans or wide mouth PINT canning jars, but would have to divide the batter into maybe 3 of them and adjust the cooking time accordingly.  IF you ever take some bread out of the pressure cooker and it is not done enough, just put it back in and give it a little more time.  It works just fine.

After you put the batter in the baking pan, cover it tightly with foil and place it on the trivet with 2 cups of water in the pressure cooker.  Put on the lid, bring up to pressure and reduce heat so the petcock is rocking gently.  Bake for 35 minutes.  Remove from heat and let the pressure escape on its own.  Then, open the cooker, take out the pan, take off the foil and let it rest for 10 minutes.  Then you can put the banana bread on a wire rack to cool.  Wrap tightly and store in the refrigerator.  It is tender, sweet, and very nice.  Banana bread is sometimes best eaten the next day!

Pressure Cooker Whole Wheat Bread 

1 1/4 cup water (110 - 115 degrees F)
1 1/2 teaspoons active dry or instant baking yeast
3 cups whole wheat flour
unbleached flour for kneading
1 1/2 teaspoons salt
2 Tablespoons extra-virgin olive oil
2 Tablespoons blackstrap molasses

Put the whole wheat flour in your bread bowl.  Make a well in the center, pour in the warm water and sprinkle the yeast over it.  Stir in gently with a fork.  Let that sit while you gather your other ingredients.  Then add the salt, oil and molasses.  Stir together thoroughly.  Sprinkle some unbleached flour on your kneading surface and knead vigorously for 10 minutes, sprinkling a little more flour under the dough as you knead to keep it from sticking.  Wash and dry the bowl.  Grease the bowl with more oil.  Put in the dough and turn it over, so the top is oiled.  Cover tightly with plastic wrap.  Let the dough rise, in a warm place, until when you poke it, it "sighs."  If it springs back when you poke it, let it rise some more.  Punch down the dough.  Re-cover and let it rise again.  Shape into a loaf.  Place the loaf in the well-buttered baking pan/bowl. Cover tightly with aluminum foil, that has been buttered on the inside. Place on trivet with 2 cups of water in the pressure cooker.  Put on the lid.  Bring up to pressure and cook, with the petcock gently jiggling, for 30 minutes.  Remove from heat and allow the pressure to escape naturally.  Remove pan from cooker and put your loaf on a wire rack to cool.


Wednesday, January 15, 2014

Pressure Cooking - Chapter 2

File:Groundhog3.jpg

In 1972, my husband and I didn't have very much money.  We made it, but there was definitely no "extra" so we did everything we could figure out to pinch pennies.  One day, he shot and killed a ground hog. It was a fairly large animal.  After preparing it for cooking, we cut it into two portions.  The first portion I roasted in the oven.  It was as tough as shoe leather.  Very difficult to eat.  The second half I cooked in our pressure cooker.  It was falling-off-the-bone tender, moist and delicious!  The moral of this story is that you can purchase less-expensive cuts of meat, and if you pressure cook them, they become tender.

I did not cook a ground hog today.  Instead, I made ham and Great Northern bean soup and cornbread in the pressure saucepans.  Here we go!

The night before, pour 1 pound of dried Great Northern beans into a colander, rinse thoroughly, pour them into a large bowl, add 2 Tablespoons of lemon juice and 3 times as much cold water as there are beans.  Let that sit on the counter until you are ready to cook the next day. As in yesterday's post, I am using TWO pressure saucepans for this meal.


This is what they look like after soaking.


Pour the soaked beans into your colander and rinse them thoroughly.


Put a nice meaty ham hock into the smaller cooker, on the trivet, with 2 cups of water.  Secure the lid and bring up to temperature.  Allow to cook at pressure for 15 minutes, then cool quickly under running cold water.


When the pressure releases, open the cooker and the ham hock will look like this.


Pour the cooked meat and the liquid over the beans that by now you have poured into the 6-quart pressure cooker.  Add enough more water to cover the beans by at least 1/2 inch.  I added one whole inch since we like our soup a little more watery.  Here it is, ready to cook.


Prepare a batch of cornbread (recipe follows.)  Pour it into an appropriately sized pan or Pyrex bowl.  I used a 1.5 quart Pyrex bowl, well buttered.  Add 1.5 cups of water and the trivet to the smaller pan.  Cover the bowl or pan tightly with aluminum foil.  Place it in the cooker on the trivet and water.  Secure lid.  Bring to pressure, cook for 22 minutes.  Remove from heat and allow the pressure to go down by itself.  Here is what it looked like after cooking.


Here are both cookers on the stove.  When you cook the bean soup, bring it up to pressure, reduce heat and cook for 5 minutes.  That's right.  Only FIVE minutes.  Remove from heat and allow the pressure to go down naturally.


The corn bread was moist, sweet, and delicious!


The soup was just right!  I also added a teaspoon of Realsalt and some freshly ground black pepper.


My husband likes to put a piece of cornbread in his bowl and pour his soup over that.  I prefer to eat them separately.  Here is mine with butter and some lovely honey.  Oh my!  Such luxury!


I hope you will try this.  It saves time and energy and the food turns out so nicely.  Here is the cornbread recipe I promised:

Pressure-Cooker Cornbread

1 1/3 cups corn meal
2/3 cup unbleached flour
1/3 cup sugar
1 Tablespoon baking powder
1 teaspoon salt

1/4 cup melted butter
1 cup buttermilk
2 eggs

Mix the dry ingredients together in a bowl.  Mix the wet ingredients together well.  Pour the wet into the dry and stir with a fork, just until the batter is moist.  Do not beat it.  Pour into greased baking vessel and then proceed as described above, cooking at pressure for 22 minutes, with 1.5 cups water in the pan and the trivet.  Be sure to cover your pan or bowl tightly with aluminum foil and allow the pressure to go down by itself.

This is fun.

Tuesday, January 14, 2014

Pressure Cooking - Chapter 1


Early on in our marriage, we had a pressure saucepan.  I had it for many years, but I can't remember when it "died" or got lost or whatever, but since in the first 16 years of our marriage, we lived in 16 different homes in 3 different states, I guess it wouldn't be too surprising if it got lost.  A little over a year ago, I was able to purchase a 4-quart stainless steel pressure saucepan at a thrift store.  I love it, but found that often it just wasn't quite big enough for what I wanted to cook.  Saturday was my 65th birthday.  Yes, I really am 65-years-old and grateful for it.  Anyway, my husband gave me a 6-quart stainless steel pressure saucepan!  I've been playing with it today.  I made vegetable/sausage soup for lunch in it.  I didn't take pictures so can't blog about it properly, but it was wonderful.  Between the food processor and the pressure cooker it only took me about 20 minutes to make  4 quarts of beautiful yummy soup.  It only had to cook for 3 minutes at pressure!  Wow.  I am in love!

So, for dinner, I cooked a whole chicken in the bigger pot and potatoes and carrots in the smaller pot.  Here is what I did.

Here is the thawed raw chicken.


Melt 1/4 lard in cast iron skillet.


Brown the chicken in the hot fat.


Still browning, turning as needed.  I used a cloth towel to grab it with to make it easy to move around in the pan.


Scrubbed potatoes, peeled carrots and two cups of water are on a rack in the smaller pot.


The browned chicken is in the larger pot with 2 cups of water with the rack in the bottom.  It has been sprinkled with salt, pepper and dried basil.


4:13 p.m. I closed the chicken pot and started heating it on high heat.


Here are both pots on the stove.  When the large pot got up to temperature and the petcock was rocking gently, I set a timer for 25 minutes.  When that time was done, I turned off the heat and let the pressure go down on its own.

10 minutes before the time was up for the chicken, I turned on the smaller pot of vegetables.  Once the petcock was rocking, I set a timer for 10 minutes, and as soon as that time was up...


I took the pot to the sink an ran cold water over it to stop the cooking.  When the little rubber plug goes down, then the pressure is gone and you can open it up so the food won't overcook.


Here are the potatoes and carrots beautifully done.  


When I was finished taking the vegetables out of their pot, the pressure had finished going out of the larger pot and I was able to open it and take out the chicken.  Here is the timer then.  So, start to finish, it took 58 minutes for a nicely roasted whole chicken, tender as can be and perfectly cooked potatoes and carrots.


Here is the chicken, when I opened the pot. Oh my goodness it was good.  We all enjoyed it very much. 


Our daughter and her husband and 2 children are currently living with us, so I get to do more cooking than usual.  I love cooking.  I plan to try to do a series here on various pressure saucepan cooking adventures.  Stay tuned!

By the way, BEFORE you EVER use a pressure cooker, carefully read the instructions that come with it.  They are easy to use, but you MUST take proper steps to avoid making a dangerous mistake.

Related Posts Plugin for WordPress, Blogger...